cooking instructions for costco stuffed salmon

Understanding Costco Stuffed Salmon

Costco’s stuffed salmon offers a convenient, flavorful meal, typically featuring salmon fillets generously filled with crab or shrimp mixtures, ready for baking.

The stuffing variations often include crab, shrimp, or a blend, seasoned with herbs and spices, creating a delightful culinary experience for seafood lovers.

What is Costco Stuffed Salmon?

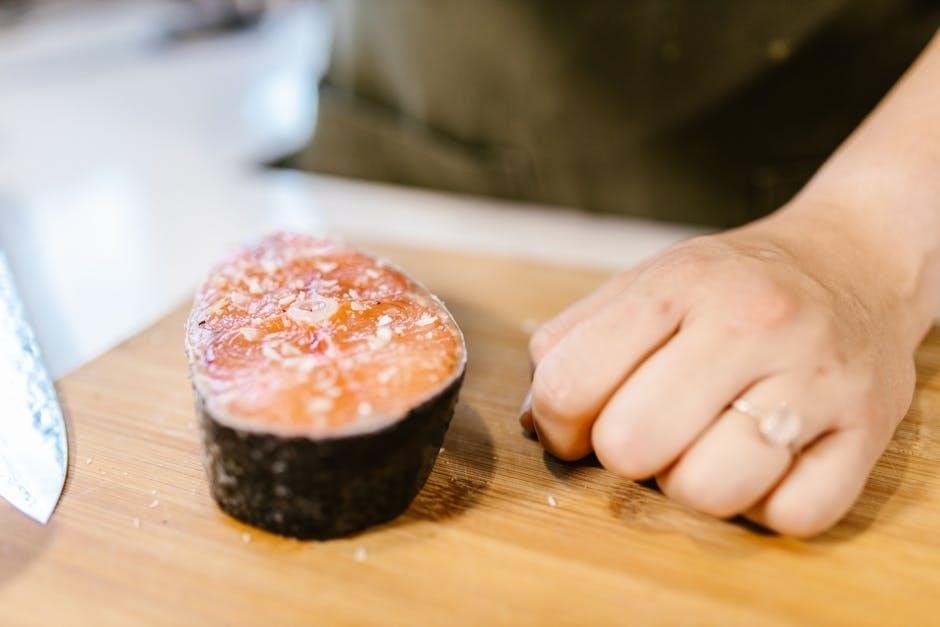
Costco’s stuffed salmon is a pre-prepared, ready-to-cook meal solution gaining immense popularity for its convenience and delicious taste. Typically, it consists of salmon fillets carefully cut to create a pocket, which is then generously filled with a savory stuffing.

This stuffing commonly features succulent crab meat, tender shrimp, or a delightful combination of both, blended with flavorful herbs, spices, and often a creamy base. The entire fillet is then seasoned, making it exceptionally easy to prepare.

Essentially, Costco provides a semi-prepared dish, allowing customers to enjoy a gourmet-quality salmon dinner with minimal effort, usually requiring just 20-25 minutes of baking time.

Variations in Stuffing (Crab, Shrimp, etc.)

Costco stuffed salmon showcases delightful stuffing variations, primarily revolving around seafood. The most common filling is a luscious crab mixture, often incorporating mayonnaise, breadcrumbs, and aromatic seasonings like paprika.

Alternatively, you’ll frequently find shrimp-stuffed salmon, offering a slightly different, yet equally appealing flavor profile. Some recipes even blend crab and shrimp for a more complex taste.

Beyond the primary seafood, the stuffing may include finely chopped vegetables, herbs, and spices to enhance the overall flavor. Primal Palate suggests a light dusting of paprika before baking, adding a subtle smoky note to the finished dish.

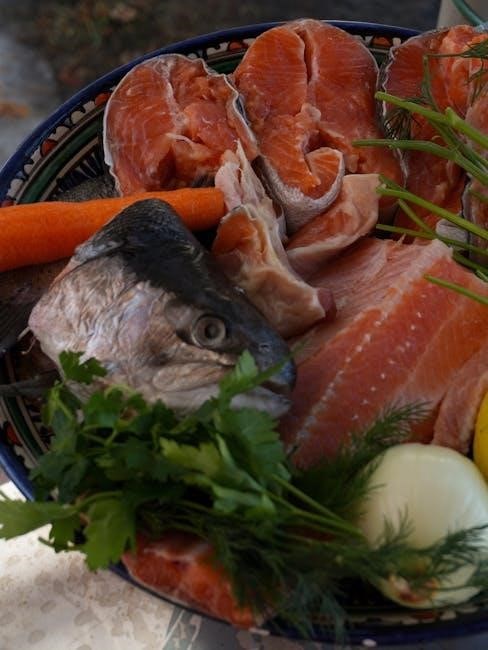
Preparation Before Cooking

Before baking, ensure the salmon is fully thawed and check for any remaining pin bones for a pleasant dining experience.

Preheating your oven is crucial for even cooking, setting the stage for a perfectly prepared Costco stuffed salmon.

Thawing the Salmon Safely

Proper thawing is essential for both food safety and optimal texture. The recommended method is to thaw the Costco stuffed salmon in the refrigerator overnight.

Place the frozen salmon on a baking sheet or in a container to catch any drips, preventing cross-contamination. Avoid thawing at room temperature, as this can encourage bacterial growth.

If you’re short on time, you can thaw the salmon under cold running water in a leak-proof bag, but this requires constant attention. Never use warm or hot water, as it can partially cook the fish and compromise its quality. Ensure the salmon is completely thawed before proceeding to cooking.

Checking for Bones

Although Costco’s stuffed salmon is generally well-processed, it’s always prudent to check for any remaining pin bones before cooking. Run your fingers gently along the flesh side of the salmon fillet, feeling for small, thin bones.

Use clean tweezers or fish bone pliers to carefully remove any bones you detect, pulling them out in the direction they lie. This step ensures a more enjoyable dining experience, free from unexpected surprises.

Pay particular attention to the thicker parts of the fillet where bones are more likely to be present. A thorough check minimizes the risk of accidental ingestion and enhances the overall quality of the meal.

Preheating the Oven

Proper oven preheating is crucial for evenly cooking Costco’s stuffed salmon and achieving optimal texture and flavor. Set your oven temperature to 400°F (200°C) and allow it to fully preheat before placing the salmon inside.

A fully preheated oven ensures that the salmon begins cooking immediately upon entry, promoting consistent doneness throughout the fillet and stuffing. This prevents uneven cooking, where some parts may be overcooked while others remain underdone.

Verify the oven has reached the set temperature using an oven thermometer for accuracy, guaranteeing the best possible results.

Cooking Methods

Oven baking remains the most popular and straightforward method for preparing Costco stuffed salmon, delivering consistently delicious results with minimal effort.

Alternative cooking techniques, while possible, are less commonly used due to the convenience and effectiveness of oven baking for this particular product.

Oven Baking: The Most Common Approach

Oven baking is the preferred method for cooking Costco stuffed salmon due to its simplicity and ability to cook the salmon evenly while keeping the stuffing moist. This technique requires minimal hands-on time and delivers a consistently delicious outcome.

Preheating your oven is crucial for optimal cooking. Most recommendations suggest a temperature suitable for baking fish, ensuring both the salmon and the stuffing reach a safe and palatable internal temperature. Utilizing a baking sheet lined with parchment paper is highly recommended to prevent sticking and facilitate easy cleanup.

Generally, a baking time of around 20-25 minutes is suggested, but this can vary based on the thickness of the salmon fillet and your oven’s calibration.

Using a Baking Sheet & Parchment Paper

Employing a baking sheet is fundamental when preparing Costco stuffed salmon, providing a stable and even surface for heat distribution during cooking. However, to prevent the salmon from sticking and to simplify the cleaning process, lining the baking sheet with parchment paper is strongly advised.

Parchment paper creates a non-stick barrier, ensuring the delicate salmon fillet and flavorful stuffing don’t adhere to the metal. This is particularly important given the richness of the stuffing. Carefully place the stuffed salmon onto the prepared baking sheet, ensuring it’s centered for even cooking.

This simple step significantly reduces post-meal cleanup and helps maintain the salmon’s presentation.

Temperature & Time Guidelines (20-25 Minutes)

Generally, Costco stuffed salmon benefits from oven baking at a moderate temperature, typically around 375°F (190°C). The recommended cooking time usually falls within the 20 to 25-minute range, but this can fluctuate based on your oven’s calibration and the salmon’s thickness.

Starting with 20 minutes is a good baseline, especially for thinner fillets. However, thicker portions may require the full 25 minutes, or even slightly longer, to ensure the stuffing is thoroughly heated and the salmon is cooked through.

Regular monitoring is key; checking for doneness is crucial to avoid undercooking or overcooking.

Detailed Oven Baking Instructions

Preheat your oven to 375°F (190°C). Place the stuffed salmon on a parchment-lined baking sheet and bake for an initial 20 minutes, then check for doneness.

Initial Baking Time (20 Minutes)

Begin by placing the Costco stuffed salmon onto a baking sheet that has been carefully lined with parchment paper; this prevents sticking and simplifies cleanup. Insert the sheet into a preheated oven, typically around 375°F (190°C).

Set a timer for 20 minutes as a starting point. This initial baking period allows the salmon to begin cooking through and the stuffing to warm up. However, remember that cooking times can vary slightly depending on your oven’s calibration and the thickness of the salmon fillet.

During these 20 minutes, avoid opening the oven door frequently, as this can cause temperature fluctuations and affect the cooking process. A consistent temperature is key to achieving perfectly cooked salmon.

Checking for Doneness – Internal Temperature

To accurately determine if your Costco stuffed salmon is cooked through, utilize a reliable meat thermometer. Insert the thermometer into the thickest part of the salmon fillet, ensuring it doesn’t touch any bones.

The USDA recommends an internal temperature of 145°F (63°C) for cooked salmon. This temperature guarantees the fish is safe to eat and has reached optimal texture and flavor.

Check the temperature in multiple spots to ensure even cooking. If the salmon hasn’t reached 145°F, continue baking in 2-3 minute increments, rechecking the temperature each time, until it’s perfectly done.

Adjusting Baking Time Based on Thickness

The baking time for Costco stuffed salmon is heavily influenced by the fillet’s thickness. Thicker fillets naturally require longer cooking times to ensure the center reaches a safe and desirable temperature.

If your salmon appears to be browning too quickly but isn’t cooked through, tent it loosely with aluminum foil. This prevents over-browning while allowing the center to continue cooking.

Conversely, if the salmon isn’t browning sufficiently, increase the oven temperature slightly during the last few minutes of baking. Always prioritize reaching the internal temperature of 145°F (63°C).

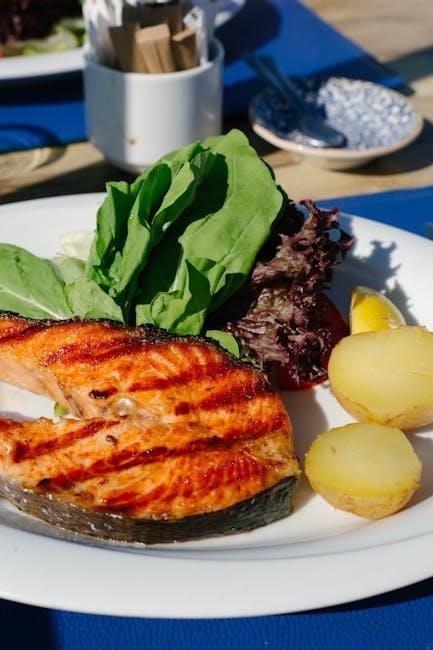
Ensuring Perfect Doneness

Achieving perfect doneness involves using a meat thermometer to verify an internal temperature of 145°F (63°C), ensuring the salmon is both safe and flavorful.

Look for opaque flesh that flakes easily with a fork, indicating it’s fully cooked without being dry or overdone.

Using a Meat Thermometer (145°F/63°C)

Employing a meat thermometer is the most reliable method for guaranteeing your Costco stuffed salmon reaches a safe and delicious internal temperature. Insert the thermometer into the thickest part of the salmon fillet, avoiding contact with the stuffing itself for an accurate reading.

The USDA recommends an internal temperature of 145°F (63°C) for cooked salmon. This ensures any potential bacteria are eliminated, providing a safe and enjoyable meal. Regularly check the temperature during the final minutes of baking, as cooking times can vary.

Remember, carryover cooking will continue to raise the temperature slightly after removal from the oven, so aim to remove it just before reaching 145°F.

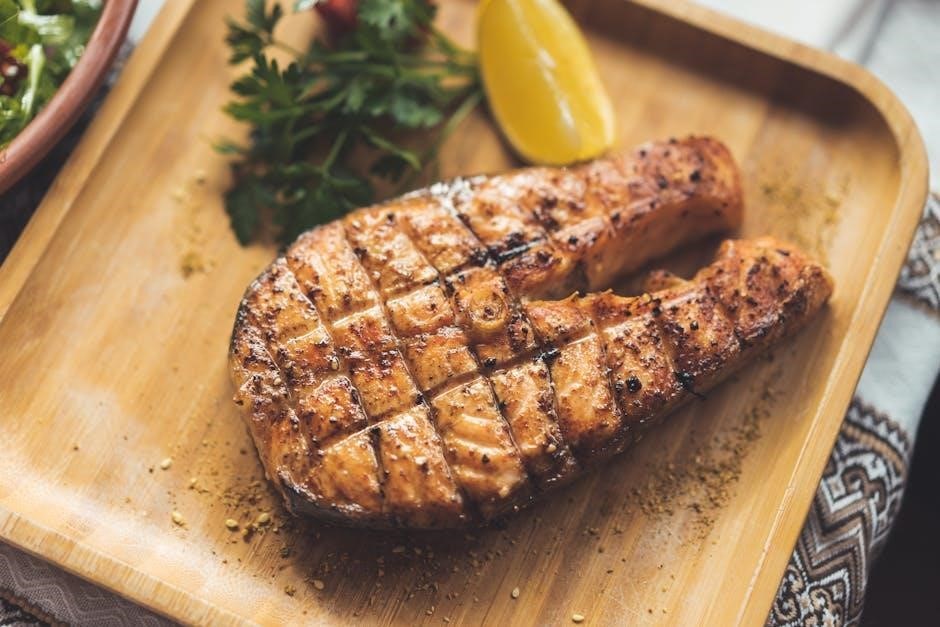
Visual Cues for Cooked Salmon

Beyond a thermometer, several visual cues indicate your Costco stuffed salmon is cooked through. The salmon should transition from translucent to opaque, with the flesh flaking easily when gently prodded with a fork.

Look for a noticeable color change throughout the fillet; any remaining translucency suggests it needs more cooking time. The stuffing should also be heated through and slightly browned on top, indicating it’s reached a safe temperature.

Be mindful not to rely solely on color, as some stuffings can mask the salmon’s true doneness. Combining visual cues with a thermometer provides the best results.

Avoiding Overcooking & Dryness

Overcooking is the biggest threat to enjoying Costco stuffed salmon, leading to dry, less flavorful results. To prevent this, closely monitor the internal temperature using a meat thermometer, aiming for 145°F (63°C).

Start checking the temperature a few minutes before the suggested cooking time ends. If the salmon appears to be browning too quickly, tent it loosely with foil to slow down the cooking process.

Remember, carryover cooking will continue to raise the temperature slightly after removal from the oven, so err on the side of slightly undercooked.

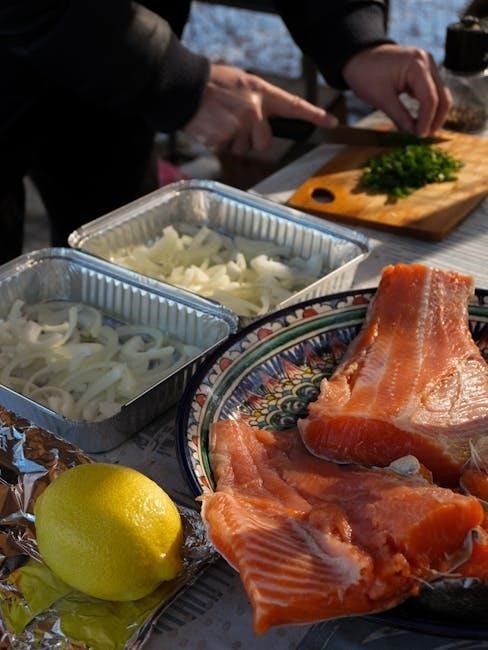
Flavor Enhancement & Seasoning

Enhance the salmon’s natural flavors with simple seasonings like paprika and garlic powder, or brighten it with a squeeze of fresh lemon juice and butter.

Herb combinations, such as dill or parsley, beautifully complement the stuffed salmon, elevating the overall taste profile.

Simple Seasoning Options (Paprika, Garlic Powder)

For a quick and easy flavor boost, consider sprinkling the Costco stuffed salmon with paprika and garlic powder before baking. These readily available spices complement the seafood beautifully without overpowering the delicate flavors of the salmon and stuffing.

Paprika adds a subtle sweetness and vibrant color, while garlic powder provides a savory depth. A light dusting is all that’s needed – approximately half a teaspoon of each for a standard-sized fillet is sufficient. Feel free to adjust the amounts to your personal preference, but remember less is often more when enhancing already flavorful dishes.

These seasonings require minimal effort and yield noticeable improvements in the final taste, making them ideal for a weeknight meal.

Adding Lemon Juice or Butter

To elevate the flavor profile of your Costco stuffed salmon, consider adding a touch of brightness with lemon juice or richness with butter before baking. A squeeze of fresh lemon juice – about a tablespoon – over the fillet introduces a zesty acidity that cuts through the richness of the salmon and stuffing.

Alternatively, dotting the top with small pats of butter (around two tablespoons) creates a luscious, golden crust as it bakes, adding a velvety texture and subtle savory note. You can even combine both for a harmonious blend of flavors!

These simple additions significantly enhance the overall dining experience.

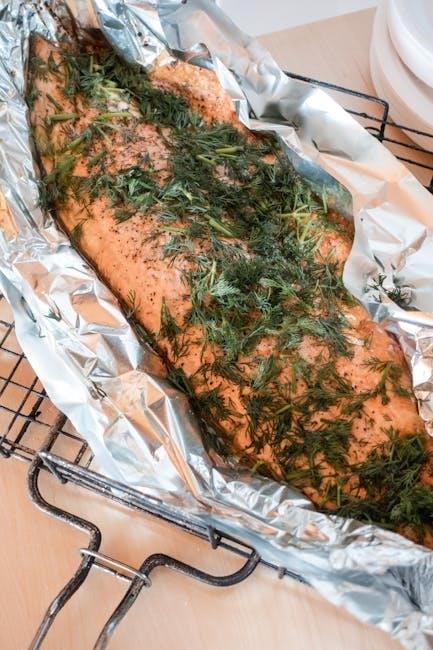
Herb Combinations for Stuffed Salmon

Enhance the savory notes of your Costco stuffed salmon with thoughtfully chosen herb combinations. A classic pairing involves dill and parsley, offering a fresh, slightly anise-like flavor that complements both salmon and crab/shrimp stuffing beautifully.

For a more robust profile, consider a blend of thyme, rosemary, and a pinch of oregano. These herbs impart an earthy, aromatic quality that stands up well to the richness of the dish.

Sprinkle approximately a teaspoon of your chosen herb blend over the salmon before baking to infuse it with delightful aromas and flavors.
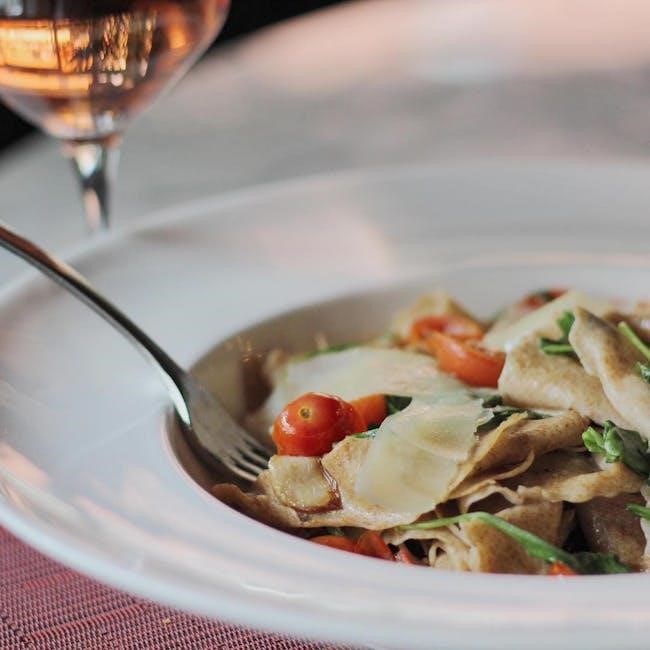
Serving Suggestions

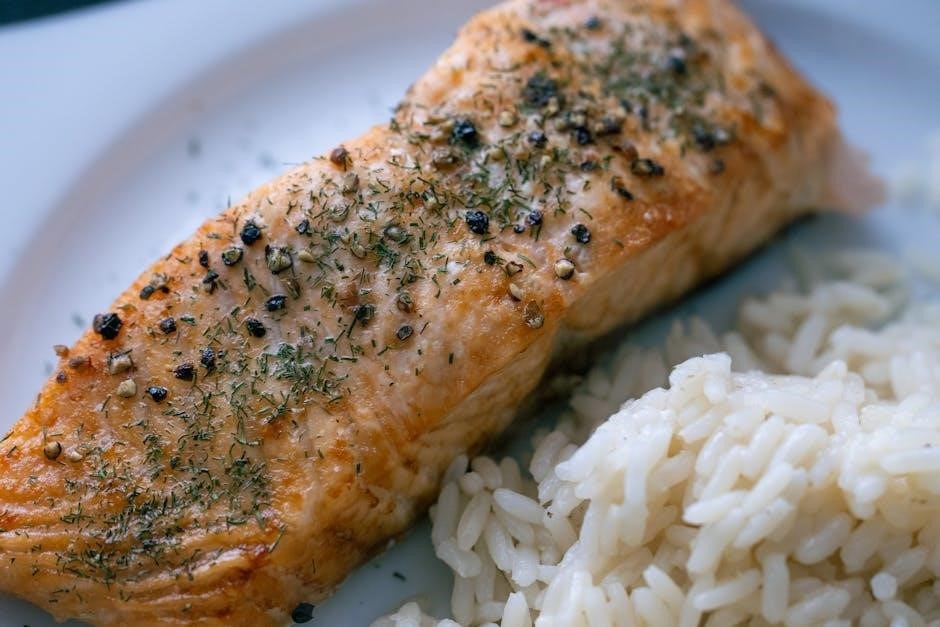
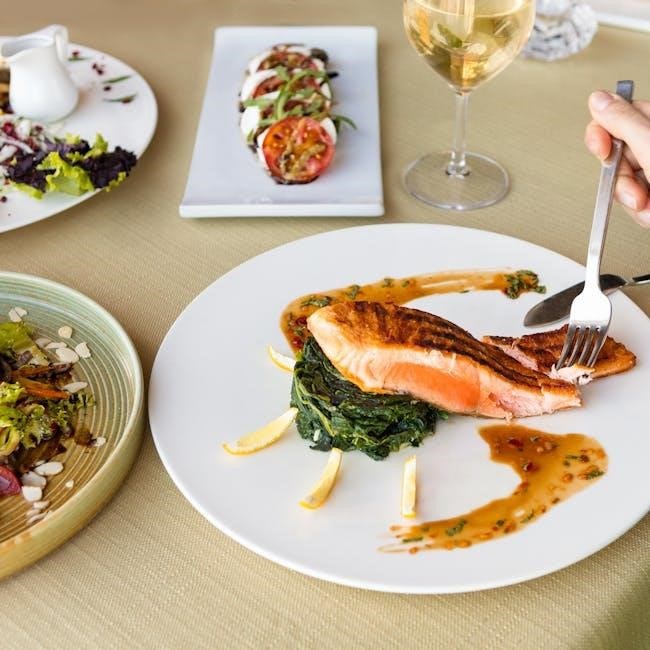
Pair your perfectly cooked Costco stuffed salmon with roasted vegetables like asparagus or broccoli, alongside a fluffy bed of rice for a complete meal.

Hollandaise or a creamy dill sauce elevates the salmon’s flavor, creating a truly memorable dining experience.

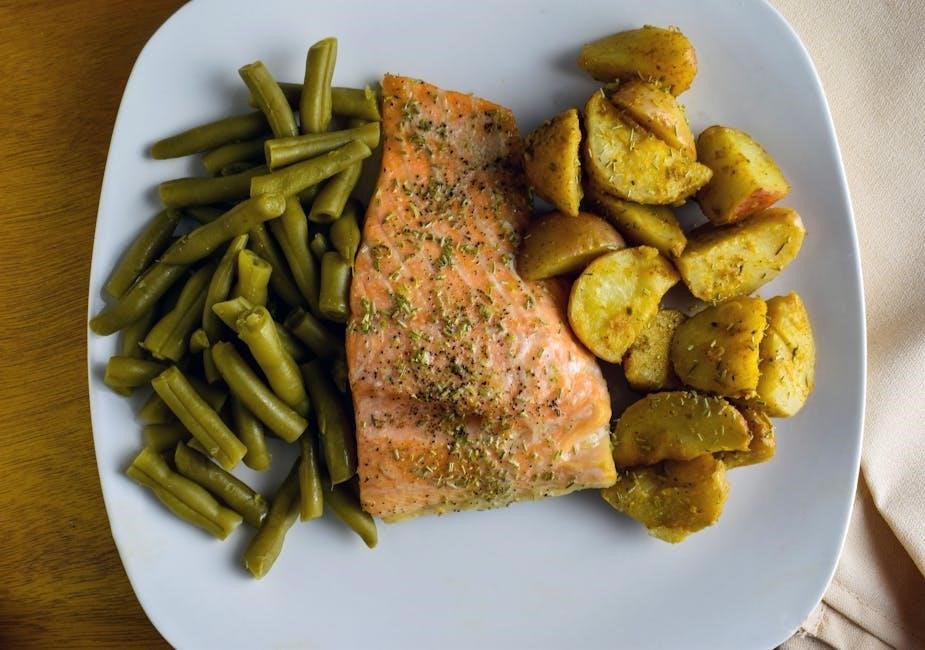
Recommended Side Dishes (Vegetables, Rice)

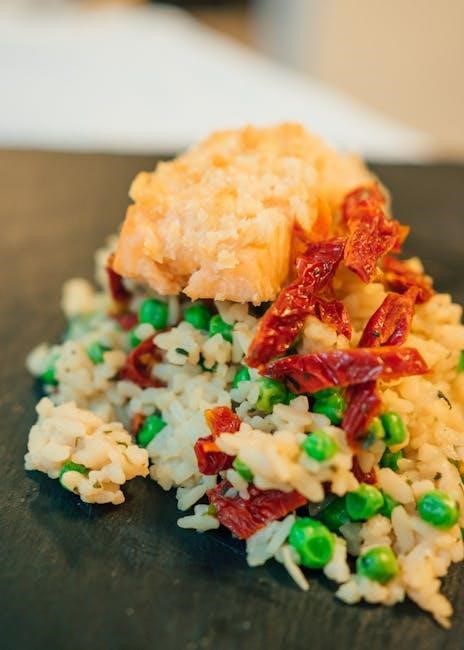
To complement the rich flavors of Costco stuffed salmon, consider a variety of vibrant side dishes; Roasted asparagus, with its slightly charred texture, provides a delightful contrast. Similarly, steamed or roasted broccoli florets offer a healthy and flavorful accompaniment. For a heartier meal, a side of fluffy white rice or quinoa perfectly absorbs any delicious pan juices.

Simple roasted potatoes, seasoned with herbs, also pair wonderfully. A light salad with a lemon vinaigrette can cut through the richness of the salmon and stuffing, offering a refreshing balance. Don’t underestimate the power of a colorful vegetable medley to complete your plate!

Sauce Pairings (Hollandaise, Dill Sauce)

Elevate your Costco stuffed salmon experience with a carefully chosen sauce. Classic Hollandaise sauce, with its rich, buttery flavor, creates a luxurious pairing, enhancing the salmon’s natural taste. Alternatively, a vibrant dill sauce, made with fresh dill, yogurt, and lemon juice, offers a bright and herbaceous counterpoint to the savory stuffing.

A simple lemon-butter sauce also works beautifully, adding a touch of acidity and richness. For a bolder flavor, consider a creamy horseradish sauce. These sauces complement the seafood beautifully, creating a truly memorable meal.

Troubleshooting Common Issues

If the salmon is undercooked, return it to the oven for a few more minutes. Overcooked salmon becomes dry; avoid this by monitoring internal temperature closely.

Salmon is Undercooked

Discovering your Costco stuffed salmon is undercooked is easily remedied! First, don’t panic – it’s a common occurrence, especially with thicker fillets. Immediately return the salmon to the preheated oven. Cover loosely with foil to retain moisture while it continues to cook.

Check the internal temperature again after 5-10 minutes using a meat thermometer. Remember, the target is 145°F (63°C). Continue checking in short intervals to avoid overcooking. Ensure the stuffing itself also reaches a safe temperature. Undercooked salmon can pose health risks, so thorough cooking is crucial for a safe and enjoyable meal.

Salmon is Overcooked

Unfortunately, overcooked Costco stuffed salmon results in a dry, less flavorful dish. While still safe to eat, the texture suffers significantly. There’s limited recovery; however, you can attempt to salvage it with a sauce. A creamy dill sauce or hollandaise can add moisture and flavor back into the salmon.

Next time, reduce your baking time and rely heavily on a meat thermometer. Aim for 145°F (63°C) and check frequently, especially during the final minutes. Remember, carryover cooking will continue to raise the temperature slightly after removal from the oven. Prevention is key!

Stuffing is Not Heated Through

If the salmon appears cooked but the stuffing remains cold, it indicates insufficient heat penetration. This often happens with thicker stuffed portions. To rectify this, carefully cover the salmon loosely with aluminum foil and continue baking for another 5-10 minutes.

Ensure the foil doesn’t seal the salmon completely, allowing some steam to escape. Check the stuffing’s internal temperature with a food thermometer; it should also reach 165°F (74°C). Prioritize stuffing temperature, as undercooked seafood within poses a food safety risk. Patience is crucial for thoroughly heated enjoyment!

Safety Considerations

Always practice proper food handling when preparing salmon. Refrigerate leftovers promptly and consume within 3-4 days to prevent bacterial growth and ensure safety.

Proper Food Handling

Maintaining food safety is crucial when handling Costco stuffed salmon. Begin by ensuring your hands are thoroughly washed with soap and warm water before and after touching the raw salmon. Prevent cross-contamination by using separate cutting boards and utensils for the salmon and other foods.

Keep the salmon refrigerated at a temperature below 40°F (4°C) until ready to cook. If thawing, do so in the refrigerator, never at room temperature, to inhibit bacterial growth. Discard any salmon that has an unusual odor or appearance. Following these guidelines will help ensure a safe and delicious meal.

Storage of Leftovers

Properly storing leftover Costco stuffed salmon is essential for food safety and maintaining quality. Allow the cooked salmon to cool to room temperature before transferring it to airtight containers. Refrigerate leftovers promptly, within two hours, to prevent bacterial growth.

Stored correctly, cooked salmon will remain safe to eat for up to three to four days. For longer storage, consider freezing the leftovers; they can be kept frozen for up to two to three months. Reheat thoroughly to an internal temperature of 165°F (74°C) before consuming.

evenflo exersaucer instructions

Welcome to the comprehensive guide for the Evenflo Exersaucer, designed to help you maximize your child’s safety and enjoyment․ This versatile baby product combines play, learning, and exercise, offering adjustable height settings and detachable toys for extended use․ The instructions provided here will walk you through essential safety guidelines, assembly steps, and usage tips to ensure a secure and engaging experience for your little one․ Always follow the manual carefully to guarantee proper setup and functionality․

Safety Guidelines for Using Evenflo Exersaucer

Ensure your child’s safety by following these essential guidelines․ Always supervise your baby during use and never leave them unattended․ Check for loose parts and ensure all components are securely attached․ Keep the area around the Exersaucer clear of hazards․ Follow the recommended age and weight limits to prevent accidents․ Regularly inspect the product for damage and report any issues to the manufacturer․ Adhere to the instructions provided to maintain safety and functionality․

Important Safety Warnings

When using the Evenflo Exersaucer, it is crucial to adhere to the following safety warnings to ensure your child’s well-being․ First, always inspect the product before and after use for any signs of damage or wear․ Check for loose parts, as they can pose a choking hazard․ Ensure all toys and accessories are securely attached to the saucer․ Additionally, be aware of any recalls, such as the 66,000 units recalled due to detachable parts like the cake toy with a candle flame, which can pose a choking risk;

Never exceed the recommended age and weight limits, as this can lead to structural instability․ The Exersaucer is designed for babies who can hold their heads up unassisted and should not be used as a substitute for a crib or playpen․ Avoid placing the product near stairs, windows, or other hazards․ Keep the area around the Exersaucer clear of any objects that could cause tripping or entanglement․

Always follow the assembly instructions carefully to ensure the product is stable and secure․ Tighten all screws properly, but avoid overtightening, as this could damage the components․ If you notice any instability or wobbling, discontinue use until the issue is resolved․ Regularly clean the Exersaucer with mild soap and water to maintain hygiene, but avoid using harsh chemicals that could harm your child․

Finally, never leave your child unattended while they are using the Exersaucer․ Supervision is key to preventing accidents and ensuring your baby’s safety․ By following these guidelines, you can create a secure and enjoyable environment for your child to play and learn․

Age and Weight Limits

The Evenflo Exersaucer is designed for babies who can hold their heads up unassisted, typically starting from around 4 months of age․ However, the exact age range may vary depending on the specific model, so it’s essential to refer to the user manual for precise guidelines․ Generally, the product is intended for infants who are not yet walking independently and are under a certain weight limit, usually around 30 pounds (13․6 kilograms)․ Exceeding this weight limit can compromise the stability of the Exersaucer and pose a safety risk․

It’s crucial to monitor your child’s growth and development to ensure they remain within the recommended age and weight range․ Once your child reaches the upper weight limit or begins to show signs of outgrowing the product, such as attempting to climb out or reaching a height where they can no longer safely use the features, it’s time to discontinue use․ Always prioritize your child’s safety by adhering to these guidelines․

Additionally, the Exersaucer is not intended for overnight sleep or as a substitute for a crib or playpen․ It is designed for active play and learning under adult supervision․ By following the age and weight limits, you can ensure your child enjoys the benefits of the Exersaucer while staying safe and secure․ Always double-check the user manual for specific details, as different models may have slightly varying recommendations․

Remember, adhering to these limits is a critical part of maintaining the product’s stability and preventing potential hazards․ If you’re ever unsure about whether your child has outgrown the Exersaucer, it’s best to err on the side of caution and stop using it․ Your child’s safety should always come first․

Supervision Tips

Proper supervision is essential to ensure your child’s safety while using the Evenflo Exersaucer․ Always keep an eye on your baby during playtime, as this helps prevent accidents and allows you to intervene if necessary; Start by placing the Exersaucer on a flat, stable surface, away from any hazards such as stairs, windows, or sharp objects․ Ensure the area around the product is clear of toys or items that could pose a tripping risk or entanglement hazard․

Never leave your child unattended, even for a moment, as they can quickly lose balance or attempt to climb out of the Exersaucer․ Teach your child to play safely by avoiding rough movements that could tip the product․ Additionally, check the Exersaucer regularly for any signs of wear or damage, such as loose screws or torn fabric, and address these issues promptly to maintain its stability and safety․

Supervision also involves monitoring your child’s behavior and development․ If your baby shows signs of outgrowing the Exersaucer, such as attempting to stand on the edges or reaching beyond the toy attachments, it may be time to transition to a different product․ Always follow the age and weight guidelines provided in the user manual to ensure the Exersaucer remains a safe and appropriate option for your child․

By staying attentive and proactive, you can create a safe and enjoyable environment for your child to play, learn, and grow with the Evenflo Exersaucer․ Remember, supervision is key to maximizing the benefits of this product while protecting your child’s well-being․

Assembly Instructions for Evenflo Exersaucer

Begin by carefully unboxing and identifying all components, ensuring no parts are missing or damaged․ Follow the step-by-step guide in the manual to assemble the base, legs, and main frame․ Insert the feet into the base and secure them with the provided screws․ Attach the activity toys according to the diagrams, ensuring they are tightly fastened․ Adjust the height to fit your child’s needs and double-check all connections for stability․ Proper assembly ensures safety and functionality for your child’s playtime․

Unboxing and Identifying Components

Unboxing your Evenflo Exersaucer is an exciting first step toward providing your child with a safe and engaging play experience․ Carefully open the box and ensure all components are included and undamaged․ Typically, the package contains the main frame, legs, activity toys, screws, and an instruction manual․ Take a moment to familiarize yourself with each part before assembly begins․

The main components include the base, which provides stability, and the pylon, the central column that supports the activity area․ You’ll also find detachable toys and interactive features designed to stimulate your child’s senses and encourage motor skill development․ Additional hardware, such as screws and bolts, will be used to secure these parts together during assembly․

Before starting, organize the components by category to avoid confusion․ Separate the structural parts, such as the legs and frame, from the activity toys and accessories․ This step ensures a smooth assembly process and prevents missing or misplaced items․ If any parts appear damaged or are missing, contact the manufacturer immediately to resolve the issue․

Refer to the instruction manual for a detailed diagram of the components and their corresponding labels․ This will help you identify each part quickly and confirm that everything is accounted for․ Taking the time to properly unbox and organize the components sets the foundation for a successful and stress-free assembly experience․

Remember, careful preparation is key to ensuring your Evenflo Exersaucer is assembled correctly and safely for your child to enjoy․ By following these steps, you can create a fun and interactive environment that promotes learning and physical activity․

new york breadsticks cooking instructions

Ready to enjoy freshly baked New York breadsticks? Whether you’re using a conventional oven, air fryer, or toaster oven, we’ve got you covered. Follow our easy-to-understand instructions for perfect, golden-brown breadsticks every time. Get ready to savor the taste of authentic New York flavor!

New York breadsticks, often associated with classic Italian-American cuisine, offer a delightful combination of a crispy exterior and a soft, chewy interior. These elongated, hearth-baked delights are a versatile accompaniment to various meals, from pasta dishes and soups to salads and appetizers. Their appeal lies in their simple yet satisfying flavor, often enhanced with garlic, cheese, or herbs.

The New York Bakery brand, with its roots in a small family bakery in Cleveland, OH, has popularized these breadsticks, bringing European Old World flavor to modern convenience. Whether you opt for the regular, garlic, or cheese-infused variety, these breadsticks provide a quick and easy way to elevate your dining experience.

Perfect for dipping in marinara or Alfredo sauce, or simply enjoyed on their own, New York breadsticks are a crowd-pleasing option for family dinners, gatherings, or even a quick snack. With various cooking methods available, including conventional oven, air fryer, and toaster oven, achieving that perfect golden-brown crispness is easier than ever.

Ingredients for Homemade Breadsticks

Creating homemade New York-style breadsticks is a rewarding culinary experience, allowing you to customize flavors and textures to your liking. The foundation of these delicious sticks lies in a few simple ingredients, readily available in most kitchens.

First, you’ll need flour, the heart of any bread recipe. Bread flour is recommended for its higher protein content, which contributes to a chewier texture, but all-purpose flour can also be used. Yeast, the leavening agent, is crucial for creating a light and airy dough. Active dry yeast or instant yeast will both work, just be sure to activate it properly with lukewarm water.

Water is essential for hydrating the flour and activating the yeast. A touch of sugar, honey, or agave nectar provides food for the yeast, enhancing its activity and adding a subtle sweetness. Olive oil adds flavor and richness to the dough, while salt balances the flavors and controls the yeast’s activity.

For added flavor, consider incorporating garlic powder, onion powder, or Italian herbs into the dough. Toppings like grated Parmesan cheese, sesame seeds, or a brush of melted butter with garlic and parsley elevate the breadsticks to a truly irresistible treat.

Preparing the Dough

Crafting the perfect dough is paramount for achieving authentic New York-style breadsticks. Begin by activating the yeast: in a small bowl, combine lukewarm water with sugar or honey, then sprinkle the yeast over the top. Let it stand for 5-10 minutes until foamy, indicating the yeast is active.

In a large bowl, whisk together the flour and salt. Create a well in the center and pour in the activated yeast mixture and olive oil. Gradually incorporate the dry ingredients into the wet ingredients, mixing until a shaggy dough forms.

Turn the dough out onto a lightly floured surface and knead for 8-10 minutes, until smooth and elastic. Alternatively, use a stand mixer with a dough hook, kneading for 6-8 minutes. Place the dough in a lightly oiled bowl, turning to coat. Cover with plastic wrap and let it rise in a warm place for 1-1.5 hours, or until doubled in size.

Once risen, gently punch down the dough to release the air. It’s now ready to be shaped into those classic breadstick forms, paving the way for baking perfection. Remember, patience and proper kneading are key to a light and airy texture.

Baking Instructions in a Conventional Oven

For that classic, golden-brown finish, a conventional oven is your best friend. Start by preheating your oven to 425°F (220°C). This high temperature ensures a crispy exterior and a soft, chewy interior, characteristic of authentic New York breadsticks.

While the oven preheats, prepare a baking sheet by lightly greasing it or lining it with parchment paper. This prevents the breadsticks from sticking and makes for easy cleanup. Gently place the shaped breadsticks onto the prepared baking sheet, ensuring they are evenly spaced to allow for proper air circulation.

Bake on the middle rack for approximately 5-6 minutes, or until the breadsticks are golden brown. Keep a close eye on them, as baking times may vary depending on your oven. For an extra touch of flavor, consider brushing the breadsticks with melted butter and sprinkling them with garlic powder during the last few minutes of baking.

Once baked, remove the breadsticks from the oven and let them cool slightly on the baking sheet before serving. Enjoy them warm with your favorite dipping sauce or alongside a comforting bowl of soup.

Air Fryer Cooking Instructions

Craving crispy, golden-brown breadsticks in a fraction of the time? The air fryer is your secret weapon! Begin by preheating your air fryer to 380°F (193°C). This ensures that the breadsticks cook evenly and achieve that perfect crispy texture we all crave.

Once preheated, carefully place the breadsticks into the air fryer basket, making sure not to overcrowd them. Overcrowding can lead to uneven cooking, so it’s best to work in batches if necessary. A single layer is ideal for optimal crispness.

Cook the breadsticks for approximately 4-6 minutes, flipping them halfway through using tongs to ensure even browning. Keep a close watch, as air fryers can vary in cooking time. You’ll know they’re ready when they’re golden brown and crispy to the touch.

For an extra burst of flavor, consider lightly spraying the breadsticks with olive oil or melted butter before air frying. This helps to enhance the crispness and adds a delightful richness. Once cooked, remove the breadsticks from the air fryer and let them cool slightly before serving. Enjoy them as a delicious snack or a satisfying side dish.

Toaster Oven Instructions

For a quick and convenient way to enjoy warm, delicious New York breadsticks, your toaster oven is an excellent choice. Begin by preheating your toaster oven to 425°F (220°C). This ensures that the breadsticks will cook evenly and develop a golden-brown crust.

While the toaster oven is preheating, prepare a small baking sheet or aluminum foil. This will prevent the breadsticks from sticking to the toaster oven rack and make for easier cleanup.

Carefully place the breadsticks flat on the prepared baking sheet or foil. Make sure they are not overcrowded to allow for proper heat circulation. Depending on the size of your toaster oven, you may need to cook the breadsticks in batches.

Bake the breadsticks for approximately 8-10 minutes, or until they are golden brown and heated through. Keep a close eye on them, as toaster ovens can vary in temperature and cooking time. Once they are ready, carefully remove the baking sheet from the toaster oven and let the breadsticks cool slightly before serving. Enjoy them as a tasty snack or a delightful accompaniment to your favorite meal.

Using Frozen Breadsticks

Frozen breadsticks offer a convenient way to enjoy a warm, comforting side dish with minimal effort. Whether you’re short on time or simply prefer the ease of pre-made options, frozen breadsticks can be a delicious addition to your meal. To achieve the best results, it’s important to follow a few simple steps.

Firstly, preheat your oven to the temperature specified on the breadstick packaging, typically around 400°F (200°C) to 425°F (220°C). While the oven is heating, remove the desired number of breadsticks from the freezer. There’s no need to thaw them beforehand.

Arrange the frozen breadsticks in a single layer on a baking sheet. For optimal crispiness, use a baking sheet with edges to prevent them from sliding off. Place the baking sheet in the preheated oven and bake for the time indicated on the packaging, usually around 5-10 minutes.

Keep a close watch on the breadsticks as they bake, as cooking times can vary depending on your oven. They are ready when they turn golden brown and are heated through. Remove from the oven and let cool slightly before serving.

Adding Flavors and Toppings (Garlic, Cheese, Herbs)

Elevate your homemade New York breadsticks by experimenting with a variety of flavors and toppings. Garlic, cheese, and herbs are classic additions that can transform simple breadsticks into a savory delight. The possibilities are endless, so feel free to get creative and customize your breadsticks to your liking.

For garlic breadsticks, melt butter and mix it with minced garlic. Brush this mixture generously over the breadsticks before baking. You can also add garlic powder for an extra boost of flavor. If you prefer fresh herbs, finely chop parsley, oregano, or basil and sprinkle them over the breadsticks along with the garlic butter.

Cheese lovers can add grated Parmesan, mozzarella, or cheddar cheese to their breadsticks. Sprinkle the cheese over the breadsticks after brushing them with garlic butter or olive oil. For a richer flavor, use a combination of cheeses.

Experiment with other herbs and spices such as rosemary, thyme, or red pepper flakes to create unique flavor profiles. You can also add a sprinkle of sea salt or everything bagel seasoning for added texture and taste. Get creative and enjoy the process of customizing your breadsticks!

Serving Suggestions and Pairings

Freshly baked New York breadsticks are incredibly versatile and can be enjoyed in numerous ways. Whether you’re looking for a simple snack or an accompaniment to a hearty meal, these breadsticks are sure to please. Their crispy exterior and soft interior make them a perfect addition to any table.

Serve them warm with a side of marinara sauce, Alfredo sauce, or even a spicy dipping sauce for a delicious appetizer. They also pair wonderfully with soups, salads, and pasta dishes. Use them to scoop up the last bit of sauce from your plate or as a crunchy addition to a fresh salad.

For a more substantial meal, serve your breadsticks alongside a platter of cold cuts and cheeses. This makes for a satisfying and customizable meal that everyone can enjoy. You can also use them to create mini sandwiches or sliders with your favorite fillings.

Consider serving them at your next gathering or party. They are easy to make in large batches and are always a crowd-pleaser. Whether you’re hosting a formal dinner or a casual get-together, New York breadsticks are a welcome addition to any occasion.

Troubleshooting Common Issues (Dough, Baking Time)

Making New York breadsticks can sometimes present challenges, but don’t worry, we’re here to help you troubleshoot common issues. One frequent problem is dough that is either too sticky or too dry. If your dough is too sticky, gradually add a little more flour until it becomes manageable. If it’s too dry, add a teaspoon of water at a time until it reaches the right consistency.

Another issue is uneven baking. Ensure your oven is properly preheated and that the breadsticks are evenly spaced on the baking sheet. Rotating the baking sheet halfway through the baking time can also help ensure even browning.

If your breadsticks are browning too quickly, lower the oven temperature slightly and monitor them closely. Conversely, if they’re not browning enough, you can increase the temperature for the last few minutes of baking.

Sometimes, breadsticks can turn out too hard. This is often due to overbaking. Keep a close eye on the baking time and remove them from the oven as soon as they are golden brown. Letting them cool completely on a wire rack can also help prevent them from becoming too hard. Remember, practice makes perfect!

Storage Instructions

Proper storage is essential to maintain the quality and flavor of your homemade New York breadsticks. To store leftover breadsticks, allow them to cool completely on a wire rack after baking. Once cooled, place them in an airtight container or a resealable plastic bag. This will help prevent them from drying out and becoming stale.

At room temperature, breadsticks can typically be stored for up to two days. For longer storage, consider refrigerating them. In the refrigerator, they can last for up to a week. When ready to eat, you can reheat them in a low oven or toaster oven to restore their crispness.

For even longer storage, freezing is an excellent option. Wrap the cooled breadsticks individually in plastic wrap, then place them in a freezer-safe bag or container. Frozen breadsticks can be stored for up to two months. To reheat frozen breadsticks, thaw them in the refrigerator overnight or bake them directly from frozen in a preheated oven until warmed through and crispy. Enjoy your delicious breadsticks anytime!

Congratulations! You’ve successfully created delicious, homemade New York breadsticks. From mixing the dough to adding your favorite flavors and toppings, you’ve put your own personal touch on this classic treat. Now, it’s time to sit back, relax, and savor the fruits of your labor.

These warm, crusty breadsticks are perfect for any occasion, whether you’re serving them as an appetizer at a dinner party, pairing them with a comforting bowl of soup, or simply enjoying them as a satisfying snack. The possibilities are endless!

Experiment with different dipping sauces, cheeses, and herbs to create your own signature breadstick experience. Don’t be afraid to get creative and have fun in the kitchen. Remember, the best part of homemade cooking is the joy of sharing your creations with family and friends. So, gather around the table, break bread together, and enjoy the simple pleasure of a freshly baked New York breadstick.