electrician study guide

Electrician Study Guide: A Comprehensive Plan

This guide details a path for aspiring electricians, encompassing theoretical knowledge, practical skills, and career advancement—including navigating the Inflation Reduction Act’s requirements.

Embarking on an electrician’s journey requires dedication and a grasp of fundamental principles. LinkedIn highlights a shift towards valuing soft skills alongside technical expertise. Apprenticeships, like those in St. Maries, Idaho, blend online learning with hands-on experience. This trade offers stable employment and opportunities fueled by initiatives like the Inflation Reduction Act, demanding skilled professionals.

Core Electrical Concepts

Understanding electricity’s core is paramount. This involves grasping fundamental principles that underpin all electrical work. Professionals on LinkedIn emphasize continuous learning for career success. Mastery of these concepts forms the bedrock for advanced topics, including circuit analysis, power systems, and adherence to the National Electrical Code standards.

Voltage, Current, and Resistance (Ohm’s Law)

Ohm’s Law (V=IR) is foundational. It defines the relationship between voltage, current, and resistance in a circuit. Electricians must expertly apply this law for calculations, troubleshooting, and safe system operation. LinkedIn highlights the importance of a strong theoretical base for practical application in the field.

AC vs. DC Electricity

Understanding the differences between Alternating Current (AC) and Direct Current (DC) is crucial. AC is commonly used in residential and commercial power, while DC powers many electronic devices. Electricians must know how each behaves, their applications, and safety protocols for both systems.

Electrical Power and Energy

Electrical power, measured in watts, represents the rate of energy transfer. Energy, measured in kilowatt-hours, is the total amount of energy used. Electricians calculate power and energy to size circuits, determine costs, and ensure efficient system operation, vital for both residential and industrial applications.

Electrical Safety

Prioritizing safety is paramount for electricians; hazards include electrocution, arc flash, and burns. Strict adherence to safety protocols, including Lockout/Tagout procedures and consistent use of Personal Protective Equipment (PPE), minimizes risks. Comprehensive training and awareness are crucial for preventing workplace incidents.

Lockout/Tagout Procedures

Lockout/Tagout (LOTO) is a critical safety procedure ensuring de-energized equipment before maintenance or service. It involves physically isolating energy sources and applying locks/tags to prevent accidental re-energization. Proper LOTO prevents electrocution and other serious injuries, safeguarding electricians during vital work.

Personal Protective Equipment (PPE)

Essential PPE for electricians includes insulated gloves, safety glasses, arc-rated clothing, and hard hats. These items create a barrier against electrical hazards like shocks, burns, and falling objects. Proper PPE selection and consistent use are non-negotiable for maintaining safety on every job site.

Common Electrical Hazards & Prevention

Electricians face risks like electrocution, arc flash, and burns. Prevention involves Lockout/Tagout procedures, utilizing proper PPE, maintaining safe distances, and regular equipment inspections. Thorough hazard assessments before starting work are crucial, alongside continuous awareness of surroundings and potential dangers;

Electrical Theory and Calculations

A solid grasp of electrical theory is fundamental. This includes understanding series and parallel circuits, power factor, and impedance calculations. Mastering Ohm’s Law—voltage, current, and resistance—is essential for troubleshooting and safe, effective electrical system design and installation practices.

Series and Parallel Circuits

Understanding circuit configurations is crucial. Series circuits offer a single path for current, while parallel circuits provide multiple paths. Electricians must calculate total resistance, voltage drops, and current flow in both types to ensure proper component operation and prevent overloads or failures.

Power Factor and Impedance

Power factor reflects efficient energy use; impedance hinders current flow. Electricians analyze these concepts to optimize electrical systems, minimizing losses and ensuring equipment operates within safe limits. Correcting poor power factor improves efficiency, while understanding impedance aids in fault analysis and protection.

National Electrical Code (NEC) Fundamentals

The NEC establishes safe electrical installations, crucial for electricians. Understanding its structure, including articles and sections, is paramount. Electricians must adhere to NEC guidelines for wiring methods, overcurrent protection, and grounding. Regular updates require continuous learning to ensure compliance and public safety.

Understanding NEC Article 100

NEC Article 100 defines key terms used throughout the code, ensuring consistent interpretation. It clarifies definitions for conductors, equipment, and wiring methods. Mastering these definitions is vital for accurate application of other NEC articles, preventing misinterpretations and ensuring safe, compliant electrical work.

Wiring Methods and Materials (NEC Chapter 3)

NEC Chapter 3 details acceptable wiring methods and materials, covering conduit, cables, and raceways. It specifies installation requirements for each, considering factors like environment and voltage. Understanding these rules is crucial for selecting appropriate materials and ensuring installations meet safety standards and code compliance.

Wiring Techniques and Practices

Mastering wiring techniques is paramount for safe and reliable electrical systems. This includes proper wire handling, secure connections, and neat installations. Proficiency in conduit bending, wire splicing, and termination are essential skills, demanding precision and adherence to NEC guidelines for optimal performance.

Conduit Bending

Precise conduit bending is crucial for efficient and code-compliant installations. Electricians must learn to accurately calculate bends, offsets, and saddles using bending tools. Understanding conduit fill capacities and proper support spacing ensures structural integrity and safety, adhering strictly to NEC standards.

Wire Splicing and Termination

Secure and reliable wire connections are fundamental to electrical safety. Mastering various splicing techniques – pigtails, split bolts, and wire nuts – is essential. Proper termination at devices, including outlets and switches, demands precision and adherence to torque specifications, preventing overheating and failures.

Apprentice Programs and Career Paths

Formal apprenticeships, like those in St. Maries, Idaho, blend classroom learning with hands-on experience. These programs are crucial for skill development and licensure. Career paths range from residential to industrial work, with opportunities for specialization and advancement, often influenced by IRA requirements and prevailing wage laws.

Finding Registered Apprenticeships (e.g., St. Maries, Idaho)

Locating registered programs is vital; resources include local union halls, state labor departments, and online platforms like LinkedIn. The St. Maries, Idaho facility offers a combined online/classroom and practical experience program. Thorough research ensures alignment with career goals and IRA-related apprenticeship stipulations.

Inflation Reduction Act (IRA) & Apprenticeship Requirements

The IRA incentivizes clean energy projects, but mandates prevailing wage and registered apprenticeship participation for maximized tax credits. Compliance is crucial; new portals, like Baker Tilly US, LLP’s, streamline tracking. Electricians must understand these requirements to qualify projects and secure future employment opportunities.

Tools of the Trade

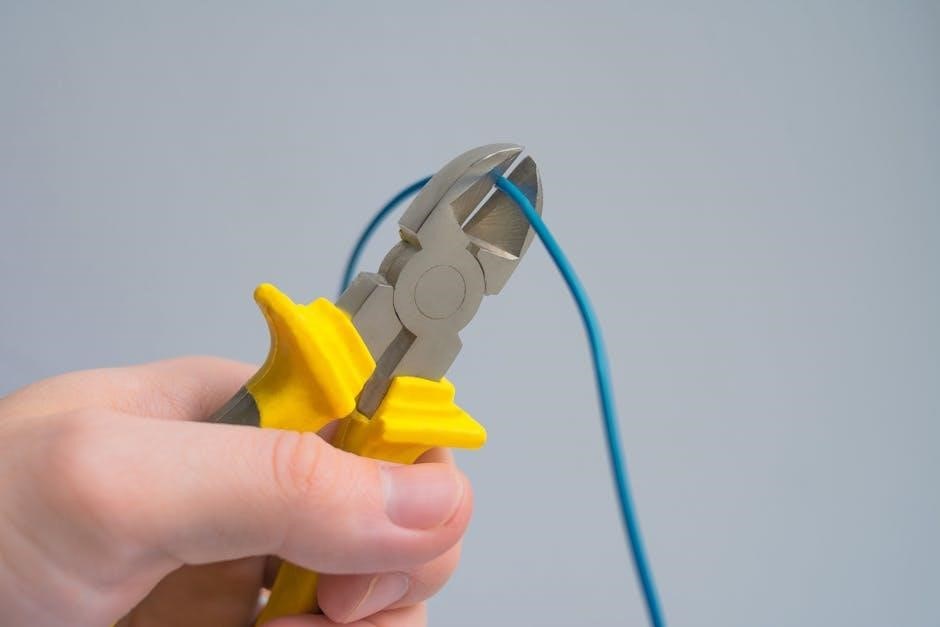
Electricians require a diverse toolkit, spanning essential hand tools – pliers, screwdrivers, wire strippers – and specialized testing equipment like multimeters. Proficiency with these tools is paramount for safe and accurate work. Mastering their use is a core component of any comprehensive electrician training program.

Essential Hand Tools

A foundational electrician’s kit includes pliers for gripping and bending, screwdrivers for various terminals, wire strippers for precise insulation removal, and measuring tapes for accurate layouts. Quality hand tools are vital for efficiency, safety, and longevity, forming the bedrock of any electrical project.

Electrical Testing Equipment

Essential tools include multimeters for voltage, current, and resistance checks, circuit tracers to identify wire paths, and clamp meters for measuring amperage without circuit interruption. Voltage testers confirm power absence, ensuring safety before work begins, while insulation testers verify wire integrity.

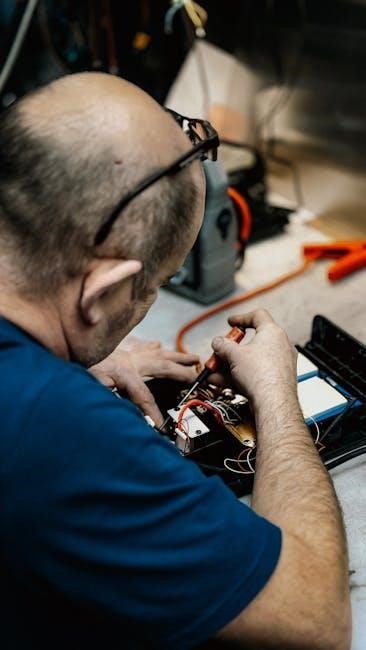
Troubleshooting Electrical Circuits

Systematic diagnosis begins with identifying symptoms and checking power sources. Utilizing a multimeter to verify voltage and continuity is crucial. Common faults include open circuits, short circuits, and ground faults; isolating these requires careful testing and tracing. Safety protocols are paramount during this process.

Using a Multimeter

A multimeter is essential for measuring voltage, current, and resistance, verifying circuit functionality. Proper selection of the range and function is vital for accurate readings. Understanding AC and DC measurements, alongside continuity testing, aids in fault finding. Always prioritize safety when utilizing this tool.

Identifying Common Faults

Electricians frequently encounter open circuits, short circuits, and ground faults. Recognizing tripped breakers, blown fuses, and damaged wiring are crucial first steps. Utilizing a multimeter to trace circuits and pinpoint issues is key. Systematic troubleshooting, combined with schematic reading, ensures efficient repairs.

Residential Wiring

Residential wiring focuses on branch circuit installation, encompassing outlets, lighting, and appliance connections. Grounding and bonding are paramount for safety, preventing shocks and ensuring proper equipment function. Understanding load calculations and adhering to the National Electrical Code (NEC) are essential for compliant installations.

Branch Circuit Installation

Proper branch circuit installation demands careful wire sizing, breaker selection, and adherence to NEC guidelines. This includes calculating loads, determining appropriate conduit fill, and ensuring secure connections. Safe practices, like de-energizing circuits, are crucial, alongside accurate wiring diagrams for reliable performance.

Grounding and Bonding

Effective grounding and bonding are vital for electrical safety, creating a low-impedance path for fault currents. This protects personnel and equipment from hazardous voltages. Understanding grounding electrode systems, bonding jumpers, and equipment grounding conductors is essential, adhering strictly to NEC standards for a secure installation.
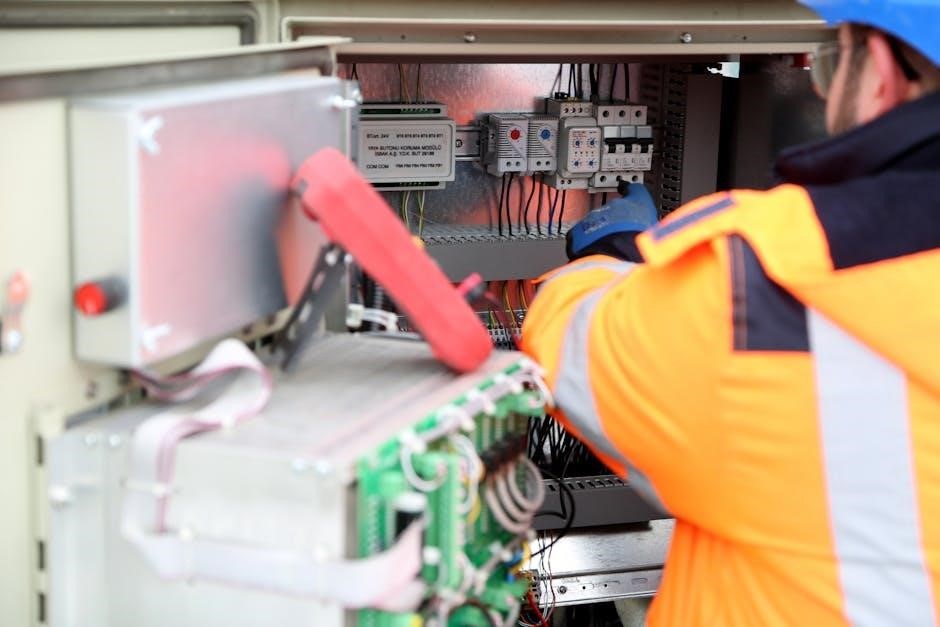
Commercial Wiring

Commercial wiring demands expertise in three-phase power systems and motor control circuits. Electricians must proficiently install conduit, pull wiring, and terminate connections for diverse loads. Understanding commercial building codes and load calculations is crucial for safe, efficient, and NEC-compliant installations.

Three-Phase Power Systems

Three-phase systems are fundamental to commercial and industrial power distribution. Electricians must grasp voltage differences, wiring configurations (wye and delta), and balanced load principles. Troubleshooting requires understanding phase rotation, voltage measurements, and the impact of unbalanced loads on equipment performance and safety.

Motor Control Circuits

Mastering motor control is crucial for commercial electricians. This involves understanding motor starters, overload protection, and control transformers. Electricians need to interpret schematics, troubleshoot faults, and safely implement variable frequency drives (VFDs) for efficient motor operation and precise speed control.

Industrial Wiring

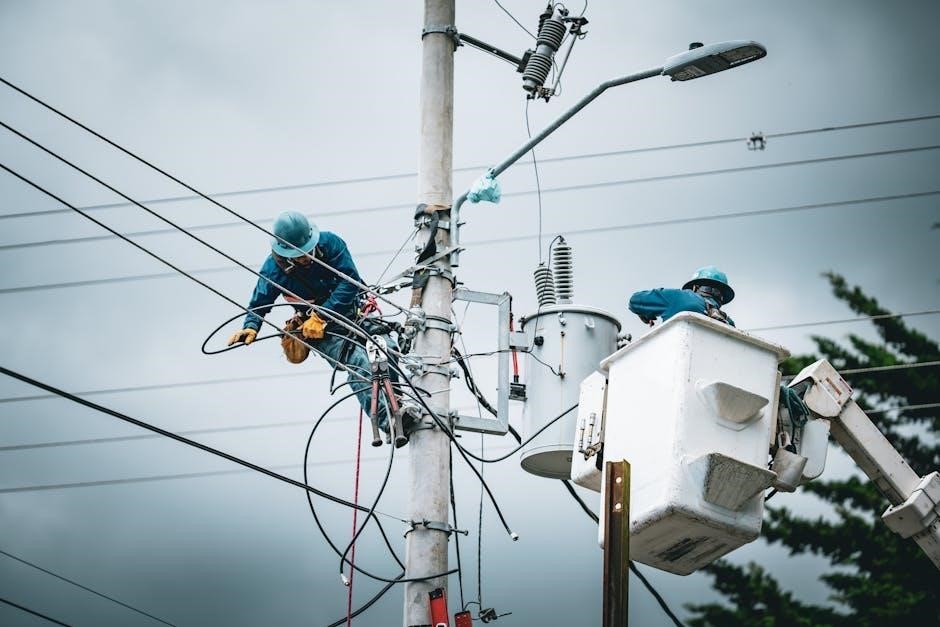
Industrial settings demand robust wiring solutions. Electricians must be proficient in installing and maintaining conduit systems, cable trays, and various industrial connectors. Understanding three-phase power distribution, grounding techniques, and safety protocols within complex industrial environments is paramount for reliable operation and worker safety.

High-Voltage Systems

Working with high-voltage systems requires specialized training and strict adherence to safety regulations. Electricians must understand transformer operation, switchgear maintenance, and protective relaying principles. Proper grounding, insulation testing, and the use of specialized PPE are crucial when dealing with these potentially dangerous environments.

PLC Basics for Electricians

Programmable Logic Controllers (PLCs) are increasingly common in industrial settings, demanding electrician familiarity. Understanding PLC components, ladder logic programming basics, and troubleshooting techniques is essential. Electricians should learn to interpret schematics, diagnose input/output issues, and perform basic PLC maintenance effectively.

Utilizing Professional Networks (LinkedIn)

LinkedIn is a powerful tool for electricians seeking career advancement and networking opportunities. Building a professional profile, connecting with industry peers, and actively participating in relevant groups are crucial. Utilize LinkedIn to search for jobs, showcase skills, and stay informed about industry trends and opportunities.

Building Your Professional Profile

A strong LinkedIn profile is essential for electricians. Highlight completed apprenticeships, certifications, and skills like conduit bending and electrical troubleshooting. Detail project experience and emphasize adherence to NEC standards. A professional headshot and a compelling summary will attract potential employers and expand your network.

Job Searching and Networking

Leverage LinkedIn to discover electrician roles and connect with industry professionals. Actively search for positions, join relevant groups, and engage with content. Networking can uncover opportunities not publicly advertised, particularly with the growing demand fueled by the Inflation Reduction Act’s clean energy initiatives.

Prevailing Wage and Apprenticeship Compliance

The Inflation Reduction Act (IRA) mandates prevailing wage and apprenticeship requirements for projects receiving certain clean energy credits. Compliance portals, like those offered by Baker Tilly US, LLP, streamline tracking; Understanding these regulations is crucial for electricians and employers to maximize IRA benefits and ensure project eligibility.

Understanding PW & A Requirements

Prevailing Wage (PW) and Apprenticeship (A) requirements, as defined by the IRA, apply to laborers and mechanics on qualifying projects. Taxpayers, contractors, and subcontractors must adhere to these standards to receive full credit amounts. Accurate payroll and apprentice tracking are essential for demonstrating compliance.

Utilizing Compliance Portals (e.g., Baker Tilly US, LLP)

Leading advisory firms like Baker Tilly US, LLP offer new IRA PW&A compliance portals. These streamline payroll and apprentice tracking, crucial for clean energy projects. Utilizing such portals aids in accurate reporting and ensures adherence to the Inflation Reduction Act’s complex requirements, simplifying the process.

Continuing Education and Licensing

Electricians must pursue ongoing education to stay current with evolving codes and technologies. Maintaining licensure requires fulfilling continuing education units, ensuring competency and safety standards. Professional development, coupled with updated credentials, enhances career prospects and demonstrates commitment to the electrical trade’s best practices.

peterson field guide series

The Legacy of Roger Tory Peterson and His Field Guide Series

Roger Tory Peterson’s groundbreaking series revolutionized nature observation‚ beginning with his 1934 bird guide‚ and continuing through expansions
and collaborations‚ inspiring generations of naturalists and conservationists․

Origins and Early Life of Roger Tory Peterson

Roger Tory Peterson‚ born in 1908‚ developed a keen interest in birds during his childhood in Jamestown‚ New York․ Early struggles with eyesight‚ corrected by eyeglasses‚ heightened his observational skills‚ fostering a meticulous attention to detail crucial for his future work․ He wasn’t academically inclined in traditional schooling‚ finding greater fulfillment in artistic pursuits and natural history exploration․

Peterson’s artistic talent blossomed early‚ and he secured an apprenticeship with a local artist‚ further honing his skills in illustration․ This artistic foundation proved invaluable when he began to visually represent birds in a uniquely accessible manner․ His early experiences‚ coupled with a passion for ornithology‚ laid the groundwork for a revolutionary approach to field guides‚ moving beyond dry taxonomic lists to a system focused on identification through key field marks․

The Revolutionary “Peterson Identification System”

Roger Tory Peterson’s innovative identification system‚ a cornerstone of his field guides‚ moved away from traditional taxonomic arrangements․ Instead‚ he grouped birds based on visual similarities – their key field marks – making identification far more intuitive for beginners․ This system utilized arrows and pointers directly on the illustrations‚ highlighting crucial characteristics like wing bars‚ eye stripes‚ and tail patterns;

Prior to Peterson‚ field guides often relied on detailed descriptions requiring extensive ornithological knowledge․ Peterson’s approach democratized birdwatching‚ enabling anyone to learn and identify species through visual comparison․ This revolutionary method wasn’t merely about listing features; it was about teaching observers how to see‚ fostering a deeper connection with the natural world․

A Field Guide to Birds: The Groundbreaking First Edition

Published in 1934‚ Peterson’s initial bird guide was a pivotal moment‚ selling out its modest 2‚000-copy print run remarkably quickly and changing birding forever․

Publication and Initial Reception (1934)

The initial publication of A Field Guide to the Birds in 1934 was met with cautious optimism by its publisher‚ Houghton Mifflin․ Reflecting perceived limited market demand‚ a relatively small first printing of only 2‚000 copies was undertaken on April 27th․ Priced at $2․75‚ the guide initially offered Peterson no royalties on the first 1‚000 copies sold – a testament to the publisher’s initial uncertainty․

However‚ this apprehension proved unfounded․ The book rapidly gained traction‚ and the entire first print run sold out within a mere two weeks‚ demonstrating an unexpectedly strong public appetite for a practical‚ accessible bird identification guide․ This swift success signaled a turning point‚ establishing Peterson as a significant voice in natural history and paving the way for future editions and expansions of his influential field guide series․

Key Features of the First Edition

The groundbreaking A Field Guide to the Birds (1934) distinguished itself through its innovative and user-friendly approach to bird identification․ Departing from traditional taxonomic arrangements‚ Peterson organized species by visual similarity‚ grouping birds with comparable markings and behaviors․ This facilitated easier comparison and recognition for observers in the field․

Crucially‚ the guide incorporated Peterson’s revolutionary “Identification System‚” utilizing arrow markings to draw attention to key field marks – distinctive features essential for accurate species determination․ This‚ combined with concise descriptions and range maps‚ empowered birdwatchers of all levels to confidently identify birds․ The guide’s simplicity and practicality were central to its immediate and lasting popularity․

The Impact on Birdwatching

The publication of A Field Guide to the Birds in 1934 fundamentally transformed birdwatching from an elite pursuit to a widely accessible hobby․ Prior to Peterson’s guide‚ identification relied heavily on complex taxonomic knowledge and detailed plumage descriptions‚ often proving daunting for beginners․ Peterson’s system democratized bird identification‚ empowering a broader audience to engage with and appreciate avian life․

The initial print run of 2‚000 copies sold out remarkably quickly‚ demonstrating the pent-up demand for a practical and intuitive field guide․ This success spurred subsequent editions and expansions‚ solidifying Peterson’s legacy as the father of modern field guides and igniting a surge in birdwatching enthusiasm across North America․

Evolution of the Bird Guides

Peterson’s guides evolved from Eastern birds to encompass Central and all of North America‚ with continual updates reflecting new knowledge and artistic improvements․

Expansion to Eastern and Central North America

Following the phenomenal success of his initial guide focusing on birds of the Eastern United States‚ Roger Tory Peterson logically expanded his scope to include Central North America․ This expansion wasn’t merely a geographical addition; it represented a commitment to providing comprehensive coverage for birders across a wider region․

The Peterson Field Guide to Birds of Eastern and Central North America became a staple for those venturing beyond the original scope‚ offering detailed descriptions and illustrations for a significantly larger number of species․ Subsequent editions‚ like the sixth edition‚ continued to refine this expanded coverage‚ incorporating updated taxonomy and range information․ This dedication to broadening the geographical reach of his guides solidified Peterson’s influence and accessibility for a growing community of bird enthusiasts․

The expansion demonstrated a responsiveness to the needs of the birding public and a desire to make identification resources available to as many people as possible․

Later Editions and Updates

Throughout his life‚ and continuing after his death in 1996‚ Roger Tory Peterson’s field guides underwent numerous revisions and updates․ These weren’t simply reprints; they represented a continuous effort to incorporate new scientific discoveries‚ refine illustrations‚ and improve the overall user experience․ Experts and artists collaborated to preserve and enhance Peterson’s legacy․

Updates included changes to species classifications‚ reflecting advancements in ornithological understanding‚ and adjustments to range maps based on ongoing observations․ The Houghton Mifflin Harcourt publishing company‚ alongside the Roger Tory Peterson Institute of Natural History‚ played a crucial role in maintaining the accuracy and relevance of the guides․

These ongoing refinements ensured that Peterson’s system remained a trusted and reliable resource for birders‚ adapting to the evolving knowledge of the natural world and solidifying its enduring value․

The Centennial Edition (2008) ‒ North America

The publication of the Peterson Field Guide to Birds of North America in 2008 marked a significant milestone – the centennial of Roger Tory Peterson’s birth․ This larger‚ comprehensive guide drew upon materials from his earlier‚ regional publications‚ consolidating decades of observation and refinement into a single volume․

It wasn’t merely a compilation‚ however․ The Centennial Edition benefited from contributions by renowned birding experts and artists‚ ensuring the guide reflected the latest scientific understanding and incorporated updated text and imagery․ This collaborative effort aimed to preserve and enhance Peterson’s original vision․

The edition represented a celebration of Peterson’s life’s work and a commitment to continuing his legacy of accessible‚ accurate‚ and inspiring natural history guides for future generations of bird enthusiasts․

Beyond Birds: Expanding the Field Guide Series

Peterson’s influence extended beyond ornithology‚ encompassing guides to medicinal plants and herbs‚ and other natural history subjects‚ broadening the scope of his identification system․

Peterson Field Guide to Medicinal Plants & Herbs

The Peterson Field Guide to Medicinal Plants & Herbs of Eastern and Central North America represents a significant extension of Peterson’s identification system beyond the avian world․ This guide‚ available in multiple editions‚ empowers readers to discover nature’s remedies within their region․

It provides detailed descriptions and illustrations‚ enabling accurate plant identification‚ crucial for safe and effective herbalism․ The guide doesn’t merely list plants; it delves into their traditional uses‚ historical context‚ and potential medicinal properties․

This resource caters to both seasoned herbalists and those beginning their journey into the world of natural remedies‚ emphasizing responsible foraging and sustainable practices․ It embodies Peterson’s commitment to connecting people with the natural world‚ fostering both appreciation and understanding․

Other Natural History Guides

Beyond birds and medicinal plants‚ the Peterson Field Guide series blossomed to encompass a diverse range of natural history subjects․ These guides demonstrate the adaptability and enduring relevance of Peterson’s identification system․ Titles included guides to edible wild plants‚ wildflowers‚ trees‚ and even seashells‚ each meticulously crafted with detailed illustrations and accessible descriptions․

The series aimed to democratize natural knowledge‚ making it available to amateur naturalists and outdoor enthusiasts; These guides weren’t simply identification keys; they fostered a deeper connection with the environment‚ encouraging observation and appreciation․

The expansion of the series solidified Peterson’s legacy as a champion of accessible natural history‚ inspiring countless individuals to explore and understand the world around them․

The Peterson System in Practice

The Peterson Identification System prioritizes key field marks‚ organized species arrangements‚ and visual cues‚ enabling quick and accurate identification for both novice and expert users․

Focus on Key Field Marks

Roger Tory Peterson’s revolutionary approach centered on identifying birds – and later‚ other natural subjects – not by exhaustive description‚ but by focusing on a limited number of key field marks․ This meant highlighting the most distinctive and readily observable characteristics‚ such as wing bars‚ eye stripes‚ or tail patterns․

Instead of overwhelming the observer with every detail‚ Peterson’s system directed attention to the features that most reliably differentiate species․ This simplified the identification process‚ making it accessible to a wider audience․ His guides included arrows and lines pointing directly to these crucial markings‚ visually guiding the user’s eye․

This emphasis on key field marks wasn’t merely a stylistic choice; it was a fundamental shift in how people interacted with nature‚ promoting focused observation and a deeper understanding of species distinctions․ It allowed birders to quickly narrow down possibilities and arrive at accurate identifications‚ even in challenging field conditions․

Arrangement and Organization of Species

Roger Tory Peterson’s field guides weren’t simply collections of illustrations; they were carefully organized tools for identification․ Unlike traditional taxonomic arrangements‚ Peterson grouped species based on visual similarity‚ rather than evolutionary relationships․ This meant birds that looked alike were placed together‚ even if they weren’t closely related․

This pragmatic approach reflected the needs of field identification․ It allowed users to quickly compare similar-looking species side-by-side‚ facilitating accurate distinctions․ The guides also employed a hierarchical system‚ starting with broad groupings and progressively narrowing down to individual species․

This intuitive organization‚ combined with the focus on key field marks‚ made Peterson’s guides exceptionally user-friendly․ It empowered birders to navigate the complexities of avian diversity with confidence and efficiency‚ a hallmark of his enduring legacy․

Collaborations and Continued Development

The Roger Tory Peterson Institute and experts continued Peterson’s work after his 1996 death‚ updating guides with new information and artistic renderings․

The Role of the Roger Tory Peterson Institute

The Roger Tory Peterson Institute (RTPI) plays a crucial role in preserving and extending Peterson’s legacy․ Founded to honor his contributions to natural history and conservation‚ the RTPI actively supports research‚ education‚ and the continued development of the Peterson Field Guide series․ Following Peterson’s passing in 1996‚ the Institute collaborated with Houghton Mifflin Harcourt to ensure the guides remained current and accurate․

This partnership led to significant updates‚ including the comprehensive Peterson Field Guide to Birds of North America released in 2008‚ coinciding with the centennial of Peterson’s birth․ The RTPI’s involvement guarantees that future editions will uphold the high standards of identification and accessibility that defined Peterson’s original work‚ fostering a deeper connection between people and the natural world․ They champion his system and promote conservation efforts․

Contributions from Other Experts

Maintaining the Peterson Field Guide series as a leading resource required collaboration beyond Roger Tory Peterson himself․ Experts like Lee Allen Peterson‚ Michael DiGiorgio‚ Paul Lehman‚ Michael O’Brien‚ and Jeffrey A․ Gordon have significantly contributed to later editions‚ ensuring accuracy and incorporating new discoveries in ornithology and botany․

The 2008 North American bird guide‚ released for Peterson’s centennial‚ exemplifies this collaborative spirit‚ drawing upon the expertise of numerous renowned birding specialists and artists․ These contributions weren’t merely updates; they were enhancements‚ preserving Peterson’s foundational system while integrating modern knowledge․ This ongoing process demonstrates a commitment to evolving the guides‚ solidifying their relevance for future generations of naturalists and birdwatchers‚ and expanding the scope of the series․

Collecting Peterson Field Guides

First editions are highly sought after by collectors‚ with the initial 1934 bird guide being particularly valuable due to its limited print run of 2‚000 copies․

Identifying First Editions

Determining a true first edition of Peterson’s A Field Guide to the Birds requires careful examination․ Published on April 27th‚ 1934‚ these early copies are prized possessions․ Key indicators include the Houghton Mifflin Company imprint and the absence of subsequent edition statements․ The initial printing consisted of only 2‚000 copies‚ making them relatively scarce․

Collectors should also look for specific details like the dust jacket‚ if present‚ and compare it to known examples․ The price of $2․75 is another clue․ Notably‚ Peterson himself didn’t receive royalties on the first 1‚000 copies sold‚ adding to the historical significance of these early printings․ Careful scrutiny of the publication details is essential for accurate identification․

Value and Rarity

The value of Peterson Field Guides‚ particularly first editions‚ varies significantly based on condition‚ edition‚ and demand․ First editions of A Field Guide to the Birds‚ in excellent condition with original dust jackets‚ can command substantial prices in the collecting market․ Later editions‚ while more common‚ still hold value for enthusiasts and researchers․

Rarity is a key driver of price‚ with the initial 1934 printing being the most sought-after due to its limited run of only 2‚000 copies․ Centennial editions and specialized guides‚ like those focusing on medicinal plants‚ also attract collectors․ Condition plays a crucial role; well-preserved copies are considerably more valuable than those showing significant wear․

The Enduring Influence of Peterson’s Work

Peterson’s guides fostered a deeper connection with nature‚ profoundly impacting conservation efforts and inspiring countless individuals to become dedicated and informed naturalists․

Impact on Conservation

Roger Tory Peterson’s field guides weren’t merely identification tools; they ignited a widespread passion for birdwatching and‚ by extension‚ a heightened awareness of environmental concerns․ By empowering individuals to recognize and appreciate the natural world around them‚ Peterson’s work fostered a sense of stewardship․

Increased public interest‚ fueled by the accessibility of his guides‚ translated into greater support for conservation initiatives․ Bird populations‚ once declining due to habitat loss and unregulated hunting‚ benefited from the growing advocacy of an informed citizenry․ The guides facilitated citizen science‚ enabling amateur naturalists to contribute valuable data to ornithological studies and conservation monitoring programs․

This heightened awareness extended beyond birds‚ influencing broader environmental movements and shaping public policy regarding habitat preservation and species protection․ Peterson’s legacy continues to inspire conservation efforts today‚ demonstrating the powerful link between knowledge‚ appreciation‚ and action․

Inspiring Future Naturalists

Roger Tory Peterson’s field guides transcended simple identification manuals‚ becoming gateways to a lifelong pursuit of natural history for countless individuals․ His innovative “Peterson Identification System” demystified the process of species recognition‚ making it accessible to beginners while still proving valuable to experienced observers․

The guides fostered a sense of wonder and curiosity‚ encouraging exploration and observation of the natural world․ Generations of birders‚ botanists‚ and other naturalists credit Peterson’s work as their initial spark‚ igniting a passion that shaped their lives and careers․

The continued publication and updating of the field guide series‚ even after Peterson’s death in 1996‚ ensures his influence endures‚ inspiring new generations to connect with nature and contribute to its understanding and preservation․ His legacy is a testament to the power of accessible knowledge and the enduring appeal of the natural world․

thok ast thok hard guide

Thok ast Thok (Hard), a Heavensward trial, presents a significant challenge for players venturing through the main story questline.
It requires coordinated teamwork and understanding of its unique mechanics, demanding a party of eight players: two tanks, two healers, and four DPS.

This guide will delve into the intricacies of the fight, offering strategies for success and navigating the trial’s phases effectively.

Overview of the Trial

Thok ast Thok (Hard) is a challenging trial found within the Heavensward expansion, specifically tied to the main story progression. Players will encounter this formidable foe as they delve deeper into the narrative surrounding the Ishgardian Dragonsong War. The trial is designed for a party of eight, consisting of two dedicated tanks responsible for maintaining enemy aggression, two skilled healers focused on sustaining the party’s health, and four damage-per-second (DPS) classes to efficiently reduce Thok ast Thok’s health pool.

The fight is characterized by distinct phases, each introducing new mechanics and demanding adaptability from the party. Notably, the “Liberation” stance is a crucial element, requiring coordinated DPS cooldown usage. The trial also features a punishing “Vulnerability Up” debuff, emphasizing the importance of precise movement and mechanic execution. Understanding these core elements is paramount for a successful clear.

Difficulty and Party Composition

Thok ast Thok (Hard) is widely considered an introductory “hard” trial, serving as a stepping stone to more complex encounters in Heavensward. While not excessively demanding, it requires a solid understanding of basic roles and responsibilities. Expect frequent wipes in learning parties as players familiarize themselves with the mechanics. A well-coordinated group can overcome the challenge, but individual skill alone is often insufficient.

The ideal party composition consists of two tanks – typically Paladin and Warrior – to handle Thok ast Thok’s consistent damage output. Two healers, such as White Mage and Scholar, are essential for maintaining party health. Finally, four DPS classes, offering a balance of melee and ranged capabilities, are needed to maximize damage. Class limitations may apply within pre-formed parties.

Phase 1: The Initial Encounter

Phase 1 begins with straightforward attacks, allowing players to establish positioning and learn basic mechanics. Focus on dodging AoE attacks and maintaining consistent damage output.

Understanding Thok ast Thok’s Abilities

Thok ast Thok utilizes a diverse range of abilities throughout the encounter. Key attacks include powerful physical strikes requiring tank mitigation, and several area-of-effect (AoE) attacks demanding precise player positioning. Recognizing these patterns is crucial for survival.

A defining feature is the Liberation stance, triggered periodically. During Liberation, Thok ast Thok unleashes a series of unavoidable AoE attacks. Getting hit by these inflicts the Vulnerability Up debuff, significantly increasing damage taken for three minutes – a major setback for the party.

Understanding the timing and telegraphs of each ability, especially during Liberation, is paramount. Players must prioritize dodging these attacks to avoid the debilitating Vulnerability Up debuff and maintain consistent damage output throughout the fight. Proper awareness will dramatically improve the party’s success rate.

Positioning and Basic Mechanics

Positioning is fundamental throughout the Thok ast Thok (Hard) encounter. During standard phases, maintain a spread formation to minimize the impact of AoE attacks. Tanks should position Thok ast Thok to allow for clear cleave angles and facilitate easy raid-wide damage checks.

When Liberation is cast, players must quickly occupy designated safe spots to avoid the ensuing AoE attacks. These spots are visually telegraphed, demanding swift reaction times. Failure to properly position results in the punishing Vulnerability Up debuff.

Basic mechanics involve consistent damage output and effective mitigation. Healers must anticipate incoming damage and proactively utilize healing abilities. DPS should focus on maximizing uptime while remaining aware of positional requirements and incoming attacks.

Phase 2: Liberation Stance

Liberation Stance is a critical phase where Thok ast Thok unleashes a barrage of AoE attacks. DPS cooldowns should be used during this burn phase for maximum effectiveness;

Recognizing the Liberation Stance

Thok ast Thok transitions into Liberation Stance after reaching a specific health threshold, visually indicated by a distinct change in his posture and a noticeable increase in his attack frequency. He ceases most other actions during this phase, focusing entirely on unleashing a series of powerful, unavoidable Area of Effect (AoE) attacks.

Players must immediately recognize this shift to prepare for the incoming mechanics. Each instance of Liberation represents a crucial damage window, often referred to as a “burn phase,” where the party must maximize their damage output. Failing to identify the stance quickly can lead to missed opportunities for significant damage and potentially prolong the fight. The stance is characterized by a rapid succession of AoE markers appearing across the arena, demanding swift and precise movement from all party members.

DPS Cooldown Usage During Liberation

Liberation Stance is the primary burn phase for Thok ast Thok (Hard), demanding optimal DPS cooldown alignment. Players should aim to unleash their strongest offensive abilities immediately upon recognizing the stance, maximizing damage output during this limited window. Coordinating cooldowns ensures a concentrated burst, significantly reducing the overall fight duration.

Prioritize cooldowns with substantial upfront damage, rather than those with prolonged effects. Communicate cooldown usage within the party to avoid overlap and ensure consistent damage. Remember that each Liberation cast is a distinct burn opportunity, so efficient cooldown management is vital. Proper execution during these phases is critical for a successful clear, as it directly impacts the fight’s length and complexity.

Navigating the AoE Mechanics

Thok ast Thok’s Liberation Stance features a series of challenging Area of Effect (AoE) attacks that demand precise positioning and quick reactions. Failing to avoid these mechanics results in the debilitating Vulnerability Up debuff, severely hindering the party’s performance. Players must diligently watch for visual cues indicating incoming AoEs and immediately move to safe zones.

Understanding the patterns of these attacks is crucial; they often target specific areas or follow predictable sequences. Maintaining spatial awareness and communicating with your party will minimize the risk of taking unnecessary damage. Prioritize survival over DPS during these phases, as a single Vulnerability Up debuff can drastically increase the fight’s difficulty.

Phase 3: Vulnerability Up Debuff

Vulnerability Up, a three-minute debuff, stacks with each application, significantly increasing damage taken. Avoiding Thok ast Thok’s AoEs is paramount to prevent this punishing penalty.

The Impact of Vulnerability Up

Vulnerability Up is arguably the most crucial mechanic to understand in the Thok ast Thok (Hard) fight. Receiving this debuff dramatically increases the damage a player takes by a substantial margin, making subsequent mechanics far more dangerous.

Each stack of Vulnerability Up is independent, meaning multiple stacks amplify the damage received exponentially. A single stack is manageable with proper healing, but accumulating several stacks quickly overwhelms healers and can lead to swift party wipes.

The debuff’s duration is three minutes, so even a single mistake can have lasting consequences. Prioritizing movement and precise execution of AoE avoidance is essential. Players must communicate quickly if they receive the debuff, allowing the party to adjust healing and mitigation strategies accordingly. Ignoring this debuff is a guaranteed path to failure.

Mitigating and Avoiding the Debuff

Avoiding Vulnerability Up is paramount to success. Precise positioning during Liberation Stance is key, as the AoE attacks are the primary source of the debuff. Pay close attention to the telegraphs and move decisively to safe zones. Communication is vital; call out your intended movement to avoid collisions.

If a player does receive Vulnerability Up, immediate mitigation is crucial. Healers should prioritize them with strong heals and shields. Tanks can use defensive cooldowns to reduce incoming damage.

Players with the debuff should briefly move away from the main group to avoid spreading the increased damage vulnerability. Understanding the timing of the AoEs and practicing consistent dodging will significantly reduce the frequency of receiving this punishing debuff, improving the party’s overall survivability.

Advanced Strategies

Optimizing performance involves mastering DPS rotations, refined tank cooldown usage, and proactive healing prioritization during critical phases of the Thok ast Thok encounter.

Optimizing DPS Rotation

Maximizing damage output during Liberation Stance is crucial for a swift clear. This phase represents a significant burn window, demanding coordinated cooldown usage from all DPS players. Prioritize instant-cast abilities and weave auto-attacks effectively to maintain consistent damage.

Understanding your job’s optimal rotation and burst windows is paramount. Save powerful cooldowns specifically for Liberation, ensuring they align with the boss’s vulnerability. Communicate cooldown timings with the party to avoid overlap and maximize collective damage.

Be mindful of movement requirements during the AoE mechanics within Liberation. Maintaining uptime on the boss while dodging attacks is a key skill. Efficiently managing resources and minimizing downtime will significantly contribute to the party’s overall success.

Tanking Strategies for Thok ast Thok

Tanking Thok ast Thok requires diligent attention to positioning and mitigation. Coordinate with your co-tank to establish a clear positional strategy, ensuring smooth transitions during phase changes. Utilize defensive cooldowns proactively, anticipating incoming damage from the boss’s various abilities.

Maintaining consistent threat is vital, especially during the burn phases. Employ gap closers and prioritize abilities that generate high threat. Communicate cooldown usage with the other tank to avoid overlapping mitigation and ensure adequate coverage.

Be prepared to quickly react to positional adjustments demanded by the fight’s mechanics. Proper tanking execution minimizes damage taken and contributes to a stable and successful encounter.

Healing Considerations and Priorities

Healing Thok ast Thok demands efficient mana management and swift reaction times. Prioritize healing targets afflicted with Vulnerability Up, as the increased damage taken can quickly overwhelm the party. Coordinate cooldown usage with your co-healer to ensure consistent mitigation of raid-wide damage.

Anticipate incoming bursts during Liberation Stance and prepare preemptive shields or heals. Monitor tank health closely, providing timely support during heavy damage phases. Utilize instant-cast heals to address sudden damage spikes effectively.

Effective communication and awareness of party member positioning are crucial for optimal healing output and overall success.

Learning Party Etiquette

Learning parties thrive on constructive feedback and patience. Expect wipes, communicate clearly, and focus on understanding mechanics—avoid blame and embrace collaborative learning!

Constructive Criticism in Learning Parties

Effective communication is paramount in learning environments, and constructive criticism is a vital component. When offering feedback during Thok ast Thok attempts, focus on specific actions rather than personal shortcomings. For example, instead of saying “You messed up the stack marker,” try “Let’s try to align closer on the next stack to avoid overlap.”

Frame suggestions positively, emphasizing what can be improved rather than dwelling on mistakes. Remember that everyone learns at their own pace, and a supportive atmosphere fosters growth. Avoid harsh tones or accusatory language, as this can discourage participation and hinder progress. A learning party should be a safe space to experiment and refine strategies collaboratively.

Be receptive to feedback yourself, and view criticism as an opportunity to enhance your own performance;

Expectations for Wipes and Learning

Wipes are an inevitable part of learning Thok ast Thok (Hard), and a positive attitude towards them is crucial. Entering a learning party means accepting that multiple attempts will be necessary to grasp the mechanics and refine execution. Don’t be discouraged by failures; instead, treat each wipe as a valuable learning opportunity.

Focus on identifying what went wrong and discussing adjustments for the next attempt. Avoid blaming others and prioritize collective improvement. Remember that the goal is not immediate success, but rather a gradual understanding of the fight’s intricacies. Patience and perseverance are key.

Acknowledge that mastering Thok ast Thok takes time and effort, and celebrate small victories along the way.

Resources and Further Learning

Numerous online resources can aid in mastering Thok ast Thok (Hard), including the FFXIV Wiki, Eorzea Database, and YouTube guides for visual learners.

Useful Websites and Guides

For comprehensive information, the Final Fantasy XIV Online Wiki (FFXIV / FF14 Online Community Wiki and Guide) provides a detailed breakdown of Thok ast Thok’s abilities, phases, and mechanics. It’s an excellent resource for understanding the fight’s core elements.

The Eorzea Database offers a structured presentation of the trial’s details, including duty information, player requirements (2 tanks, 2 healers, 4 DPS), and limitations like Phoenix Down restrictions. This database is invaluable for quick reference.

Gamer Escapes’ FFXIV wiki also provides a trial guide, offering another perspective on strategies and mechanics. Furthermore, exploring Reddit’s r/ffxiv can reveal community discussions and learning party experiences, offering practical insights from fellow players.

Video Guides for Visual Learners

For those who prefer a visual approach, YouTube hosts numerous guides dedicated to Thok ast Thok (Hard). Final Fantasy 14 ౼ Heavensward ⎼ Thok Ast Thok (Hard) ⎼ Trial Guide is a valuable resource, demonstrating the fight’s mechanics in action.

These videos often showcase optimal positioning, DPS rotations, and healing strategies, making it easier to grasp complex concepts. Watching experienced players navigate the phases can significantly improve understanding.

Seek out guides that clearly explain the Liberation stance and the Vulnerability Up debuff, as these are crucial elements of the encounter. Pay attention to tanking strategies and how to effectively mitigate damage during AoE phases. Visual aids can accelerate the learning process and enhance preparedness.

Patch 3.0 Context

Thok ast Thok (Hard) debuted in Patch 3.0, part of the Heavensward expansion, challenging players with its mechanics.
Level sync is a consideration for lower-level jobs participating in the trial.

Thok ast Thok within the Heavensward Expansion

Thok ast Thok (Hard) is a crucial trial within the narrative of the Heavensward expansion, specifically tied to the storyline surrounding the Dragonsong War and the Ishgardian conflict. It serves as a significant stepping stone for players progressing through the main scenario, testing their ability to apply learned mechanics in a more demanding encounter.

Positioned within the broader context of Heavensward’s trials, Thok ast Thok (Hard) introduces players to concepts like stance changes and complex AoE avoidance, preparing them for the challenges presented by later content. The trial’s difficulty is designed to be a noticeable increase from earlier encounters, requiring a greater degree of coordination and understanding of individual job roles. Successfully overcoming Thok ast Thok (Hard) is a key milestone in a player’s journey through the expansion.

Level Sync Considerations

Thok ast Thok (Hard) is often tackled while level synced, particularly by players revisiting the content at higher levels or assisting others. The trial is level synced to 53, meaning characters above this level will have their stats reduced to match. This impacts damage output, healing potency, and overall survivability, requiring adjustments to strategy.

When level synced, optimizing gear and understanding stat priorities become even more crucial. Players should focus on maximizing their effective stats within the level-synced range. Furthermore, communication is key, as cooldown timings and mitigation strategies need to be adapted to account for the reduced power levels. Successfully navigating Thok ast Thok (Hard) while synced demands a deeper understanding of mechanics and efficient resource management.

automated guided vehicle manufacturers

Automated Guided Vehicle (AGV) Manufacturers: A Comprehensive Overview (Updated October 2, 2026)

This overview details leading AGV brands like Dematic, Daifuku, Toyota, and KUKA, alongside emerging innovators, aiding selection for logistics and manufacturing needs.

Automated Guided Vehicles (AGVs) represent a pivotal technology in modern industrial automation and intelligent manufacturing, transforming material handling processes across diverse sectors. These driverless vehicles navigate predefined paths, enhancing efficiency, safety, and productivity within facilities. Initially relying on wire guidance, AGVs have evolved significantly, now incorporating laser guidance, vision guidance, and sophisticated Simultaneous Localization and Mapping (SLAM) technologies.

The increasing demand for AGVs stems from the need to optimize warehouse operations, streamline production lines, and reduce labor costs. Manufacturers and suppliers are actively integrating AGV solutions, particularly within the automotive industry, to improve quality control and overall operational performance. This comprehensive overview explores the leading AGV manufacturers and their respective contributions to this rapidly evolving field.

The Growing Demand for AGVs in Manufacturing and Logistics

The surge in AGV adoption is directly linked to the escalating pressures within manufacturing and logistics to enhance efficiency and responsiveness. Accelerated industrial automation and the pursuit of intelligent manufacturing are key drivers, as companies seek to optimize material flow and reduce operational expenses. Warehouses, in particular, benefit from AGVs’ ability to automate repetitive tasks, improving throughput and minimizing errors.

Automotive manufacturers and their suppliers are at the forefront of AGV implementation, leveraging these systems for precise material delivery and quality control. This demand fuels innovation among AGV manufacturers, leading to more sophisticated navigation, safety features, and integration capabilities, ultimately reshaping the landscape of industrial logistics.

Leading AGV Manufacturers – Global Landscape

Key players include Dematic, Daifuku, Toyota Industries, and KUKA, dominating the global AGV market with diverse solutions for various industrial applications.

Dematic (KION Group)

Dematic, a KION Group company, stands as a prominent global supplier of automated material handling systems and services, including a robust portfolio of AGVs. They offer solutions spanning various industries, with a strong focus on optimizing warehouse and distribution operations. Dematic’s AGVs are known for their scalability and integration capabilities, seamlessly connecting with existing infrastructure.

Their expertise extends to quality control applications, supporting automotive manufacturers and suppliers in streamlining production processes. Dematic consistently invests in research and development, ensuring their AGV technology remains at the forefront of innovation, delivering reliable and efficient material flow solutions for complex logistical challenges.

Dematic’s AGV Product Portfolio

Dematic’s AGV offerings encompass a diverse range of vehicles designed for varied payload capacities and operational requirements. Their portfolio includes unit load AGVs for transporting pallet-sized loads, and smaller, more agile vehicles suited for handling individual totes or containers. They provide both traditional wire-guided AGVs and more modern, flexible solutions leveraging laser guidance and natural navigation technologies.

Dematic also delivers customized AGV solutions tailored to specific customer needs, integrating seamlessly with their broader automation systems. This comprehensive approach ensures optimal performance and efficiency within the entire material handling process, supporting diverse applications across manufacturing and distribution centers.

Dematic’s Market Position and Strengths

Dematic, as part of the KION Group, holds a strong global market position in the AGV industry, bolstered by decades of experience in material handling solutions. Their key strength lies in providing complete, integrated systems, rather than simply supplying vehicles. This includes software, fleet management, and comprehensive support services.

Dematic’s extensive industry knowledge allows them to effectively address complex automation challenges, particularly in quality control applications. They excel in partnering with automotive manufacturers and suppliers, delivering tailored AGV solutions that enhance production efficiency and streamline logistics operations. Their reliability and scalability are highly valued.

Daifuku (Japan)

Daifuku, a prominent Japanese corporation, specializes in comprehensive material handling systems, with AGVs forming a crucial component of their offerings. They’ve established a strong reputation for delivering robust and reliable solutions tailored to diverse industrial environments. Daifuku distinguishes itself through continuous technological advancements, consistently integrating cutting-edge features into their AGV designs.

Their focus extends beyond basic vehicle functionality, encompassing sophisticated software and control systems for optimized fleet management. Daifuku’s commitment to innovation ensures their AGVs meet the evolving demands of modern manufacturing and logistics, providing efficient and adaptable automation solutions for their clients worldwide.

Daifuku’s Specialization in Material Handling AGVs

Daifuku’s core competency lies in developing AGVs specifically engineered for intricate material handling tasks. They excel in providing solutions for transporting a wide array of materials, from raw components to finished goods, within manufacturing and warehousing facilities. Their AGVs are designed to navigate complex layouts and seamlessly integrate into existing production lines.

This specialization allows Daifuku to offer customized AGV systems optimized for specific material characteristics and handling requirements; They focus on enhancing operational efficiency, reducing labor costs, and improving overall supply chain performance through their specialized material handling AGV solutions.

Daifuku’s Technological Advancements

Daifuku consistently invests in cutting-edge technologies to enhance its AGV capabilities. Modern AGVs from Daifuku increasingly incorporate SLAM (Simultaneous Localization and Mapping) for real-time mapping, path planning, and autonomous navigation without relying on fixed infrastructure. This allows for greater flexibility and adaptability within dynamic environments.

Furthermore, Daifuku focuses on developing sophisticated fleet management systems that optimize AGV traffic flow, minimize congestion, and maximize throughput. These advancements contribute to improved operational efficiency, reduced downtime, and enhanced overall productivity for their clients in various industries.

Toyota Industries (Japan)

Toyota Industries is renowned for its commitment to reliability and efficiency in AGV solutions. They’ve established a strong presence, particularly within the automotive industry, providing tailored AGV systems for complex manufacturing processes. Automotive manufacturers and suppliers frequently partner with Toyota to implement these solutions, streamlining production lines and material flow.

Toyota’s AGVs are designed for robust performance and minimal maintenance, aligning with the Toyota Production System’s principles. This focus ensures consistent operation and reduces total cost of ownership for customers seeking dependable automation solutions.

Toyota’s Focus on Reliability and Efficiency

Toyota Industries prioritizes reliability and efficiency in its AGV design and manufacturing processes. This dedication stems from the core principles of the Toyota Production System, emphasizing continuous improvement and minimizing waste. Their AGVs are engineered for robust performance, capable of withstanding demanding industrial environments and maintaining consistent operation over extended periods.

This focus translates to reduced downtime, lower maintenance costs, and increased overall productivity for customers. Toyota’s commitment ensures their AGV solutions deliver long-term value and contribute to streamlined, efficient workflows.

Toyota’s AGV Solutions for Automotive Industry

Toyota Industries provides specialized AGV solutions tailored for the automotive industry’s unique demands. These solutions support various applications, including parts delivery to assembly lines, finished vehicle handling, and pallet transportation within manufacturing facilities. Automotive manufacturers and suppliers partner with Toyota to implement AGVs, enhancing production efficiency and reducing material handling costs.

Toyota’s AGVs integrate seamlessly into complex automotive workflows, improving logistics and enabling just-in-time delivery of components. This results in optimized production processes and enhanced responsiveness to market changes.

KUKA (Germany, Midea Group)

KUKA, a German company now part of the Midea Group, is a prominent player in AGV technology, renowned for its integration capabilities with robotic systems. This synergy allows for highly automated and flexible material handling solutions across diverse industries. KUKA’s AGVs aren’t simply transporters; they are intelligent components within a larger automation ecosystem.

The company’s focus extends beyond basic movement, offering solutions that optimize workflows and enhance overall production efficiency. KUKA’s AGVs are deployed in applications ranging from automotive manufacturing to logistics and beyond, demonstrating their versatility.

KUKA’s AGV Integration with Robotics

KUKA distinguishes itself through seamless AGV integration with its extensive robotics portfolio. This combination creates powerful, automated workflows where AGVs deliver materials directly to robotic workstations, eliminating manual intervention and boosting productivity. The synergy allows for complex tasks, such as machine tending and assembly, to be performed with greater precision and speed.

KUKA’s approach isn’t merely about connecting robots and AGVs; it’s about creating a cohesive, intelligent system. This integration streamlines processes, reduces errors, and optimizes material flow, resulting in significant operational improvements for manufacturers.

KUKA’s AGV Applications in Diverse Industries

KUKA’s AGV solutions demonstrate versatility across numerous sectors, extending beyond traditional manufacturing. Automotive manufacturers leverage them for just-in-time delivery of components, enhancing assembly line efficiency. In the electronics industry, AGVs handle sensitive materials with precision, minimizing damage and ensuring product quality.

Furthermore, KUKA AGVs find applications in the food and beverage industry, transporting ingredients and finished goods in hygienic environments. Even in healthcare, they assist with material transport within hospitals and laboratories. This broad applicability underscores KUKA’s ability to tailor solutions to specific industry challenges.

Emerging AGV Manufacturers and Innovators

Innovative companies like Otto Motors, MiR, and Locus Robotics are reshaping the AGV landscape with advanced AMRs and collaborative robotic solutions.

Otto Motors

Otto Motors distinguishes itself through a dedicated focus on Autonomous Mobile Robots (AMRs), leveraging sophisticated Simultaneous Localization and Mapping (SLAM) technology for dynamic navigation. This allows their robots to operate flexibly in changing environments without relying on fixed infrastructure like wires or magnets.

Beyond the robots themselves, Otto Motors provides comprehensive software and fleet management solutions. These tools enable businesses to efficiently deploy, monitor, and optimize their AMR fleets, maximizing productivity and minimizing downtime. Their systems are designed for ease of integration and scalability, catering to diverse operational requirements within modern facilities. The company’s approach emphasizes intelligent automation and streamlined workflows.

Otto Motors’ Focus on Autonomous Mobile Robots (AMRs) & SLAM Technology

Otto Motors champions AMRs, diverging from traditional AGVs by employing advanced SLAM technology. This enables real-time mapping, path planning, and localization, allowing robots to navigate dynamically and adapt to changing environments. Unlike AGVs needing fixed pathways, Otto’s AMRs offer unparalleled flexibility.

SLAM empowers these robots to build and update maps concurrently, ensuring accurate positioning even without pre-defined infrastructure. This capability is crucial for complex, evolving industrial settings. Otto Motors’ commitment to SLAM-based AMRs signifies a shift towards more intelligent and adaptable material handling solutions, optimizing workflows and boosting operational efficiency.

Otto Motors’ Software and Fleet Management Solutions

Otto Motors provides comprehensive software solutions designed to manage and optimize AMR fleets effectively. Their platform offers real-time visibility into robot performance, location, and task completion, streamlining operations and maximizing throughput. Fleet Manager allows for centralized control, task assignment, and monitoring of multiple AMRs simultaneously.

Beyond basic fleet management, Otto’s software integrates with existing warehouse systems, facilitating seamless data exchange and workflow automation. This connectivity enhances overall efficiency and reduces manual intervention. The intuitive interface and robust analytics empower users to identify bottlenecks, optimize routes, and proactively address potential issues, ensuring a consistently productive AMR deployment.

MiR (Mobile Industrial Robots)

MiR specializes in collaborative mobile robots (cobots) designed for internal transport and logistics. Their AMRs are known for their user-friendly interface and ease of programming, enabling quick deployment and adaptation to changing environments. MiR robots navigate dynamically, avoiding obstacles and working safely alongside people without the need for safety fencing.

The company offers a range of models catering to diverse payload requirements, from lightweight applications to heavier-duty tasks. MiR’s focus on flexibility and scalability makes them a popular choice for businesses seeking to automate material handling processes and improve operational efficiency. They provide solutions for various industries.

MiR’s Collaborative Mobile Robots (Cobots)

MiR’s core offering revolves around collaborative mobile robots, or cobots, distinguished by their ability to safely operate alongside human workers. These AMRs are equipped with advanced sensors and safety features, ensuring collision avoidance and responsive navigation within dynamic environments. Unlike traditional AGVs, cobots don’t require fixed pathways or safety infrastructure like fences.

This collaborative nature allows for flexible automation of internal transport tasks, improving workflow efficiency without disrupting existing operations. MiR cobots handle repetitive and physically demanding jobs, freeing up personnel for more value-added activities. Their intuitive interfaces simplify programming and integration.

MiR’s Applications in Light Payload Transportation

MiR excels in automating the transport of light payloads, typically ranging up to several hundred kilograms. Their robots are widely deployed in scenarios involving internal logistics within factories, warehouses, and hospitals. Common applications include delivering materials to assembly lines, transporting components between workstations, and handling finished goods.

These AMRs efficiently move items like parts, tools, documents, and laundry, optimizing material flow and reducing manual handling. MiR’s solutions are particularly valuable in environments requiring frequent changes in layout or delivery routes, offering a flexible alternative to fixed conveyor systems. They enhance productivity and reduce operational costs.

Locus Robotics

Locus Robotics revolutionizes warehouse automation with its collaborative robots, designed to work alongside human workers; Their system utilizes autonomous mobile robots (AMRs) that navigate warehouses to assist pickers, significantly boosting order fulfillment speed and accuracy. Locus focuses on optimizing the “goods-to-person” workflow, bringing shelves directly to employees.

This approach reduces travel time for workers and minimizes errors, leading to increased productivity and improved labor utilization. Locus’s multi-robot collaboration allows for scalable deployments, adapting to fluctuating demand. Their solutions are particularly effective in e-commerce fulfillment and retail distribution centers.

Locus Robotics’ Warehouse Automation Solutions

Locus Robotics delivers comprehensive warehouse automation solutions centered around its AMR-based system. These solutions dramatically improve order fulfillment efficiency by integrating seamlessly with existing warehouse infrastructure and workflows. Their robots collaborate with warehouse staff, reducing walking distances and enhancing picking accuracy.

Locus offers scalable deployments, adapting to varying warehouse sizes and operational demands. The system’s intelligent software optimizes robot routes and task assignments, maximizing throughput. Key benefits include increased order fulfillment rates, reduced labor costs, and improved worker ergonomics, ultimately transforming warehouse operations for greater profitability.

Locus Robotics’ Multi-Robot Collaboration

Locus Robotics excels in multi-robot collaboration, deploying fleets of AMRs that work harmoniously alongside warehouse personnel. This collaborative approach distinguishes Locus from traditional automation, fostering a human-robot synergy that boosts overall productivity. Their system dynamically assigns tasks to robots, optimizing workflow and minimizing congestion within the warehouse environment.

The robots communicate and coordinate movements, ensuring efficient navigation and preventing collisions. This sophisticated collaboration enables warehouses to handle increased order volumes and adapt to fluctuating demands. Locus’s solution provides a flexible and scalable automation strategy, enhancing operational resilience and responsiveness.

AGV Technology and Key Features

Modern AGVs utilize technologies like wire guidance, laser guidance, vision guidance, and SLAM for navigation, alongside robust safety systems and adherence to industry standards.

Navigation Technologies: Wire Guidance, Laser Guidance, and Vision Guidance

AGVs employ diverse navigation methods to traverse facilities autonomously. Traditional wire guidance uses circuits embedded in the floor, offering a reliable, yet inflexible, path. Laser guidance utilizes rotating lasers to map surroundings and follow defined routes, providing greater flexibility than wire guidance.

More recently, vision guidance has emerged, leveraging cameras and image processing to navigate based on visual landmarks – offering significant adaptability and eliminating the need for physical infrastructure. Each technology presents trade-offs regarding cost, complexity, and suitability for different environments; The selection depends on the specific application, facility layout, and required level of flexibility within the automated system.

SLAM (Simultaneous Localization and Mapping) in Modern AGVs

Modern AGVs increasingly integrate SLAM (Simultaneous Localization and Mapping) technology, representing a significant advancement in autonomous navigation. Unlike traditional methods, SLAM enables AGVs to create and update maps of their environment in real-time, concurrently localizing themselves within that map.

This capability allows for dynamic path planning, obstacle avoidance, and operation in unstructured environments without relying on pre-defined infrastructure. Companies like Otto Motors are at the forefront of implementing SLAM, enhancing AGV flexibility and adaptability. SLAM empowers AGVs to respond to changes in the facility layout, improving overall efficiency and reducing downtime.

AGV Safety Systems and Standards

Safety is paramount in AGV operation, driving the implementation of robust safety systems and adherence to stringent standards; These systems commonly include emergency stop buttons, safety scanners, and warning lights/sounds to prevent collisions and ensure personnel safety.

AGV manufacturers prioritize compliance with relevant industry standards, such as ANSI/ITSDF B56.5, which outlines safety requirements for AGVs. Advanced features like speed monitoring and zone control further enhance safety. Integrating these systems minimizes risks in dynamic environments, fostering a secure collaboration between AGVs and human workers within manufacturing and logistics facilities.

Choosing the Right AGV Manufacturer

Selecting the ideal vendor requires a fit-by-scenario approach, considering payload, navigation, integration, quality control, and comprehensive supplier support for optimal results.

Fit-by-Scenario: Matching Vendor to Specific Needs

Successfully integrating AGVs demands a precise vendor selection aligned with unique operational requirements. Automotive manufacturers often prioritize reliability, making Toyota a strong contender. For complex, integrated robotic solutions, KUKA’s expertise shines.

Warehouses seeking flexible, collaborative robots will find MiR ideal, while Locus Robotics excels in multi-robot warehouse automation. Dematic provides comprehensive material handling solutions, and Daifuku specializes in intricate systems.

Otto Motors, with its focus on AMRs and SLAM technology, suits dynamic environments. A thorough needs assessment—considering payload, navigation type, and existing infrastructure—is crucial for a successful partnership.

Key Considerations: Payload, Navigation, and Integration

Selecting an AGV necessitates careful evaluation of payload capacity, ensuring it meets material handling demands. Navigation technology—wire guidance, laser, or vision—impacts flexibility and cost. Modern AGVs increasingly utilize SLAM for dynamic mapping and autonomous movement, as seen with Otto Motors.

Seamless integration with existing systems (WMS, ERP) is paramount. Consider the vendor’s integration capabilities and support services. Safety systems and adherence to industry standards are non-negotiable.

Evaluate the AGV’s adaptability to your facility’s layout and potential future expansion. A well-considered approach to these factors maximizes ROI and operational efficiency.

Evaluating AGV Suppliers: Quality Control and Support

Rigorous quality control is crucial when selecting an AGV supplier; assess their manufacturing processes and certifications. A reliable supplier provides comprehensive support, including installation, training, and ongoing maintenance. Prompt access to spare parts minimizes downtime, vital for continuous operations.

Investigate the supplier’s track record and customer testimonials. Consider their responsiveness to inquiries and problem-solving capabilities.

Evaluate the availability of remote diagnostics and preventative maintenance programs. A strong partnership with a supportive supplier ensures long-term AGV performance and maximizes investment value.

ulla johnson size guide

Ulla Johnson Size Guide: A Comprehensive Overview (Updated 02/03/2026)

Ulla Johnson generally runs large, with many customers finding success sizing down, particularly in dresses. This guide provides detailed insights to navigate their sizing effectively.

Understanding the Ulla Johnson Fit

Ulla Johnson’s aesthetic centers around bohemian femininity, often featuring flowing silhouettes, intricate detailing, and luxurious fabrics. This design philosophy inherently influences the brand’s fit. Garments are typically designed with ease and comfort in mind, resulting in a relaxed, rather than a body-con, fit. However, this ease can sometimes translate to running larger than standard sizing.

The brand prioritizes a flattering drape and movement, which is achieved through generous cuts. Expect to find pieces with wider sleeves, relaxed waistlines, and ample room in the bust and hips. It’s crucial to understand that consistency can vary between styles; some pieces may adhere more closely to standard sizing than others. Therefore, consulting specific garment measurements and customer reviews is highly recommended. The brand’s use of fabrics like cotton, linen, and silk also impacts how garments fall and fit on the body.

General Sizing Tendencies: Runs Large

Across numerous customer reports, a consistent theme emerges: Ulla Johnson clothing generally runs large. Many shoppers, even those who typically wear a specific size, find they need to size down – often by a full size – to achieve a desired fit. This is particularly noticeable in dresses and tops. A size zero is frequently purchased by customers who usually wear a size two or four in other brands.

However, this isn’t a universal rule. Some styles, particularly those with more structured silhouettes or limited stretch, may run closer to true-to-size. It’s essential to consider the fabric composition; garments with substantial stretch may be more forgiving. When in doubt, prioritizing sizing down is generally advisable, especially when purchasing online where trying on isn’t possible. Careful review of individual product measurements is always recommended.

Ulla Johnson Size Chart ─ Women’s Clothing

While a standardized, universally published Ulla Johnson size chart is not readily available, understanding their general measurements is crucial. Bust measurements typically range from 34″ to 44″, waist from 26″ to 36″, and hips from 36″ to 46″ across their size spectrum. However, these are approximate and vary significantly by style.

It’s important to note that Ulla Johnson often utilizes a more relaxed fit, influencing these measurements. Sizes generally correlate as follows: US 2 = Bust 34″, Waist 26″; US 4 = Bust 35″, Waist 27″; US 6 = Bust 36″, Waist 28″; US 8 = Bust 38″, Waist 30″; US 10 = Bust 40″, Waist 32″; US 12 = Bust 42″, Waist 34″. Always prioritize checking individual garment descriptions for specific size details and measurements before purchasing.

Comparing Ulla Johnson Sizing to Other Brands

When comparing Ulla Johnson’s sizing to more conventional brands, it’s generally accepted that their sizing runs approximately one size larger. Customers often find they wear a smaller size in Ulla Johnson compared to brands like Reformation or Madewell, which tend to have a more standard fit.

Compared to brands like Free People, known for their bohemian and often oversized styles, Ulla Johnson’s fit is more tailored, though still relaxed. If you typically wear a size 6 in J.Crew, you might find a size 4 or even a size 2 fits best in Ulla Johnson. Considering this difference is vital, especially when purchasing online. Always consult reviews and garment-specific measurements for the most accurate fit prediction.

Specific Garment Sizing Considerations

Ulla Johnson’s sizing isn’t uniform across all garment types. Dresses, particularly those with intricate detailing or flowing silhouettes, tend to run larger than tops or skirts. Knitwear often has more give, potentially allowing for a more forgiving fit, but still leans towards a generous cut.

Items featuring structured fabrics, like cotton poplin, may require more attention to precise measurements. Pay close attention to the bust and waist measurements provided for each piece. Consider the garment’s design; a wrap dress will offer more adjustability than a fitted bodice. Always review the product description for specific fit notes, as Ulla Johnson frequently includes details about a garment’s intended silhouette.

Dresses: Common Fit Issues & Solutions

A frequent concern with Ulla Johnson dresses is the generous sizing, leading to issues with the bodice or overall silhouette feeling too loose. Customers often report needing to size down, even in dresses where they typically wear their standard size. Another common issue is the length, as styles vary considerably.

If a dress feels too large in the bust, consider sizing down or exploring alterations to cinch the waist. For dresses that are too long, hemming is a straightforward solution. If unsure, compare your measurements to the size chart and read customer reviews for specific feedback on the dress’s fit. Prioritize understanding the fabric’s drape and stretch to anticipate how it will conform to your body.

Tops & Blouses: Shoulder & Bust Measurements

When selecting Ulla Johnson tops and blouses, accurate shoulder and bust measurements are crucial, given the brand’s tendency to run large. Pay close attention to the bust measurement, as many designs feature detailed embellishments or flowing silhouettes that require a precise fit. A well-fitted shoulder ensures the garment hangs correctly and avoids slippage.

Compare your bust measurement to the size chart, noting whether the garment offers any stretch. If you’re between sizes, consider sizing down, especially if the blouse has a relaxed fit. Shoulder measurements are particularly important for structured styles. Review customer feedback regarding specific blouse styles to understand potential fit variations and common sizing recommendations.

Bottoms (Pants & Skirts): Waist & Hip Measurements

Accurate waist and hip measurements are paramount when purchasing Ulla Johnson pants and skirts, considering the brand’s overall sizing tendencies. Prioritize a comfortable yet flattering fit, as many bottoms feature unique detailing or high-waisted designs. Measure your natural waist – the narrowest part of your torso – and the fullest part of your hips.

Compare these measurements to the official size chart, paying attention to the fabric composition. Styles with limited stretch may require a slightly larger size for ease of movement. High-waisted skirts and pants often benefit from a precise waist measurement. Customer reviews can offer valuable insights into how specific styles fit in practice, particularly regarding length and rise.

Ulla Johnson Plus & Extended Sizes

Ulla Johnson is progressively expanding its size range to offer more inclusive options, recognizing the demand for extended sizing. Currently, the brand features a selection of plus-size items, with availability varying by style and season. As of today, 02/03/2026, there are 18 items available in plus & extended sizes.

While not all designs are offered in every size, Ulla Johnson consistently increases the number of styles available in larger sizes. Regularly checking the official website or authorized retailers is recommended to discover the latest additions. Focus on detailed product descriptions and size charts, as fit can differ between styles. Explore resale platforms like Poshmark for potentially wider size selections from previous collections.

Availability of Sizes 18 and Beyond

Finding Ulla Johnson clothing in sizes 18 and above can require diligent searching, as availability fluctuates considerably. As of today, 02/03/2026, the brand offers a limited, but growing, selection of styles extending beyond size 18. The official Ulla Johnson website and select authorized retailers are the primary sources for these larger sizes.

However, stock levels are often limited, and popular items sell out quickly. Resale platforms, such as Poshmark, present a valuable alternative for discovering previously owned pieces in sizes 18 and beyond. Regularly monitoring these platforms can yield successful results. It’s crucial to carefully review the seller’s description and photos to assess the garment’s condition and fit before purchasing.

Fit Tips for Curvier Body Types

For those with curvier figures, understanding Ulla Johnson’s silhouettes is key. Given the brand generally runs large, focusing on waist and hip measurements is crucial, rather than solely relying on dress size. Many designs feature adjustable ties or elasticated waistbands, offering flexibility and a more customized fit.

Pay close attention to garment construction; styles with defined waists or wrap details often flatter fuller shapes. Consider sizing down and utilizing tailoring for a more precise fit, especially in structured pieces. Embrace the brand’s flowing fabrics and A-line silhouettes, which tend to drape beautifully and accommodate curves. Don’t hesitate to consult customer reviews for insights from individuals with similar body types.

Measuring Yourself for Ulla Johnson Clothing

Accurate measurements are paramount when shopping Ulla Johnson, especially considering the brand’s tendency to run large. Begin with a soft measuring tape and minimal clothing. For bust, measure around the fullest part of your chest, keeping the tape level. Waist measurement should be taken at the narrowest point of your torso, naturally. Hips are measured around the fullest part, approximately 7-9 inches below your waist.

Don’t pull the tape too tightly; ensure it’s snug but comfortable. Additionally, measure your shoulder width and inseam for optimal fit in tops and bottoms. Compare your measurements to the Ulla Johnson size chart, noting any discrepancies. It’s often beneficial to have a friend assist for greater accuracy, particularly with back measurements.

Bust, Waist, and Hip Measurement Guide

Bust: Measure around the fullest part of your chest, keeping the tape level across your back and under your arms. Ensure you’re wearing a non-padded bra for the most accurate reading. Round up to the nearest whole number if your measurement falls between sizes.

Waist: Locate your natural waistline – typically the narrowest part of your torso. Measure around this point, keeping the tape comfortably snug, not tight. Avoid measuring over clothing; direct skin contact is best.

Hips: Stand with your feet together and measure around the fullest part of your hips, approximately 7-9 inches below your waist. Maintain a level tape measure for consistent results. Remember, Ulla Johnson often runs large, so consider sizing down if your measurements align with a smaller size.

Shoulder and Inseam Measurements

Shoulder: Measure across your back from the outer edge of one shoulder to the outer edge of the other. Keep the tape measure straight and relaxed. This measurement is particularly crucial for tops and dresses, influencing fit across the upper body. Consider how a garment’s shoulder seam aligns with your natural shoulder slope.

Inseam: For pants, measure from the crotch seam down the inside of your leg to where you want the hem to fall. Wear shoes similar to those you’ll pair with the pants for accurate length. Note that Ulla Johnson’s styles often feature varying inseam lengths.

Accurate shoulder and inseam measurements contribute significantly to overall garment fit, especially given that Ulla Johnson pieces frequently run large.

Ulla Johnson Fabric & Stretch Considerations

Ulla Johnson utilizes a diverse range of fabrics, from structured cottons and linens to flowing silks and blends. Understanding a garment’s fabric composition is vital for accurate sizing, as fabrics significantly impact fit. Non-stretch fabrics require more precise measurements, while those with stretch offer greater flexibility.

Pay close attention to fabric descriptions. Garments labeled with a percentage of elastane or spandex will inherently have more give. Conversely, 100% linen or cotton will maintain its shape with less accommodation for variation. Remember that Ulla Johnson often runs large, and stretch can mitigate this.

Identifying garments with stretch is key to selecting the correct size, ensuring both comfort and a flattering silhouette.

Impact of Fabric on Sizing

The fabric’s weight and drape profoundly influence how a Ulla Johnson garment fits. Lightweight, flowing fabrics like silk or rayon will naturally drape and conform to the body, potentially appearing larger than structured materials. Heavier fabrics, such as cotton canvas or denim, maintain their shape and offer less give.

Considering this, a garment in a less forgiving fabric may necessitate sizing down, especially given that Ulla Johnson generally runs large. Conversely, a piece with substantial stretch might allow for a more comfortable fit even if it’s initially perceived as slightly snug.

Always review the fabric content before purchasing. A blend with elastane will offer more flexibility than a 100% linen piece, impacting your size selection.

Identifying Garments with Stretch

Determining whether a Ulla Johnson garment contains stretch is crucial for accurate sizing, given the brand’s tendency to run large. Check the product description carefully; keywords like “stretch,” “spandex,” “elastane,” or “lycra” indicate the presence of elastic fibers.

Examine the fabric composition listed on the garment’s tag or online details. Even a small percentage of elastane (2-5%) can significantly impact the fit, allowing for greater flexibility and a closer, more forgiving silhouette.

If the description is unclear, consider customer reviews – they often mention whether a garment has give. Look for phrases like “stretchy,” “comfortable,” or “easily accommodates curves.” Without stretch, sizing down is often recommended.

Customer Reviews & Sizing Feedback

Ulla Johnson sizing is frequently discussed in customer reviews, offering valuable insights beyond the official size chart. A consistent theme emerges: the brand generally runs large. Many shoppers report needing to size down, particularly in dresses and flowy silhouettes.

Pay close attention to reviews mentioning similar body types to yours. Filter reviews by size to see what others with comparable measurements experienced. Look for comments regarding length, waist fit, and overall comfort.

Platforms like Poshmark and resale sites are goldmines for sizing feedback. Examine sold listings and read descriptions where sellers detail the fit. This real-world data can help you anticipate how a garment will fit you.

Common Sizing Complaints & Resolutions

A frequent complaint regarding Ulla Johnson clothing centers around inconsistent sizing between different styles. While the brand generally runs large, some pieces fit true to size or even slightly small. Customers often struggle with dresses, reporting issues with the waist or overall length.

Another common issue is the lack of detailed measurements on product pages. This makes it difficult to accurately assess fit before purchasing. To resolve this, diligently consult the size chart and compare your measurements.

If you receive an ill-fitting garment, utilize Ulla Johnson’s exchange policy (see section on Returns & Exchanges). Prioritize sizing down initially, especially for dresses, and carefully review customer feedback before committing to a purchase.

Analyzing Poshmark & Resale Market Data

Data from resale platforms like Poshmark reveals valuable insights into Ulla Johnson sizing realities. Listings frequently include “size down recommended” notes, confirming the brand’s tendency to run large. Sold listings often showcase buyer comments regarding fit, providing real-world examples.

Analyzing frequently returned sizes on these platforms can pinpoint problematic styles. For example, certain dress silhouettes consistently appear for resale in larger sizes, indicating potential fit issues. Examining sold prices can also reveal demand for specific sizes, potentially highlighting popular fits.

This resale data corroborates customer reviews, reinforcing the need for careful measurement and consideration before purchasing. It’s a valuable resource for understanding how garments typically fit in practice.

Ulla Johnson Size Exchange & Return Policies

Understanding Ulla Johnson’s exchange and return policies is crucial, especially given the sizing considerations. Policies vary depending on the retailer – directly from Ulla Johnson versus third-party stores like Nordstrom or Shopbop. Generally, unworn, unwashed items with original tags are eligible for return within a specified timeframe, typically 30 days.

However, final sale items are often non-returnable. Exchanges are usually permitted for size discrepancies, but may incur shipping fees. Carefully review the specific policy of the retailer where you purchased the item.

Given the potential for sizing issues, it’s wise to keep all packaging and tags intact until you’ve confirmed the fit. Documenting the item’s condition before trying it on is also recommended.

Understanding Return Eligibility

Ulla Johnson’s return eligibility hinges on several factors, primarily the purchase location and item condition. Items bought directly from Ulla Johnson’s website generally require returns within 30 days of the delivery date. Products must be unworn, unwashed, and with all original tags attached – essentially, in resalable condition.

Retailers like Nordstrom or Shopbop may have differing return windows and stipulations. Final sale items, often marked down significantly, are typically excluded from returns. Returns often require a prepaid shipping label, and the customer may be responsible for return shipping costs.

It’s vital to retain proof of purchase and carefully review the retailer’s specific return policy before initiating a return to avoid complications.

Tips for Successful Exchanges

Successfully exchanging a Ulla Johnson garment requires careful planning. First, verify the retailer’s exchange policy – some only offer store credit, while others permit a direct size swap. Before shipping the original item, confirm the desired size is in stock to avoid delays or cancellations.

Pack the item securely, including all original tags and packaging, to ensure it arrives in pristine condition. Utilize the provided return label and track the shipment diligently. Communicate with customer service proactively if any issues arise during the exchange process.

Consider the final sale status; exchanges are rarely permitted for these items. Document everything – screenshots of policies, tracking numbers, and communication – for a smooth resolution.

tv guide reading pa

TV Guide Reading PA: A Comprehensive Overview (as of 01/09/2026)

Today, January 9th, 2026, the 48-page Reading Eagle TV guide supplement offers comprehensive listings for local channels, cable, and satellite television viewers in Berks County.

Historical Context of the Reading Eagle TV Guide

The Reading Eagle has long been a cornerstone of information for Berks County, Pennsylvania, and its TV guide supplement represents a fascinating evolution in how residents accessed entertainment schedules. Before the digital age, the printed TV guide, included with the newspaper, was the primary source for discovering what was on television.

These guides weren’t simply listings; they were a cultural artifact, often discussed and shared within families, shaping viewing habits. The supplement, as evidenced by current examples, provided a tangible connection to local broadcasting and programming. Its presence signaled a commitment from the Reading Eagle to serve as a complete source of local news and leisure information, extending beyond traditional reporting to encompass the growing world of television entertainment.

The Physical TV Guide: Format and Dimensions

As of January 9th, 2026, the Reading Eagle’s TV listings supplement maintains a traditional newspaper insert format. Measuring approximately 8-1/4 inches by 10-3/4 inches, it’s designed for easy handling alongside the main newspaper. The guide consists of 48 pages, providing ample space for detailed program listings across numerous channels.

The physical nature of the guide—its paper stock and layout—contributes to the overall reading experience. It’s a tactile medium, offering a break from digital screens. Shipping options, notably USPS 1st Class or Media Mail, reflect its distribution method. This format catered to a readership accustomed to a tangible, browsable television schedule.

Content Analysis: What Was Listed?

On January 9th, 2026, the Reading Eagle TV guide comprehensively listed programming across a wide spectrum of channels. This included major networks, cable staples like HGTV (channel 60), Disney Channel (61), and FS1 (62), alongside entertainment options such as TBS (63), Game Show Network (64), and truTV (65).

Beyond entertainment, listings extended to news (HLN ― 96), public affairs (Pennsylvania Cable Network, 98), and emergency broadcasts (Emergency Alert Channel ― 97). Music Choice channels (77, 78, 79) also featured. The guide served as a central resource for viewers to plan their viewing, encompassing diverse content and catering to varied interests within the Reading, PA area.

Channel Lineups Available (2026 Data)

As of January 9th, 2026, the Reading Eagle TV guide detailed an extensive channel lineup for local viewers. This included channels 60-67: HGTV, Disney Channel, FS1, TBS, Game Show Network, truTV, and Discovery Channel, plus Bravo (67). Further listings covered channels 69-76: Golf Channel, History, ESPN2, Hallmark Channel, Oprah Winfrey Network, and HBO Family (East).

Additional channels listed were Music Choice options (77-79), C.A.R.E. Channel (82), C-SPAN2 (95), and public access channels 98 & 99. This data reflects the diverse programming options available to residents accessing television through various providers in the Reading, Pennsylvania region.

Decoding the Channel Numbers

The 2026 Reading Eagle TV guide utilized a numerical system to organize channel listings, aiding viewers in navigating available programming. Numbers 60 through 76 primarily featured entertainment networks like HGTV, Disney, and HBO Family (East). Higher numbers, extending into the 90s, were dedicated to public access and informational channels.

Specifically, channels 98 and 99 hosted the Pennsylvania Cable Network and local Government Access programming, respectively. Music Choice services occupied the 77-79 range. This numbering scheme provided a structured overview, allowing subscribers to quickly locate desired content within their cable or satellite packages.

60 HGTV

As of January 9th, 2026, channel 60 on the Reading Eagle’s TV listings was dedicated to HGTV, the popular home and garden television network. Viewers could expect a diverse schedule featuring programs centered around home renovation, real estate, and interior design. Popular shows likely included fix-and-flip series, property hunting adventures, and expert advice on landscaping and decorating.

The channel offered a consistent stream of content appealing to homeowners, aspiring renovators, and anyone with an interest in creating beautiful living spaces. Listings would detail specific program titles, timeslots, and brief descriptions, enabling viewers to plan their viewing experience.

61 Disney Channel

On January 9th, 2026, channel 61 within the Reading Eagle TV guide featured the Disney Channel, a cornerstone of children’s and family entertainment. The listings showcased a vibrant schedule of programming aimed at younger audiences, including animated series, live-action sitcoms, and original Disney Channel movies.

Popular shows likely included current hits and classic favorites, offering a mix of comedy, adventure, and heartwarming stories. The guide provided detailed timeslots and program descriptions, allowing families to easily plan viewing around their children’s preferences. Disney Channel consistently delivered content designed to entertain and inspire young viewers.

62 FS1

As of January 9th, 2026, channel 62 in the Reading Eagle TV guide was dedicated to FS1, Fox Sports 1, a premier destination for sports enthusiasts. The listings detailed a diverse array of sporting events, including live games, studio shows, and sports-related programming. Viewers could find schedules for college sports, NASCAR, MLB, and other popular leagues.

FS1 also featured original sports documentaries, analysis programs, and debate shows, providing in-depth coverage and commentary. The TV guide enabled local sports fans to stay up-to-date on their favorite teams and athletes, offering a comprehensive sports viewing experience.

63 TBS

On January 9th, 2026, the Reading Eagle TV guide listed TBS, channel 63, as a source for a blend of entertainment options. The schedule included a mix of comedic programming, popular television series reruns, and occasional live events. Viewers could anticipate finding sitcoms, dramas, and reality shows throughout the day and evening.

TBS also broadcasted sporting events, particularly those related to baseball, and original programming, offering a diverse range of content. The TV guide provided detailed listings, allowing residents of Berks County to plan their viewing around TBS’s varied schedule, ensuring they didn’t miss their favorite shows or events.

64 Game Show Network

As of January 9th, 2026, the Reading Eagle TV guide featured the Game Show Network (GSN) on channel 64, catering to fans of competitive entertainment. Listings detailed a continuous stream of classic and contemporary game shows, offering viewers opportunities to test their knowledge alongside contestants. Popular titles like Family Feud, The Price is Right, and Wheel of Fortune were prominently displayed.

The guide highlighted both daytime and primetime game show blocks, ensuring a constant supply of engaging content. Residents of Berks County could rely on GSN for lighthearted fun and nostalgic favorites, making it a staple channel for family viewing and casual entertainment.

65 truTV

On January 9th, 2026, the Reading Eagle TV guide listed truTV on channel 65, providing Berks County viewers with a diverse lineup of reality television and comedic programming. The channel’s schedule, as detailed in the guide, featured a mix of original series and acquired content, appealing to a broad demographic.

truTV’s offerings included unscripted shows focused on unusual professions, competitive challenges, and humorous investigations. The guide showcased primetime blocks dedicated to popular series, alongside daytime programming catering to a variety of tastes. Viewers could find both lighthearted entertainment and engaging reality-based content on channel 65.

66 Discovery Channel

As of January 9th, 2026, the Reading Eagle TV guide featured Discovery Channel on channel 66, a staple for factual entertainment in Berks County households. The listings highlighted the channel’s commitment to showcasing real-life stories, scientific exploration, and captivating documentaries.

Viewers consulting the guide could find programs covering a wide range of subjects, from natural history and technological advancements to survival skills and investigative journalism. Discovery Channel’s primetime schedule often included highly-rated series exploring extreme environments or delving into intriguing mysteries. The channel provided an alternative to scripted programming, offering informative and visually stunning content.

67 Bravo

On January 9th, 2026, the Reading Eagle TV guide listed Bravo on channel 67, catering to viewers interested in reality television, lifestyle programming, and pop culture. The guide detailed Bravo’s schedule of popular series, often featuring dramatic interpersonal relationships and aspirational lifestyles.

Local subscribers could easily find listings for shows like the Real Housewives franchises, competitive cooking programs, and fashion-focused series. Bravo’s programming frequently generated buzz and social media conversation, making it a prominent channel within the cable lineup. The TV guide provided essential information for planning viewing around these engaging, often over-the-top, reality shows.

69 Golf Channel

As of January 9th, 2026, the Reading Eagle TV guide featured Golf Channel on channel 69, a dedicated resource for golf enthusiasts in the Reading, PA area. Listings included live coverage of professional tournaments – PGA Tour, LPGA Tour, and major championships – providing local viewers with access to the sport’s biggest events.

Beyond live events, the guide showcased Golf Channel’s instructional programming, offering tips and techniques to improve viewers’ own games. It also highlighted golf-related news, analysis, and documentaries. For Berks County residents passionate about golf, the TV guide ensured they wouldn’t miss any action or insightful content on channel 69.

70 History

On January 9th, 2026, the Reading Eagle TV guide listed the History Channel on channel 70, delivering a diverse range of programming to local viewers interested in the past. The listings detailed documentaries exploring pivotal historical events, figures, and civilizations, offering insights into world history, ancient mysteries, and forgotten stories.

Channel 70 also featured series focusing on historical investigations, military history, and biographical profiles. For residents of Berks County seeking educational and engaging content, the TV guide highlighted History Channel’s offerings, ensuring they could explore the past through compelling narratives and expert analysis. It was a key destination for history buffs.

72 ESPN2

As of January 9th, 2026, the Reading Eagle TV guide showcased ESPN2 on channel 72, providing Berks County sports enthusiasts with a comprehensive schedule of athletic events and related programming. Listings included live coverage of college sports – basketball, football, and baseball – alongside professional sports like soccer and motorsports.

Beyond live games, ESPN2 offered studio shows, sports news, and highlight reels, catering to a broad spectrum of sports fans. The TV guide ensured local viewers could easily find and follow their favorite teams and athletes. It was a prime destination for sports programming, delivering action and analysis directly to homes across the region.

73 Hallmark Channel

On January 9th, 2026, the Reading Eagle TV guide featured Hallmark Channel on channel 73, a popular destination for heartwarming and family-friendly entertainment in Berks County. Listings prominently displayed the channel’s signature original movies, often centered around themes of love, romance, and small-town life.

The guide also highlighted Hallmark’s seasonal programming, including its beloved Christmas movies, which are a tradition for many viewers. Beyond movies, the channel offered series and specials geared towards a positive and uplifting viewing experience. For those seeking feel-good content, Hallmark Channel, as listed in the guide, provided a reliable source of entertainment.

74 Oprah Winfrey Network

As of January 9th, 2026, the Reading Eagle TV guide included the Oprah Winfrey Network (OWN) on channel 74, catering to viewers seeking inspirational and empowering content within the Berks County area. Listings showcased OWN’s diverse programming, featuring dramas, comedies, and reality shows focused on personal growth and positive change.

The guide highlighted OWN’s original series and specials, often centered around themes of faith, family, and overcoming adversity. Oprah’s signature talk show reruns and related content also appeared in the listings, offering viewers access to her impactful interviews and life advice. OWN, as presented in the TV guide, provided a unique blend of entertainment and inspiration.

76 HBO Family (East)

On January 9th, 2026, the Reading Eagle TV guide featured HBO Family (East) on channel 76, providing access to a curated selection of premium television programming for families in the region. Listings detailed movies, series, and specials suitable for a broad audience, offering an alternative to HBO’s more mature content.

The guide showcased HBO Family’s offerings, including popular children’s programs, family-friendly comedies, and critically acclaimed dramas. Viewers could find schedules for animated favorites, live-action adventures, and heartwarming stories. HBO Family, as presented in the TV guide, represented a valuable entertainment option for households seeking quality programming for all ages.

Beyond Entertainment: Public Access Channels

As of January 9th, 2026, the Reading Eagle TV guide acknowledged the importance of community programming by listing local public access channels. Channel 98 was dedicated to the Pennsylvania Cable Network (PCN), offering state government proceedings, public affairs discussions, and in-depth coverage of Pennsylvania issues. This provided residents with direct access to their state’s legislative process.

Channel 99 featured Government Access, showcasing local municipal meetings, community events, and information from Berks County officials. These channels served as vital resources for informed citizenship, allowing viewers to engage with their government and stay connected to local happenings. The TV guide highlighted these channels’ commitment to public service and civic engagement.

98 Pennsylvania Cable Network

Listed in the January 9th, 2026, Reading Eagle TV guide, Channel 98 was dedicated to the Pennsylvania Cable Network (PCN); PCN served as a crucial source for statewide news and governmental proceedings, offering Berks County residents direct access to Pennsylvania’s political landscape. Viewers could tune in to observe live coverage of House and Senate sessions, committee meetings, and press conferences featuring state leaders.

Beyond legislative coverage, PCN also presented in-depth public affairs programs, exploring critical issues facing the Commonwealth. This included interviews with policymakers, discussions on current events, and documentaries examining Pennsylvania’s history and culture, fostering informed civic engagement.

99 Government Access

As detailed in the January 9th, 2026, Reading Eagle TV guide, Channel 99 was reserved for local Government Access programming. This channel provided a vital platform for Berks County residents to connect directly with their local government. Viewers could access recordings of county commissioner meetings, city council sessions, and various public hearings, promoting transparency and accountability.

Beyond official meetings, Channel 99 often featured informational programs produced by local government agencies, covering topics like public safety, community events, and local services. This channel empowered citizens to stay informed about decisions impacting their communities and participate more effectively in the democratic process.

The Reading Eagle Subscription and Local News

The January 9th, 2026, Reading Eagle not only delivered comprehensive TV listings but also strongly promoted its newspaper subscriptions. The guide served as a reminder of the newspaper’s commitment to in-depth local coverage, encompassing Berks County news, sports, business, and community events. Subscribers gained unparalleled access to reporting that directly impacted their lives.

The Reading Eagle offered both digital and print subscription options, catering to diverse reader preferences. Advertisements within the TV guide highlighted the lowest available prices, encouraging residents to support local journalism. This symbiotic relationship between TV listings and news promotion reinforced the Eagle’s position as a central source of information.

Digital Alternatives to the Print TV Guide

As of January 9th, 2026, despite the continued availability of the printed Reading Eagle TV guide, numerous digital alternatives offered convenient access to television listings. Websites like American TV Tonight provided searchable guides, allowing users to browse by time or channel, finding their favorite programs easily. These platforms encompassed local cable, satellite, and over-the-air channels.

Furthermore, online travel agencies and airline websites offered booking management tools, demonstrating a broader shift towards digital information access. While seemingly unrelated, this trend mirrored the evolving landscape of TV listings. The convenience of online platforms presented a compelling alternative to the traditional print format, catering to a digitally-inclined audience.

gas club car troubleshooting guide pdf

Understanding your Gas Club car’s systems is key to effective troubleshooting. This guide helps identify common issues like fuel delivery‚ engine performance‚ and transmission problems. Learn to diagnose and resolve these efficiently‚ ensuring optimal vehicle performance and reliability.

The Basics of Gas Club Cars

Gas Club cars are designed with precision engineering to ensure optimal performance and reliability. These vehicles rely on advanced systems‚ including fuel delivery‚ engine ignition‚ and transmission mechanisms‚ to operate efficiently. Understanding the fundamental components‚ such as the gas tank‚ fuel pump‚ and engine management system‚ is crucial for troubleshooting common issues. Regular maintenance checks and knowing how to inspect key areas‚ such as the exhaust system and electrical components‚ are essential for preventing breakdowns. Proper care ensures the longevity and smooth operation of these vehicles‚ providing a seamless driving experience for owners.

Common Issues Faced by Gas Club Car Owners

Gas Club car owners often encounter challenges such as fuel delivery problems‚ engine performance issues‚ and transmission malfunctions. Fuel leaks‚ clogged fuel filters‚ and faulty injectors can disrupt smooth operation. Engine misfires‚ lack of power‚ and unusual noises may indicate deeper mechanical or electrical faults. Additionally‚ transmission issues like shifting difficulties or fluid leaks can compromise drivability. Addressing these problems promptly can prevent potential breakdowns and extend the vehicle’s lifespan. Routine maintenance and timely intervention are crucial to resolving these common issues effectively.

Purpose of the Troubleshooting Guide PDF

The Gas Club Car Troubleshooting Guide PDF serves as an essential resource for diagnosing and resolving vehicle issues. It provides clear‚ structured advice‚ helping owners understand common problems and solutions without prior technical knowledge. The guide ensures users can confidently navigate repairs‚ reducing reliance on professionals for minor fixes. Its actionable insights cover system-specific challenges‚ offering step-by-step solutions to keep the car running efficiently. This PDF empowers owners to perform regular maintenance and address concerns promptly‚ ensuring optimal performance and longevity for their Gas Club car.

Understanding Gas Club Car Symptoms

Identifying symptoms like stalling or poor acceleration is crucial for diagnosing issues. Detecting fuel leaks by smell or spillage‚ or noticing unusual warning lights‚ helps isolate problems. Ensure the battery is charged and check for signs of wear or damage to electrical components.

Common Symptoms of Gas Club Car Problems

Gas Club car owners often encounter symptoms like engine stalling‚ unusual noises‚ or poor fuel efficiency. One common issue is a fuel leak‚ which can lead to reduced power and dangerous fumes. Additionally‚ a weak battery may cause difficulty starting the vehicle. Pay attention to warning indicators on the dashboard‚ as they can signal underlying electrical or mechanical problems. If you notice these symptoms‚ it’s crucial to address them promptly to prevent further damage. Always refer to the troubleshooting guide PDF for step-by-step solutions tailored to your Gas Club car’s specific make and model.

When to Seek Professional Help

Knowing when to seek professional assistance is crucial for Gas Club car owners. If symptoms persist despite basic troubleshooting or if advanced diagnostic tools are required‚ it’s time to consult a certified mechanic. Issues like persistent engine stalling‚ severe fuel leaks‚ or complex electrical problems often demand specialized knowledge and equipment. Additionally‚ if you encounter advanced symptoms such as irregular fuel delivery or transmission troubles‚ professional intervention ensures a safe and effective resolution. Always prioritize safety and reliability when deciding Whether to tackle the problem yourself or seek expert help

Identifying Priority Symptoms

Identifying priority symptoms in your Gas Club car is crucial for effective troubleshooting. Symptoms like unusual engine noises‚ warning lights‚ or erratic behavior can signal critical issues. Prioritize symptoms that directly impact safety or performance‚ such as a faulty exhaust system or electrical malfunctions. Early detection prevents minor problems from escalating into costly repairs. Always refer to your troubleshooting guide PDF for detailed symptom analysis and solutions. By addressing these symptoms promptly‚ you ensure your Gas Club car runs efficiently and reliably‚ avoiding potential breakdowns or accidents. Proper symptom identification is the first step toward comprehensive repairs and longevity of your vehicle. Remember‚ ignoring warning signs can lead to severe damage‚ making proactive maintenance essential. Stay vigilant and act swiftly to maintain optimal performance.

Diagnostic Tools for Gas Club Cars

Effective troubleshooting requires reliable diagnostic tools. OBD-II scanners and manual inspections are essential for identifying issues. Advanced methods provide deeper insights‚ ensuring accurate and comprehensive problem-solving for Gas Club car maintenance and repair.

OBD-II Scanners and Their Role

OBD-II scanners are essential tools for diagnosing and troubleshooting issues in Gas Club cars. These devices connect to the car’s OBD-II port‚ retrieving diagnostic trouble codes and real-time data about engine performance‚ fuel systems‚ and emissions. By decoding these codes‚ you can identify the root cause of problems such as misfires‚ catalytic converter concerns‚ or sensor malfunctions. Modern OBD-II scanners often feature intuitive interfaces‚ making them accessible to both professionals and DIY enthusiasts. Regular use ensures early detection of potential issues‚ preventing costly repairs and maintaining optimal vehicle performance. Whether addressing a simple issue or unraveling complex fault codes‚ an OBD-II scanner is a trusted companion for Gas Club car owners.

Manual Inspection Techniques

Manual inspection is crucial for detecting and resolving gas club car issues. Start by examining the fuel tank‚ checking for leaks or blockages that could disrupt fuel delivery. Inspect the exhaust system for signs of rust‚ damage‚ or improper connections that may cause performance problems. Examine electrical components‚ ensuring all wiring and connectors are secure and free from corrosion. Look for visible signs of wear‚ such as frayed hoses or cracked belts‚ which can lead to mechanical failures. By systematically checking these areas‚ you can identify potential problems early and address them efficiently.

Advanced Diagnostic Methods

Advanced diagnostic methods for Gas Club cars involve specialized tools and techniques to identify complex issues. Real-time data analysis and computational modeling are used to evaluate performance metrics. Sophisticated software programs simulate potential problems‚ providing insights into system behavior. Infrared scanning and pressure testing help detect hidden issues‚ such as leaks or blockages. These methods ensure precise diagnostics‚ reducing the risk of misdiagnosis and expensive repairs. By leveraging cutting-edge technologies‚ advanced diagnostics enhance problem-solving efficiency and system reliability.

Manual Inspection of Gas Club Cars

Inspecting fuel systems‚ exhaust components‚ and electrical parts are crucial in manual Gas Club car inspections. Identifying issues early ensures smooth vehicle performance and prevents costly repairs. This guide helps you confidently examine and address common problems to maintain optimal functionality.

Checking Fuel System Components

Inspecting the fuel system is critical for maintaining optimal performance in your Gas Club car. Start by visually checking fuel lines and connections for leaks‚ corrosion‚ or damage. Ensure fuel filters are clean and free from debris‚ as clogs can restrict fuel flow. Test the fuel pump for proper functionality by checking pressure levels and listening for unusual noises. Examine fuel injectors for blockages and clean them if necessary to prevent uneven fuel delivery. Monitor fuel pressure using a pressure gauge or OBD-II scanner to ensure it matches manufacturer specifications. If you detect a strong gasoline smell or notice reduced fuel efficiency‚ investigate further for potential leaks or system failures. Always prioritize safety by using a gas sensor when working around fuel components.

Inspecting the Exhaust System

Inspecting the exhaust system is crucial for maintaining optimal performance and emissions compliance in your Gas Club car. Begin by checking for visible damage‚ corrosion‚ or leaks in the exhaust pipes‚ muffler‚ and catalytic converter. Look for discolored or cracked components‚ as these may indicate excessive heat or age. Test the oxygen sensor’s functionality‚ as faulty sensors can lead to reduced fuel efficiency and engine performance. Use a gas analyzer to measure emissions levels and ensure they meet regulatory standards. Clean or replace clogged exhaust systems to prevent backpressure‚ which can strain the engine. Regular inspection helps identify issues early‚ such as unusual noises or exhaust odors‚ ensuring the vehicle runs smoothly and safely.

Examining Electrical Components

Examining electrical components in your Gas Club car is crucial for diagnosing and resolving issues. Start by checking and testing fuses‚ wiring‚ and connectors to ensure they are clean‚ secure‚ and free of damage. Inspect the battery terminals for corrosion or loose connections‚ as these can cause power supply problems. Test electrical sensors‚ such as the oxygen sensor or temperature sensor‚ for accuracy and functionality. Additionally‚ verify the condition of the alternator and starter motor to ensure proper power distribution. Always use appropriate tools‚ such as a multimeter‚ to measure voltage and identify potential discrepancies. Addressing electrical issues promptly can prevent costly damages and improve overall vehicle performance. Always avoid common mistakes‚ such as improper wiring connections‚ to maintain reliable electrical system functionality.

Common Issues and Solutions

Fuel leaks‚ stalling‚ and battery issues are common in Gas Club cars. Start by inspecting fuel lines and connections for wear. Address stalling by checking air flow and ignition timing. For battery problems‚ ensure terminals are clean and connections secure. Regular maintenance can prevent these issues from escalating‚ keeping your vehicle running smoothly.

Fuel Delivery Problems

Fuel delivery issues are critical in Gas Club cars‚ as they directly impact engine performance. Common problems include clogged fuel filters‚ malfunctioning fuel pumps‚ or issues with the fuel injector system. These issues can cause symptoms such as difficulty starting the car‚ stalling‚ or rough idling. To resolve fuel delivery problems‚ it is essential to inspect and clean or replace components like filters and injectors. Additionally‚ checking for fuel leaks or fuel quality can help ensure smooth operation. Regular maintenance‚ including replacing fuel filters and inspecting fuel lines‚ can prevent long-term issues and improve the car’s efficiency and reliability.

Engine Performance Issues

Gas Club cars may experience engine performance issues such as decreased power‚ rough idling‚ or misfires. These problems often stem from fuel delivery or ignition system malfunctions. Check the spark plugs for wear or fouling and ensure all connections are secure. Dirty air filters or clogged fuel injectors can also hinder performance. If issues persist‚ consult the troubleshooting guide PDF for detailed diagnostics; Monitoring symptoms and prioritizing repairs can prevent further damage and extend the car’s lifespan. Remember‚ seeking professional advice through community forums or authorized repair centers is crucial for resolving complex engine issues effectively.

Transmission Troubles

Transmission issues in Gas Club cars often arise from worn belts‚ slipping gears‚ or fluid leaks. Symptoms like grinding noises‚ shaky shifts‚ or difficulty changing gears indicate potential problems. Over time‚ improper maintenance or excessive wear can damage internal components‚ leading to costly repairs. Always inspect fluid levels and check for leaks in the system. If you notice unusual behavior‚ address it promptly to prevent further damage. Regular inspections and following the maintenance schedule can help identify and resolve transmission troubles before they escalate. Remember‚ early intervention saves time and money in the long run.

Maintenance Tips for Gas Club Cars

Regular maintenance ensures optimal performance and longevity. Check oil levels‚ inspect belts‚ and rotate tires every 5‚000 miles. Replace air filters and spark plugs as recommended. Monitor fluid levels and heed warning lights to prevent costly repairs and extend your car’s life.

Regular Maintenance Schedule

Maintaining your Gas Club car regularly is essential for optimal performance and longevity. Follow this schedule: change the oil every 5‚000 miles‚ inspect air filters every 15‚000 miles‚ and check the fuel system annually. Clean or replace spark plugs every 30‚000 miles and inspect belts and hoses for wear. Inspect the undercarriage for rust or damage every 6 months. Replace cabin filters annually and ensure fluid levels are adequate. Monitor tire pressure and alignment during seasonal checks. Adhering to this schedule can prevent costly repairs and extend your vehicle’s lifespan.

Important Maintenance Checks

Maintenance is crucial for the longevity and performance of your Gas Club car. Regularly inspect the fuel system for leaks or blockages‚ ensuring proper fuel delivery. Check the engine’s oil levels and quality to prevent performance issues. Inspect belts‚ hoses‚ and spark plugs for wear and tear; replace them as needed. Monitor the air filter to maintain optimal airflow. Examine the battery connections and ensure they are secure to avoid electrical problems. Regularly inspect the exhaust system for damage or corrosion. Perform these checks to identify and address potential issues before they escalate‚ saving time and costs in the long run.

Frequent Mistakes to Avoid

Frequent mistakes when troubleshooting Gas Club cars include overlooking basic maintenance tasks‚ such as inspecting the fuel system or checking fluid levels. Ignoring warning lights or error codes can lead to more severe issues. Another common error is assuming problems are complex without performing a thorough manual inspection. Overreliance on advanced diagnostic tools without understanding the basics is also a mistake. Skipping regular maintenance or using incorrect oils and lubricants can damage components. Always prioritize safety and refer to the troubleshooting guide PDF for accurate solutions. Avoid rushing repairs without proper diagnosis‚ as this may worsen the problem. Stick to the guide and follow step-by-step procedures to avoid costly errors and ensure reliable performance.

Frequently Asked Questions

Thissection addresses common concerns about gas club cars‚ such as why the car is stalling‚ how to fix a fuel leak‚ or what to do if the battery dies. These FAQs provide practical solutions and insights to keep your vehicle running smoothly.

Why Is My Gas Club Car Stalling?

Your Gas Club car may stall due to issues like fuel delivery problems‚ electrical malfunctions‚ or mechanical failures. One common cause is a faulty fuel pump or clogged fuel filter‚ which disrupts the flow of gasoline to the engine. Additionally‚ a damaged ignition system‚ such as worn spark plugs or corroded wires‚ can prevent proper combustion. Another possibility is an air flow issue‚ caused by a malfunctioning mass airflow sensor or dirty air filter. If the car stalls while driving‚ it could indicate a problem with the engine’s timing or the car’s computer system. Regular maintenance‚ including checking fuel lines and inspecting spark plug connections‚ can help prevent stalling. If DIY fixes don’t solve the issue‚ consulting a professional mechanic is recommended for advanced diagnostics and repairs.

How to Fix a Fuel Leak

Fuel leaks in Gas Club cars can be dangerous and should be addressed immediately. Begin by locating the source of the leak. Common causes include loose fuel lines‚ cracked hoses‚ or faulty fuel injectors. Tighten any loose connections and inspect the fuel lines for damage. Replace worn or cracked hoses to prevent further leaks. If the issue persists‚ check the fuel tank for corrosion or damage. Apply a temporary fuel line repair kit if minor damage is found. For more severe issues‚ consult a mechanic or refer to the troubleshooting guide PDF for advanced solutions. Always ensure proper ventilation and avoid sparks when handling fuel. Regular inspections can help prevent future leaks and maintain vehicle safety.

What If the Battery Dies?

When a Gas Club car battery dies‚ the vehicle may fail to start‚ and dashboard lights may dim or turn off. To diagnose‚ check the battery terminals for corrosion and ensure they are securely connected. If the battery is old or frequently failing‚ it may need replacement. Jump-starting can temporarily resolve the issue‚ but repeated failures indicate a deeper problem. Charge the battery fully and test it with a multimeter. If it doesn’t hold charge‚ replace it immediately. To prevent future issues‚ use a battery maintainer during extended storage and inspect connections regularly. If the battery dies frequently despite proper care‚ consult a professional to check the charging system or starter motor.

Gas Club Car Resources

Find the official troubleshooting guide PDF for Gas Club cars on manufacturer websites and forums. Explore additional resources like repair manuals and user guides. Engage with online communities to share experiences and seek expert advice for Gas Club car owners.

Where to Find the Troubleshooting Guide PDF

To access the Gas Club Car Troubleshooting Guide PDF‚ start by visiting the official Gas Club website or manufacturer resource portal. Many car clubs and manufacturers provide comprehensive PDF guides for members. Additionally‚ forums like Ritetech.net and Reddit’s Gas Club communities often host shared troubleshooting documents. Always verify the source to ensure reliability. For more technical issues‚ check automotive publications or specialized forums focused on Gas Club car enthusiasts. These platforms frequently discuss diagnostic tools‚ repair methods‚ and PDF resources to help you resolve issues effectively.

Additional Reading Materials

To enhance your understanding of troubleshooting Gas Club cars‚ consider exploring additional resources. Dive into technical manuals covering fuel delivery systems and engine performance optimization. Online forums and automotive communities often discuss real-life scenarios and expert insights. For deeper knowledge‚ review case studies on gas storage and energy conversion‚ as these concepts apply to car diagnostics. Articles on fluid dynamics and safety protocols for handling fuels can also provide valuable context. Expand your research with these materials to strengthen your problem-solving skills and stay informed about the latest advancements in automotive troubleshooting.

Community Forums and Support

Gas Club car owners often turn to online forums and support communities for troubleshooting advice. These platforms provide access to expertise‚ troubleshooting tips‚ and reliable solutions. Many members share their experiences‚ offering insights into common issues and how to resolve them. Forums also serve as a space to ask questions‚ connect with other owners‚ and gain practical advice. By participating in these communities‚ users can find support and build their knowledge about Gas Club car maintenance and repair. The collective wisdom of the community is a valuable resource for addressing challenges and improving the performance of their vehicles.

Case Studies and Real-Life Examples

Explore real-life examples of Gas Club car issues and their solutions. Learn from case studies that demonstrate effective troubleshooting methods‚ including diagnosing complex problems and applying practical fixes. Gain insights into common scenarios to enhance your problem-solving skills and preparedness.

Sample Troubleshooting Scenarios

One common scenario involves a gas club car experiencing rough idling‚ which may indicate a dirty or clogged fuel filter needing replacement. Another situation is a fuel leak‚ which requires inspecting fuel lines and connections for damage or wear. A third scenario involves a malfunctioning exhaust system‚ such as rattling noises or reduced performance‚ pointing to potential issues with the muffler or exhaust manifold. Addressing these issues promptly prevents further damage and ensures reliable operation. By analyzing these scenarios‚ you can apply practical solutions to maintain your gas club car’s functionality and longevity.

Step-by-Step Solutions

When troubleshooting Gas Club car issues‚ follow these structured solutions: First‚ identify the root cause by reviewing common symptoms such as stalling‚ fuel leaks‚ or battery failure. If the problem is a fuel delivery issue‚ check for leaks or blockages in the fuel system. For engine performance problems‚ inspect spark plugs‚ fuel injectors‚ and oxygen sensors. In case of transmission issues‚ ensure proper fluid levels and inspect for worn components. Always maintain a regular maintenance schedule to prevent recurring problems. If unsure‚ consult the troubleshooting guide PDF or seek professional assistance. These steps ensure efficient and safe resolutions‚ extending the car’s lifespan and reliability.

Learning from Past Experiences

Learning from past experiences is crucial for improving your ability to troubleshoot Gas Club cars effectively. Reviewing previous issues and their solutions helps you recognize patterns and avoid recurring problems. By documenting each repair or maintenance task‚ you can develop a valuable reference guide for future challenges. Case studies and real-life examples provide insights into how others have resolved common and uncommon issues. Additionally‚ analyzing past mistakes ensures you approach new challenges with greater confidence and efficiency. Sharing experiences with fellow car owners or consulting forums can also enhance your understanding and problem-solving skills. Embracing past lessons allows you to refine your troubleshooting strategies and stay ahead of potential issues‚ making you more resourceful in diagnosing and resolving problems.

ad astra guide

Welcome to the Ad Astra Guide, your comprehensive resource for exploring space in Minecraft. This mod offers a universe of possibilities, from building rockets to discovering distant planets like the Moon, Mars, and beyond. Whether you’re crafting space suits, managing oxygen systems, or establishing space stations, this guide will help you navigate the vast cosmos with ease and excitement. Dive in and embark on your interstellar adventure!

1.1 Overview of Ad Astra Mod

The Ad Astra Mod is a space exploration mod for Minecraft, enabling players to travel to celestial bodies like the Moon, Mars, Venus, and Mercury. It introduces a variety of features, including multi-tiered rockets, space suits, and oxygen systems, allowing for immersive interplanetary adventures. The mod focuses on technology and survival, requiring players to craft essential items and manage resources. With its progression system, players unlock higher-tier rockets and advanced equipment, enabling deeper exploration. Compatible with both Fabric and Forge, Ad Astra offers a rich, expansive experience for those eager to venture beyond Earth and establish bases across the solar system.

1.2 Importance of Space Exploration in Minecraft

Space exploration in Minecraft, through mods like Ad Astra, adds a new layer of depth and excitement to the game. It introduces players to the thrill of discovering uncharted celestial bodies, such as the Moon, Mars, and beyond. This feature not only enhances creativity but also challenges players to adapt to new environments and resource-gathering mechanics. Exploring space encourages strategic thinking, as managing oxygen, fuel, and equipment becomes crucial for survival. The ability to establish bases and conduct interplanetary travel expands the game’s possibilities, offering a fresh and immersive experience that keeps players engaged and eager to explore further.

1.3 Purpose of the Guide

This guide is designed to provide players with a detailed roadmap for mastering the Ad Astra mod, ensuring a smooth and enjoyable journey through space exploration in Minecraft. It covers essential topics such as rocket construction, space suit crafting, and survival mechanics, while also offering tips for resource management and advanced progression. The guide aims to equip players with the knowledge needed to explore celestial bodies like the Moon, Mars, and beyond, while establishing sustainable bases and overcoming challenges. Whether you’re a novice or an experienced player, this guide will help you unlock the full potential of the Ad Astra mod and enhance your interstellar adventures.

Getting Started with Ad Astra

Begin your journey by installing the Ad Astra mod via Fabric or Forge. Gather essential resources like steel and oil to craft your first rocket and space suit. Start small, build your foundation, and prepare for liftoff to explore the cosmos!

2.1 Installing the Mod

To begin your interstellar journey, download the Ad Astra mod from CurseForge. Ensure you select the correct version for your Minecraft edition. Install it using either Fabric or Forge mod loaders. Once installed, launch Minecraft with the respective mod loader to access the Ad Astra features. The mod is compatible with both Fabric and Forge, offering flexibility for players. After installation, you’ll have access to essential items like rockets, space suits, and oxygen systems. Make sure your Minecraft version matches the mod’s requirements for seamless functionality. With the mod installed, you’re ready to craft your first rocket and embark on cosmic adventures!

2.2 Basic Setup and Requirements

Before exploring space, ensure you have the necessary materials. Gather Steel for crafting essential items and Ad Astra Oil or Pneumaticraft Oil for fuel. A Nasa Workbench is required to craft rockets and advanced equipment. Install the mod using Fabric or Forge mod loaders, ensuring compatibility with your Minecraft version. For optimal performance, avoid using Optifine or Iris on Fabric. Allocate sufficient resources and space for crafting. Familiarize yourself with the mod’s mechanics to build and fuel rockets effectively. Proper setup ensures a smooth start to your interstellar journey in Ad Astra.

2.3 Understanding the Core Mechanics

The core mechanics of Ad Astra revolve around space exploration and resource management. Players must craft rockets using a Nasa Workbench, which requires materials like steel and oil. The mod introduces a tiered rocket system, with higher tiers enabling travel to distant planets. Fueling is essential, as rockets consume 3 buckets (3000 mB) of oil for launch. Landing requires precise timing, as pressing the spacebar ensures a safe touchdown. The mod also features a progression system, where materials from one planet may be needed to access others. Understanding these mechanics is crucial for a successful interstellar journey in Ad Astra.

Rocket Construction and Fueling

Ad Astra requires crafting rockets in a Nasa Workbench using materials like steel and oil. Fueling with 3 buckets of oil enables launches, while proper landing ensures survival and retrieves the lander.

3.1 Crafting Your First Rocket

Crafting your first rocket in Ad Astra is an exciting milestone. Begin by gathering essential materials, including steel, which is the primary metal required. You’ll need about 2-3 stacks of steel to get started. Next, ensure you have sufficient fuel—around 10-20 buckets of Ad Astra Oil or compatible alternatives like Pneumaticraft Oil. Use the Nasa Workbench to assemble your rocket, following the specific blueprint provided by the mod. Once crafted, fuel your rocket with the prepared oil to prepare for launch. Remember, proper landing is crucial to avoid damage and recover your rocket. This foundational step sets the stage for your interstellar adventures!

3.2 Understanding Rocket Tiers

Ad Astra introduces a tiered rocket system, enabling progressive exploration of the solar system. The mod features four distinct rocket tiers, each unlocking access to more distant and challenging planets. The first tier allows travel to the Moon, while higher tiers enable journeys to Mars, Venus, and beyond. Each tier requires increasingly rare materials and advanced crafting techniques. As you progress, rockets become more fuel-efficient and capable of withstanding harsher conditions. Upgrading your rocket tier is essential for exploring hostile environments and unlocking new resources. This tiered system ensures a balanced and rewarding progression, encouraging players to gather materials and innovate to reach the next frontier.

3.3 Fueling and Launching the Rocket

Fueling and launching your rocket in Ad Astra is a critical step in your space exploration journey. Rockets require a significant amount of fuel, typically 3 buckets (3000 mB) of Ad Astra Oil or compatible alternatives like Pneumaticraft Oil. Once crafted in the Nasa Workbench, your rocket must be properly fueled before launch. Ensure you have enough resources for both the journey and return. Launching requires careful preparation, and landing demands precision—press the spacebar to avoid crashing. Successful launches and landings are essential for progressing through the mod and exploring new celestial bodies. Proper fuel management and planning are key to a successful mission.

Space Suits and Survival Gear

Space suits are essential for survival in Ad Astra, with three tiers offering protection for different planets. Oxygen systems and generators are crucial for extended exploration and base establishment.

4.1 Crafting Space Suits

Crafting space suits is essential for survival in hostile environments. The standard Space Suit is crafted using steel and provides basic protection for planets like the Moon. As you progress, the Netherite Space Suit offers enhanced durability for harsher worlds like Mars and Venus; The advanced Jet Suit includes a built-in jet pack, enabling flight and easier navigation. Each suit requires specific materials and tools, such as a Nasa Workbench. Crafting these suits ensures you can explore safely and efficiently, adapting to the challenges of each planet. Properly equipping yourself is crucial for a successful interstellar journey in Ad Astra.

4.2 Oxygen Systems and Generators

Oxygen systems are vital for survival in space and on other planets. The Oxygen Loader is a key component, converting water into oxygen using a Coal Generator for power. This oxygen can be stored in tanks or directly added to space suits. For extended stays, an Oxygen Distributor creates breathable areas, allowing base establishment without suits. These systems require careful setup and resource management to ensure survival. Properly configuring oxygen generators and distributors is essential for exploring hostile environments and building sustainable bases in Ad Astra.

4.3 Advanced Space Suit Upgrades

Advanced space suit upgrades in Ad Astra enhance survival and mobility in hostile environments. The Jet Suit is a pinnacle upgrade, featuring built-in jet packs for flight across dangerous terrains. It mirrors the Netherite Space Suit in design but adds superior mobility, ideal for navigating lava-rich planets like Venus. Upgrading suits requires progression through the mod, with materials like those found on Mars enabling higher-tier gear. These upgrades ensure better protection and functionality, allowing players to explore farther and survive longer in the harsh conditions of space and alien worlds.

Exploring the Solar System

Embark on an epic journey through the solar system with Ad Astra. Explore the Moon’s low gravity, Mars’ red landscapes, Venus’ hostile environment, and Mercury’s scorched surface. Discover new resources, establish bases, and unravel the mysteries of each celestial body in this vast, interplanetary adventure.

5.1 Traveling to the Moon

To reach the Moon in Ad Astra, you’ll need a Tier 1 rocket, crafted using a Nasa Workbench. Ensure you have 3 buckets of Ad Astra Oil for fuel. Launch your rocket and navigate through the atmosphere. Upon landing, press the spacebar to avoid crashing. The Moon’s low gravity and barren landscape offer a unique environment for exploration. Collect resources and establish a temporary base. Remember to wear a space suit to survive the harsh conditions. The Moon serves as an essential stepping stone for further interplanetary travel, providing valuable materials and experience for your next adventures.

5.2 Exploring Mars and Its Resources

Mars is a vital destination in Ad Astra, offering rich resources and challenges. To survive, equip a Netherite Space Suit, as the planet’s harsh environment demands advanced protection. Mining on Mars yields essential materials for crafting higher-tier equipment and fuel. The planet’s hostile terrain requires careful navigation, with dangers like toxic gases and extreme temperatures. Establishing a base on Mars can serve as a strategic outpost for further exploration. Utilize oxygen generators or distributors to sustain life during extended stays. Resources gathered here are crucial for progressing to more distant planets like Venus and Mercury, making Mars a key stepping stone in your interplanetary journey.

5.3 Venturing to Venus and Mercury

Venus and Mercury offer unique challenges in Ad Astra, requiring advanced preparation. Venus’s thick atmosphere and hostile surface demand a Jet Suit for mobility and survival. Mercury’s extreme temperatures necessitate a well-equipped base to manage heat fluctuations. Both planets provide rare resources essential for crafting higher-tier equipment. Establishing a base on Mercury can serve as a gateway for further solar system exploration. Ensure ample oxygen supply and protective gear when exploring these planets, as their environments are unforgiving. The resources gathered here are crucial for progressing to deeper space, making Venus and Mercury key destinations in your interplanetary journey.

5;4 Establishing Space Stations

Establishing space stations in Ad Astra is a crucial step for advanced exploration. These stations serve as refueling points, storage hubs, and bases for interplanetary operations. To construct one, you’ll need to gather resources like steel and advanced materials. Use a Rocket to transport components to orbit, then assemble the station module by module. Oxygen Distributors and generators are essential for sustaining life. A well-equipped station can also house rovers and additional gear, enabling longer missions; Strategic placement near resource-rich planets like Mars or Venus can enhance your exploration capabilities. Space stations are a testament to your progress and a gateway to deeper space adventures.

Advanced Features and Progression

Ad Astra offers advanced features for seasoned players, including higher-tier rockets, progression systems, and crafting complex equipment. These elements enhance gameplay depth and exploration capabilities significantly.

6.1 Unlocking Higher-Tier Rockets

To unlock higher-tier rockets in Ad Astra, players must progress through the mod’s progression system. Each tier of rocket unlocks new possibilities for space exploration, with Tier 1 being the most basic and Tier 4 allowing travel to distant planets like Venus and Mercury. Crafting higher-tier rockets requires advanced materials, such as steel and rare resources found on other planets. Fuel requirements also increase, necessitating larger storage solutions. As you progress, you’ll gain access to more efficient engines and advanced technologies, enabling longer and more complex missions. Proper landing techniques are crucial to recover your rocket and continue exploring the cosmos.

6.2 Progression System and Upgrades

The Ad Astra progression system is designed to gradually unlock advanced technologies and upgrades, allowing players to explore further into the solar system. As you gather resources and complete challenges, you’ll unlock higher-tier equipment, such as improved space suits and more efficient oxygen generators. Upgrading your gear is essential for surviving harsher environments like Mars and Venus. The progression system also introduces new crafting recipes and tools, enabling the construction of advanced machinery and infrastructure. By progressing through the mod, you’ll gain access to better fuel efficiency, faster travel, and enhanced survival capabilities, making deep space exploration more manageable and rewarding. Each upgrade brings you closer to mastering the cosmos.

6.3 Crafting Advanced Equipment

Crafting advanced equipment in Ad Astra is crucial for progressing through the mod and exploring deeper into the solar system. As you gather rare resources, you can craft higher-tier items like the Jet Suit, which includes built-in jet packs for easier navigation on hostile planets. Advanced oxygen generators and distributors enable sustained survival on distant worlds, while upgraded space suits provide enhanced protection against extreme environments. Crafting these items often requires specialized materials and blueprints unlocked through progression. Each piece of advanced equipment opens new possibilities for exploration and base-building, allowing players to thrive in the harshest conditions. Mastering these crafting recipes is key to conquering the cosmos in Ad Astra.

Tips and Tricks for Success

Mastering Ad Astra requires strategic planning and resource management. Prioritize crafting essential items like oxygen generators and advanced space suits to survive hostile environments. Optimize your base setup for efficiency and sustainability, ensuring a steady supply of fuel and materials. Regularly upgrade your equipment to unlock new possibilities for exploration and progression. Stay alert during space travel and landing to avoid crashes. Experiment with different rocket tiers and suit upgrades to adapt to varying planetary conditions. With careful preparation and smart decisions, you’ll thrive in the vastness of space.

7.1 Managing Resources Effectively

Effective resource management is crucial for success in Ad Astra. Start by gathering essential materials like steel and oil, which are vital for crafting and fueling. Prioritize crafting an Oxygen Generator early to ensure a steady supply for your space suits. Use buckets of water to produce oxygen, and consider setting up an Oxygen Distributor for bases. Fuel management is equally important; store excess oil in tanks to avoid shortages. Plan your missions carefully, carrying enough resources for survival and exploration. Regularly upgrade your equipment to improve efficiency and reduce consumption. By managing resources wisely, you’ll extend your exploration capabilities and thrive in the challenging environments of space.

7.2 Navigating Hostile Environments

Navigating hostile environments in Ad Astra requires careful preparation and the right gear. Planets like Mars and Venus feature extreme conditions, making advanced space suits essential. The Netherite Space Suit is ideal for Mars, while the Jet Suit, with its built-in jet pack, helps avoid hazards like lava pools on Venus; Always carry extra oxygen and consider setting up an Oxygen Distributor for bases to breathe freely. Use water and generators to replenish oxygen supplies, and avoid exploring without proper gear. Hostile environments demand caution, so prioritize survival equipment and plan your missions meticulously to overcome these challenges and thrive in the cosmos.

7.3 Optimizing Your Space Base

Optimizing your space base in Ad Astra is crucial for long-term survival and exploration. Start by ensuring a reliable oxygen supply using an Oxygen Distributor, which converts water into breathable air. Position generators or solar panels near your base to maintain power. Organize your base with modular structures, separating resource storage from living quarters. On planets like Mars, prioritize mining essential materials for upgrades. Use fluid pumps to manage resources efficiently and avoid waste. Consider expanding your base with landing pads for rockets and rovers, enabling easier travel. Regularly replenish supplies and adapt your base design to the planet’s unique challenges, ensuring sustainability and readiness for further exploration.

Mod Compatibility and Troubleshooting

Ad Astra works with Fabric and Forge, but issues may arise with Optifine or Iris, affecting energy transfers. Ensure Minecraft version compatibility and check for updates to resolve bugs and performance issues.

8.1 Compatibility with Fabric and Forge

Ad Astra is designed to work seamlessly with both Fabric and Forge mod loaders, ensuring a smooth experience for Minecraft players. However, compatibility issues may arise with Optifine or Iris, particularly on Fabric, as they can interfere with energy and fluid transfers. To avoid these problems, it’s recommended to disable Optifine or Iris when using Ad Astra. Additionally, ensure your Minecraft version aligns with the mod’s requirements, as compatibility varies across versions. Regularly check for updates to maintain optimal performance and resolve any potential bugs or conflicts with other mods.

8.2 Common Issues and Solutions

Players may encounter issues like crashes or failed rocket launches when using Ad Astra. A common problem is compatibility with Optifine or Iris, which can disrupt energy and fluid transfers. To resolve this, disable these mods or switch to the Forge version. Another issue is the Oxygen Loader not functioning properly, often due to incorrect setup. Ensure it’s powered correctly and connected to a water source. If rockets fail to launch, check fuel levels and ensure the launchpad is clear. For persistent problems, consult the official Ad Astra wiki or forums for troubleshooting guides and updates. Regular mod updates often fix bugs, so keep your version current.

8.3 Optimizing Performance

To ensure smooth gameplay with the Ad Astra mod, optimize your Minecraft setup. Disable mods like Optifine or Iris, as they can cause compatibility issues with Ad Astra’s mechanics; Allocate more RAM to Minecraft to improve performance, especially when exploring resource-intensive planets. Lowering graphics settings and reducing render distance can also enhance gameplay smoothness. Install performance-enhancing mods like Sodium or Lithium alongside Ad Astra for better frame rates. Regularly update your mod to the latest version, as developers often release patches to improve stability and performance. By addressing these factors, you can enjoy a seamless interstellar adventure in Ad Astra.

Community and Resources

Join the vibrant Ad Astra community to connect with fellow space explorers, share tips, and discover new content. Explore forums, YouTube tutorials, and Discord servers for support and inspiration. Utilize community-driven resources like wikis and guides to enhance your gameplay experience and stay updated on mod developments.

9.1 Joining the Ad Astra Community

Become part of the active and welcoming Ad Astra community to connect with fellow space enthusiasts. Join forums, Discord servers, and social media groups to share tips, showcase your creations, and collaborate on projects. Engage with content creators on YouTube and Twitch for tutorials, gameplay streams, and inspiration. Participate in community events and challenges to enhance your experience. The Ad Astra community is a great place to learn, grow, and stay updated on the latest mod developments and updates. By joining, you’ll become part of a passionate group dedicated to exploring the cosmos together in Minecraft.

9.2 Finding Additional Guides and Tutorials

To enhance your Ad Astra experience, explore a variety of guides and tutorials available online. Websites like Minecraft-Guides.com offer detailed walkthroughs, covering topics from basic rocket crafting to advanced space exploration. YouTube channels and forums provide video tutorials, showcasing tips for building efficient rockets, managing resources, and surviving on hostile planets. Additionally, CurseForge and mod-specific wikis offer comprehensive resources, including step-by-step instructions and troubleshooting tips. These guides are perfect for both newcomers and experienced players looking to refine their skills. By leveraging these resources, you can master the complexities of space travel and exploration in Ad Astra.

9.3 Staying Updated with Mod Developments

To stay updated with the latest developments in the Ad Astra mod, regularly check the official CurseForge page for new updates and patch notes. Subscribing to the mod’s newsletter or following its developers on social media can provide early insights into upcoming features. Joining the Ad Astra Discord server or forums allows you to engage with the community, share tips, and learn about beta releases. Additionally, YouTube channels and Minecraft forums often highlight mod updates and tutorials. Keeping your mod version current ensures access to new planets, mechanics, and improvements, enhancing your space exploration experience in Minecraft.

Thank you for exploring the Ad Astra Guide! With this comprehensive resource, you’re ready to embark on thrilling space adventures in Minecraft. Happy crafting and exploring!

10.1 Final Thoughts on Ad Astra

Ad Astra offers an extraordinary journey through space exploration in Minecraft, blending creativity with survival mechanics. From crafting rockets to thriving on distant planets, the mod delivers endless possibilities. Its tiered rocket system and advanced space suits provide a sense of progression, while the need for oxygen and resource management adds depth. The ability to establish bases and explore hostile environments makes each adventure unique. With a gentle learning curve and expansive features, Ad Astra is perfect for both casual players and those seeking a challenging experience. Embark on your cosmic quest, and let the stars guide you to unforgettable discoveries!

10.2 Encouragement to Explore and Create

Embrace the limitless possibilities of Ad Astra and let your creativity shine! Whether you’re designing intricate space stations or venturing to uncharted planets, this mod invites you to push boundaries. Experiment with advanced rocket tiers, craft innovative equipment, and establish thriving bases. The mod’s progression system rewards curiosity and ingenuity, encouraging you to explore further. Don’t hesitate to try new strategies or adapt to challenges—each discovery is a step toward mastery. With its rich features and immersive gameplay, Ad Astra inspires players to dream big and build even bigger. The cosmos awaits; go forth and create your legacy among the stars!

nascla contractors guide

The NASCLA Contractors Guide is a comprehensive resource aiding contractors in understanding state-specific licensing, exam preparation, and compliance. It serves as a roadmap for industry success.

What is the NASCLA Contractors Guide?

The NASCLA Contractors Guide is a detailed resource published by the National Association of State Contractors Licensing Agencies. It provides comprehensive information on contractor licensing, exams, and compliance requirements across multiple states. The guide is designed to assist contractors in navigating the complex process of obtaining and maintaining licenses, ensuring they meet all legal and regulatory standards. It covers topics such as application processes, exam preparation, and state-specific rules. Additionally, it offers insights into business practices, safety protocols, and continuing education needs. This guide is an essential tool for contractors aiming to operate legally and efficiently in various jurisdictions.

Importance of the NASCLA Guide for Contractors

The NASCLA Contractors Guide is a vital resource for contractors, offering detailed insights into licensing, compliance, and business practices. It helps contractors navigate complex state-specific requirements, ensuring they meet legal and regulatory standards. The guide is particularly valuable for those operating in multiple states, as it streamlines the process of understanding varying licensing rules. By providing exam preparation materials, business management tips, and compliance guidelines, the NASCLA Guide empowers contractors to operate efficiently and avoid legal pitfalls. Its comprehensive approach makes it an indispensable tool for both new and experienced contractors seeking to build sustainable and profitable businesses in the competitive construction industry.

Overview of the Licensing Process

The licensing process for contractors involves several key steps, including meeting eligibility criteria, completing required education or training, and passing the NASCLA exam. Contractors must submit applications, provide necessary documentation, and pay associated fees. Each state may have additional requirements, such as background checks or bonding. The NASCLA Guide simplifies this process by outlining specific steps for each jurisdiction. It also highlights the importance of maintaining licenses through continuing education and renewal. Understanding the licensing process is crucial for contractors to operate legally and efficiently, ensuring compliance with state and federal regulations. This overview provides a clear roadmap for navigating the licensing journey successfully.

Licensing Requirements for Contractors

Licensing requirements for contractors vary by state, including specific classifications, exams, and fees. The NASCLA guide details these processes, ensuring compliance with local regulations and standards.

State-Specific Licensing Requirements

State-specific licensing requirements for contractors vary significantly, with each state establishing its own criteria, classifications, and procedures. The NASCLA guide provides detailed insights into these variations, helping contractors navigate the complex landscape. From application processes to required exams and fees, understanding local regulations is crucial for compliance. Some states require specific bonds or insurance, while others have unique classification systems. Staying informed about these differences ensures contractors can operate legally and efficiently across jurisdictions. The guide emphasizes the importance of meeting all state-specific requirements to avoid penalties and maintain professional credibility in the industry.

Classification of Contractor Licenses

The classification of contractor licenses is a critical aspect of the licensing process, as it defines the scope and type of work a contractor is authorized to perform. Licenses are typically categorized based on the contractor’s specialty, such as general contracting, electrical, plumbing, or HVAC. Each classification ensures that contractors possess the necessary skills and expertise for specific projects, maintaining industry standards and consumer protection. The NASCLA guide provides a detailed breakdown of these classifications, helping contractors identify the appropriate license for their business. Understanding these classifications is essential for compliance and ensures that contractors can operate within their designated field effectively.

Application Process and Fees

The application process for contractor licenses involves submitting the required documentation, such as proof of experience and insurance, and paying the associated fees. Fees vary by state and license type, with some jurisdictions requiring additional costs for exams or background checks. The NASCLA guide provides detailed instructions to simplify this process, ensuring contractors meet all requirements efficiently. Understanding the fee structure and application steps is crucial for obtaining the necessary credentials to operate legally. Proper preparation and adherence to guidelines help contractors avoid delays and ensure compliance with state regulations.

Understanding the NASCLA Exam

The NASCLA exam is a standardized test for contractors, recognized across multiple states, ensuring they meet minimum competency standards. It covers business, legal, and technical knowledge essential for licensing.

What is the NASCLA Exam?

The NASCLA Exam is a standardized test for contractors, recognized across multiple states, ensuring they meet minimum competency standards. It assesses knowledge in business management, legal requirements, and technical skills essential for licensing. Designed to simplify multi-state licensing, the exam covers critical areas like bidding, contracts, and safety protocols. Passing the NASCLA Exam demonstrates a contractor’s ability to operate effectively and safely. It is a key step in obtaining a contractor’s license in participating states, ensuring professionalism and adherence to industry standards. The exam’s standardized format helps maintain consistency in licensing requirements nationwide.

Exam Format and Content

The NASCLA Exam consists of 115 multiple-choice questions, divided into two sections: business and management, and trade-specific knowledge. The exam lasts 4.5 hours, with content covering financial management, legal requirements, contracts, and safety protocols. Trade questions focus on construction practices, building codes, and technical standards. The exam is closed-book, but candidates can use approved reference materials during the test. A passing score is typically 70%, though this may vary by state. The exam ensures contractors understand both business operations and technical aspects of the industry, promoting compliance with legal and safety standards nationwide.

Preparing for the NASCLA Exam

Preparation for the NASCLA Exam involves a combination of studying and practice. Candidates should utilize the official study guide and practice exams to familiarize themselves with the exam format. Focus on key areas such as business management, financial practices, and trade-specific knowledge. It’s essential to review state-specific laws and regulations, as these may vary. Time management is critical, so practice under timed conditions. Additionally, leveraging online resources, such as webinars or workshops, can enhance understanding. Ensuring a thorough review of reference materials, like the Construction Business and Law Manual, is also recommended. Stay calm, focused, and well-prepared for the exam day.

Compliance and Regulations

Compliance and regulations are critical for contractors to operate legally, ensuring adherence to ethical standards and maintaining trust through proper implementation and understanding of regulatory requirements.

State and Federal Regulations for Contractors

Contractors must adhere to both state and federal regulations to ensure legal compliance. State laws often dictate specific licensing requirements, while federal regulations cover wage laws, workplace safety, and environmental protections. The Fair Labor Standards Act and Occupational Safety and Health Administration (OSHA) standards are critical for contractors. Additionally, federal laws like the Clean Air Act and Clean Water Act may apply to construction projects. Contractors must also comply with the National Electrical Code and other industry standards. Failure to meet these regulations can result in fines, penalties, or even license revocation. Staying informed about updates to these regulations is essential for maintaining compliance and avoiding legal issues.

Record-Keeping and Reporting Requirements

Contractors are required to maintain accurate and detailed records for compliance with legal and regulatory standards. This includes financial records, employee hours, project progress, and safety inspections. Reporting requirements vary by state but often involve submitting periodic updates to licensing boards or governmental agencies. Contractors must also retain records of contracts, invoices, and payments for audit purposes. Proper documentation helps ensure transparency and accountability, while also protecting contractors in case of disputes or legal issues. Failure to meet these requirements can result in penalties or license suspension. Organized record-keeping is essential for streamlined reporting and maintaining a professional reputation in the industry.

Continuing Education Requirements

Contractors must fulfill continuing education requirements to maintain their licenses and stay updated on industry standards. These requirements vary by state but typically include completing a set number of hours in approved courses. Topics often cover business practices, safety protocols, and legal updates. Some states require specific coursework, such as ethics or construction laws. Continuing education ensures contractors remain knowledgeable and compliant with evolving regulations. Failing to meet these requirements can result in license renewal issues or penalties. Staying proactive with ongoing education not only satisfies regulatory demands but also enhances professional growth and competitiveness in the construction industry.

Insurance and Bonding for Contractors

Insurance and bonding are critical for contractors to protect against risks, ensure compliance, and secure projects. Requirements vary by state, often including liability and workers’ compensation coverage.

Types of Insurance Required for Contractors

Contractors typically need general liability insurance to cover third-party injuries or property damage. Professional liability insurance protects against claims of faulty work or design errors. Workers’ compensation insurance is mandatory in most states to cover employee injuries. Commercial auto insurance is required if contractors use vehicles for business. Additionally, some states may require umbrella insurance for extra liability protection. The specific types and coverage amounts vary by state and project requirements. Proper insurance ensures compliance with regulations and protects contractors from financial losses. It is essential to verify state-specific insurance requirements to maintain licensing and avoid penalties. Proper coverage safeguards both contractors and their clients.

Understanding Contractor Bonds

Contractor bonds are financial guarantees ensuring contractors meet legal, regulatory, and contractual obligations. They protect project owners from non-compliance or failure to complete work. Common types include bid bonds, performance bonds, and payment bonds. Bid bonds ensure contractors enter contracts if awarded projects. Performance bonds guarantee satisfactory project completion. Payment bonds ensure subcontractors and suppliers are paid. Bonds are typically required for public projects and may vary by state or project type. Contractors must obtain bonds from surety companies, which assess creditworthiness and project risks. Understanding bond requirements is crucial for compliance and securing contracts. Proper bonding demonstrates reliability and financial stability, fostering trust with clients and stakeholders.

Insurance and Bonding Requirements by State

Insurance and bonding requirements for contractors vary significantly by state, with each jurisdiction establishing specific regulations. These requirements ensure contractors operate responsibly and protect clients from potential risks. States often mandate general liability insurance, workers’ compensation insurance, and specific bonding amounts. Requirements may differ based on the type of project, such as residential or commercial, and the contractor’s license classification. Some states have stricter regulations for public works projects compared to private contracts. Contractors must verify their state’s licensing board for exact requirements. Compliance with these regulations is essential to avoid penalties and maintain licensure. Requirements may also evolve over time, so staying informed is crucial.

Best Practices for Contractors

Adopting proven business strategies, maintaining clear communication, and adhering to industry standards are essential for success. Effective project management and ethical practices build trust and reputation.

Business Operations and Management

Efficient business operations are crucial for contractors to ensure profitability and scalability. Implementing robust project management systems helps track progress and deadlines. Clear communication with clients and teams fosters collaboration and reduces misunderstandings. Financial management, including budgeting and expense tracking, is essential for maintaining cash flow. Adopting technology, such as accounting software and CRM tools, streamlines operations and improves accuracy. Establishing a strong organizational structure ensures roles and responsibilities are defined, promoting accountability. Regular performance reviews and process improvements help identify inefficiencies and implement solutions. By prioritizing operational excellence, contractors can deliver high-quality services consistently while building a reputable and sustainable business;

Safety Protocols and Standards

Safety Protocols and Standards

Adhering to safety protocols and standards is paramount for contractors to safeguard workers, clients, and project sites. Compliance with OSHA regulations ensures a safe working environment and minimizes risks of accidents. Contractors must conduct regular safety training and inspections to identify potential hazards. Personal Protective Equipment (PPE) should be mandatory for all personnel. Implementing incident reporting systems helps address and prevent future accidents. Proper signage, barricades, and controlled access zones are essential for public safety. Regular equipment maintenance reduces mechanical failures. Contractors should also stay updated on industry-specific safety standards and best practices to create a culture of safety and accountability across all projects.

Sustainability and Green Building Practices

Sustainability and green building practices are increasingly important for contractors, focusing on eco-friendly materials and energy-efficient techniques. Using recycled or sustainably sourced materials, like reclaimed wood or low-VOC paints, reduces environmental impact. Energy-efficient systems, such as LED lighting and solar panels, lower energy consumption. Contractors should follow certifications like LEED or ENERGY STAR to meet green building standards. Water conservation methods, such as rainwater harvesting, also play a role. Adopting these practices not only benefits the environment but also aligns with growing client demand for sustainable construction. Contractors who prioritize green building enhance their reputation and contribute to a more sustainable future.

NASCLA Resources and Support

NASCLA provides resources and support to contractors, offering comprehensive guides, training materials, and exam preparation to facilitate licensing, compliance, and professional growth in the industry.

Available Resources for Contractors

NASCLA offers a variety of resources to support contractors, including study guides, training programs, and webinars. The NASCLA Study Guide is a key resource for exam preparation, providing detailed insights into contracting laws, business practices, and technical knowledge. Additionally, NASCLA hosts seminars and workshops to help contractors stay updated on licensing requirements and industry standards. Contractors can also access state-specific guides to navigate local regulations and requirements. Online forums and community groups provide networking opportunities and peer-to-peer advice. These resources ensure contractors are well-equipped to succeed in their professional journeys and maintain compliance with industry standards.

Professional Development Opportunities

NASCLA provides contractors with numerous professional development opportunities to enhance their skills and knowledge. Workshops, webinars, and continuing education programs are available to ensure contractors stay updated on industry trends and regulations. Specialized certifications, such as those in project management or green building, can be pursued through NASCLA-affiliated programs. Apprenticeships and mentorship initiatives offer hands-on experience and guidance from experienced professionals. Leadership training programs are also available to help contractors improve their business management skills. These opportunities not only foster personal growth but also contribute to a more skilled and competitive contracting workforce, aligning with NASCLA’s mission to uphold high industry standards.

Networking and Community Engagement

NASCLA facilitates networking and community engagement opportunities for contractors to connect with industry professionals. Attendees can participate in conferences, trade shows, and regional meetings to build relationships and share knowledge. Online forums and social media groups provide platforms for ongoing communication and collaboration. Mentorship programs pair experienced contractors with newcomers, fostering guidance and support. Local chapters host events to address state-specific issues and promote camaraderie. These activities encourage collaboration, innovation, and mutual growth within the contracting community. By engaging in these opportunities, contractors can strengthen their professional networks and contribute to the advancement of the industry as a whole.

The NASCLA Contractors Guide serves as a comprehensive resource, helping contractors navigate licensing, exams, and compliance while fostering best practices for professional growth and success in the industry.

Final Thoughts on the NASCLA Guide

The NASCLA Contractors Guide is an indispensable resource for contractors, offering detailed insights into licensing, exams, and compliance. It streamlines the process of understanding state-specific requirements, ensuring contractors are well-prepared to meet regulatory standards. By emphasizing best practices, the guide not only helps professionals maintain compliance but also fosters a culture of continuous improvement. Its comprehensive approach makes it a vital tool for both new and experienced contractors, providing clarity and direction in a complex industry. Ultimately, the NASCLA Guide empowers contractors to operate efficiently, ethically, and successfully, making it a cornerstone for achieving long-term success in the construction and contracting field.

Future of Contractor Licensing

The future of contractor licensing is poised for transformation, driven by technological advancements and evolving industry demands. The NASCLA Contractors Guide highlights the potential for standardized licensing processes across states, reducing barriers for contractors operating nationally. Digital platforms may streamline license applications and renewals, enhancing efficiency. There is also an increasing focus on sustainability and green building practices, which may become integral to licensing requirements. As the construction industry adapts to new challenges, the NASCLA Guide will continue to play a pivotal role in shaping licensing standards. Contractors can expect more emphasis on ongoing education and adaptation to emerging trends, ensuring the profession remains competitive and innovative.

Encouragement to Utilize the NASCLA Guide

Contractors are strongly encouraged to leverage the NASCLA Contractors Guide as a comprehensive resource for navigating the complexities of licensing, compliance, and professional growth. This guide serves as a one-stop reference, offering clarity on state-specific requirements, exam preparation, and industry best practices. By utilizing the guide, contractors can ensure they meet all legal and regulatory standards, enhancing their credibility and competitiveness. Additionally, the guide provides insights into professional development opportunities, helping contractors stay ahead in a rapidly evolving industry. Embracing the NASCLA Contractors Guide is a proactive step toward building a successful and sustainable contracting business, equipped to meet future challenges and opportunities.

cod mw2 trophy guide

Call of Duty: Modern Warfare 2 offers an immersive experience with a trophy system that rewards skill and dedication. Earning platinum requires completing the campaign on Veteran difficulty and achieving specific multiplayer milestones. This guide provides a comprehensive roadmap to unlock all trophies efficiently.

1.1 Overview of the Game and Trophy System

Call of Duty: Modern Warfare 2 is a first-person shooter with a gripping narrative and intense multiplayer action. The trophy system rewards players for completing specific tasks, such as finishing the campaign on Veteran difficulty, achieving mission-specific milestones, and excelling in multiplayer modes. The game features 108 trophies, including one platinum, 14 gold, 29 silver, and 64 bronze trophies. These achievements range from story-related milestones to skill-based challenges, offering a mix of single-player and multiplayer objectives. Earning all trophies requires dedication, strategic play, and mastery of both the campaign and online modes. This guide will help players navigate the trophy system efficiently, ensuring they unlock every achievement on their journey to the coveted Platinum trophy.

1.2 Importance of Trophies in Modern Warfare 2

Trophies in Call of Duty: Modern Warfare 2 serve as a testament to a player’s skill, dedication, and completion of challenging tasks. They provide a sense of accomplishment and motivation, encouraging players to explore all aspects of the game. From completing the campaign on Veteran difficulty to mastering multiplayer modes, trophies offer a clear roadmap for players to aim for. They also add replay value, as many achievements require multiple playthroughs or specific strategies; Earning trophies not only enhances the gaming experience but also connects players to a community striving for similar goals. For completionists, the pursuit of a Platinum trophy becomes a rewarding journey that showcases mastery of the game.

Campaign Walkthrough and Story-Related Trophies

Navigate the intense campaign, completing missions like “Wetwork” and “Cartel Protection” to earn story-related trophies. Some achievements are hidden, requiring specific actions during gameplay.

2.1 Completing the Campaign on Veteran Difficulty

Conquering the campaign on Veteran difficulty is a significant challenge, requiring precision, patience, and strategic play. This mode is designed for experienced players, with relentless enemies and limited room for error. To succeed, focus on taking cover frequently, utilizing weaponry effectively, and exploiting enemy AI patterns. Completing the campaign on a lower difficulty first can help familiarize yourself with mission layouts and enemy positions. Certain strategies, such as replaying missions to learn enemy movements, can prove invaluable. While cheats or exploits might offer shortcuts, relying on skill and persistence is the most rewarding approach. Earning this trophy is a testament to your mastery of Modern Warfare 2’s campaign, showcasing your ability to overcome its toughest challenges.

2.2 Mission-Specific Trophies: “Wetwork,” “Cartel Protection,” and “The Pit”

Earning mission-specific trophies in Call of Duty: Modern Warfare 2 requires careful execution and attention to detail. For “Wetwork,” navigate the stealth mission without triggering alarms, using silenced weapons and staying off the radar. In “Cartel Protection,” prioritize protecting the cartel member, eliminating threats swiftly and maintaining proximity to your target. “The Pit” demands completing the Gauntlet challenge under 30 seconds, focusing on speed and accuracy; Each trophy has unique requirements, so adapt your playstyle accordingly. Practice and familiarity with mission layouts will help streamline the process. These trophies highlight specific skills, making them memorable achievements in your journey to platinum.

2.4 Hidden Trophies in the Campaign

Hidden trophies in Call of Duty: Modern Warfare 2 add an extra layer of challenge and reward for completionists. These trophies are not immediately apparent and require specific actions or discoveries during the campaign. For example, some are tied to completing missions without killing certain characters or finding hidden items in specific levels. Others may involve unique gameplay moments or secret objectives. To unlock these, pay close attention to mission briefings and environmental clues. Experimenting with different actions and exploring off-the-beaten-path areas can also reveal these hidden achievements. While some are straightforward, others require precise execution, making them a fun yet tricky part of the trophy hunt. Keep an eye on your progress tracker to identify which ones you’ve missed and replay missions as needed.

Multiplayer Trophies and Achievements

Multiplayer trophies in Call of Duty: Modern Warfare 2 reward skill, strategy, and dedication. These achievements range from earning kills to completing specific objectives in matches, requiring consistent performance and teamwork to unlock.

3.1 Earning Trophies in Multiplayer Modes

Earning trophies in Call of Duty: Modern Warfare 2 multiplayer requires a combination of skill, strategy, and consistent play. Many achievements are tied to specific modes like Team Deathmatch, Domination, and Ground War. Progressing through multiplayer modes allows players to unlock rewards and earn experience points to level up. Trophies often reward objective play, such as capturing points or completing challenges. Players should focus on improving their K/D ratio and participating in team-based objectives to maximize progress. Multiplayer trophies also encourage players to experiment with different playstyles and weapons, adding variety to the gameplay experience. Consistency and strategic thinking are key to unlocking these achievements efficiently.

3.2 Specific Multiplayer Achievements: “Time for Pints” and “Hellride”

The multiplayer mode in Call of Duty: Modern Warfare 2 features unique achievements like “Time for Pints” and “Hellride.” “Time for Pints” requires players to earn 5 kills in 10 seconds in a single match, showcasing their aggressive playstyle. This can be achieved by using an SMG with the right attachments and playing in fast-paced modes like Team Deathmatch or Kill Confirmed. “Hellride,” on the other hand, demands 7 kills while in a helicopter, emphasizing teamwork and precision. Players should focus on maps with vehicle spawns and coordinate with their team to secure this achievement. Both trophies highlight the game’s emphasis on skill and strategy in competitive multiplayer.

3.3 Grinding for Experience and Levels

Grinding for experience and levels is a crucial part of unlocking multiplayer trophies in Call of Duty: Modern Warfare 2. Players must earn enough XP to progress through the ranks, which unlocks better weapons, attachments, and perks. This process can be time-consuming, but using Double XP events and completing daily Challenges can significantly speed it up. Focusing on objective-based modes like Domination or Hardpoint often rewards more XP due to capturing and holding points. Additionally, equipping weapons with XP-boosting attachments can increase earnings. Consistency is key, as the journey to max level requires dedication. While grinding can feel tedious, it’s essential for unlocking certain trophies and improving overall gameplay efficiency.

Collectibles and Hidden Items

Collectibles like Intel are hidden throughout the campaign missions, rewarding players with XP and unlocking special trophies. Use night vision to spot them in The Pit and Exodus. Collecting all Intel unlocks exclusive rewards and trophies.

4.1 Finding Intel Locations Across the Campaign

Finding Intel in Call of Duty: Modern Warfare 2 requires careful exploration and attention to detail. There are 45 Intel items hidden across the campaign missions, with 3 Intel per mission on average. Use night vision goggles to spot these items more easily, as they emit a faint blue glow. Key missions like “The Pit” and “Wetwork” have multiple Intel locations, often hidden in hard-to-reach areas or inside buildings. Keep an eye out during quieter moments in the game, as these are prime opportunities to search for Intel. Use the in-game Intel tracker to monitor your progress, and consider replaying missions to find any missed items. Thoroughly exploring each environment ensures you don’t miss these hidden collectibles.

4.2 Unlocking Hidden Rewards and Trophies

Unlocking hidden rewards and trophies in Call of Duty: Modern Warfare 2 adds an extra layer of challenge and satisfaction. Many trophies are tied to specific achievements, such as completing missions under certain conditions or achieving high kill streaks. Some rewards, like bonus XP or exclusive calling cards, are unlocked by completing hidden objectives or finding all Intel in a mission. For example, the “Ghost” trophy requires completing a mission without being detected, while others may involve unique playstyles or exploiting enemy AI. Use mission select to replay levels and focus on specific objectives, ensuring no opportunity for rewards is missed. A detailed guide can help track progress and identify overlooked challenges, making the journey to unlocking everything more efficient and enjoyable.

Tips and Tricks for Earning Trophies Efficiently

Stay focused on mission objectives, utilize in-game tools, and maintain consistency. Leverage guides to streamline trophy hunting without repeating strategies from other sections.

5.1 Utilizing the Right Playstyle for Trophy Hunting

Adapting your playstyle is crucial for efficiently earning trophies in Call of Duty: Modern Warfare 2. For story-related trophies, a stealthy approach often minimizes retries, while aggressive playstyles shine in multiplayer. Balancing accuracy and speed helps in both campaign and multiplayer achievements. Experiment with different tactics to match trophy requirements, such as completing missions without dying or earning kills streaks. Using the right weapons and perks can significantly streamline the process, especially for challenging trophies like “Cartel Protection” or “Wetwork.” Understanding the game’s mechanics and enemy patterns ensures a smoother journey. Tailor your strategy to each trophy’s demands, and don’t hesitate to switch playstyles as needed. Consistency and patience are key to unlocking the most elusive achievements.

5.2 Exploiting Glitches and Optimizing Routes

Exploiting glitches and optimizing routes can significantly accelerate trophy progression in Call of Duty: Modern Warfare 2. Certain mission-specific glitches allow players to bypass challenging sections or unlock hidden paths, making trophy hunting more efficient. For example, some glitches enable players to skip entire enemy encounters or access areas early, reducing the time required to earn select achievements. Optimizing routes is equally important, especially for collectible-related trophies like intel gathering. Mapping out the most efficient paths ensures minimal backtracking and faster completion of objectives. Staying updated with community-discovered glitches and strategies can provide a competitive edge. However, be cautious, as some glitches may cause unintended consequences or disqualify achievements. Always test strategies in a safe environment before committing to them for trophy unlocks.

5.3 Managing Difficulty and Playthroughs

Managing difficulty and playthroughs is crucial for efficiently earning trophies in Call of Duty: Modern Warfare 2. Start by completing the campaign on lower difficulties to unlock story-related trophies and gain familiarity with mission layouts. Save Veteran difficulty for a dedicated playthrough, as it requires precise strategy and patience. For collectibles and hidden trophies, consider separate playthroughs to focus solely on these objectives. Replay missions in the “Recounted Missions” section to clean up any missed achievements. Adjusting difficulty mid-playthrough can also help bypass challenging sections. Balancing difficulty with trophy requirements ensures a smoother journey toward the platinum trophy. Proper playthrough management is essential for minimizing frustration and maximizing efficiency.

Platinum Trophy Requirements

To earn the Platinum Trophy in Call of Duty: Modern Warfare 2, you must unlock all other trophies, including story-related, multiplayer, and collectible achievements. This requires completing the campaign on Veteran difficulty, finding all hidden intel, and achieving specific multiplayer milestones. Ensure you account for any hidden or secret trophies and be prepared for the time investment needed to master challenging sections and gameplay modes.

6.1 Estimated Time to Platinum

Earning the Platinum Trophy in Call of Duty: Modern Warfare 2 typically requires around 30-40 hours of gameplay for an average player. This includes completing the campaign, unlocking all story-related trophies, and achieving multiplayer milestones. However, skilled players familiar with the game’s mechanics may finish faster, while completionists searching for hidden intel or mastering Veteran difficulty could take up to 50 hours. Multiplayer achievements, such as “Time for Pints,” may add significant time depending on your playstyle and dedication. Be prepared for multiple playthroughs and a mix of challenging solo and online efforts to unlock every trophy seamlessly.

6.2 Breaking Down the Trophy List by Difficulty

The trophy list for Call of Duty: Modern Warfare 2 is divided into four difficulty categories: Bronze, Silver, Gold, and Platinum. Approximately 40-50 trophies are Bronze, focusing on basic achievements like campaign completion and multiplayer participation. Silver trophies, numbering around 20-25, require more effort, such as completing specific missions or reaching certain multiplayer milestones. Gold trophies, totaling 10-15, are challenging, involving feats like earning medals in multiplayer or completing the campaign on Veteran difficulty. The Platinum trophy is the ultimate reward for unlocking all others. This breakdown helps players understand the progression and focus on the most difficult achievements last.

Completing the Platinum trophy in Call of Duty: Modern Warfare 2 is a challenging yet rewarding journey. Stay dedicated, and enjoy the satisfaction of 100% completion!

7.1 Summarizing the Journey to Platinum

Earning the Platinum trophy in Call of Duty: Modern Warfare 2 is a testament to skill, patience, and dedication. This journey requires mastering both the campaign and multiplayer, as well as meticulously hunting for collectibles. From the intense Veteran difficulty playthroughs to the grind of multiplayer achievements, every step demands focus and perseverance. The satisfaction of unlocking the Platinum trophy is a rewarding conclusion to the experience. Stay disciplined, leverage the guide, and remember that every trophy brings you closer to the ultimate goal. Congratulations on your progress, and here’s to your continued gaming success!

7.2 Final Tips for Completionists

For completionists aiming to conquer Call of Duty: Modern Warfare 2, persistence and organization are key. Prioritize creating a checklist to track progress, ensuring no trophy is overlooked. Leverage online guides and community forums for hidden secrets and optimal routes. Stay patient, especially during challenging sections like Veteran difficulty or multiplayer grind. Avoid burnout by taking breaks and celebrating small milestones. Lastly, embrace the journey—earning every trophy is a badge of honor that reflects dedication and skill. With focus and determination, the Platinum trophy is within reach. Good luck, and enjoy the satisfaction of a fully completed game!