manual to automatic conversion price uk

Overview of Manual to Automatic Conversion Costs in the UK

Converting from manual to automatic transmission in the UK involves significant financial commitment. Costs vary widely, influenced by vehicle type, parts availability, and labour rates. Expect complexities and potential unexpected expenses during the process.

Complexity of Conversion

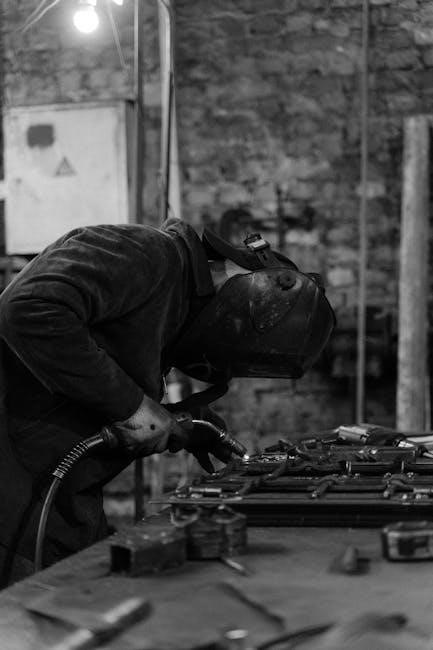
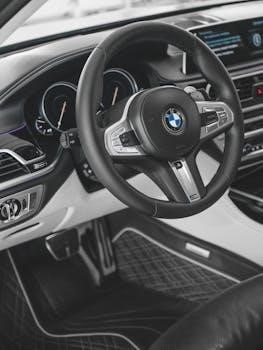
Manual to automatic transmission conversion is a complex task, not a simple swap. It requires a deep understanding of automotive mechanics and electronics. The process involves changing not just the gearbox but also the torque converter, wiring, and potentially the car’s computer systems. This level of intricacy means the work must be carried out by a qualified professional to ensure safety and correct functionality. Furthermore, the vehicle’s original design may present unique challenges during the conversion.

Factors Affecting Conversion Price

Several factors influence the cost of converting from manual to automatic. These include the vehicle’s make, model, age, and the availability of necessary parts, which can greatly affect the overall price.

Vehicle Model and Age

The specific model and age of your vehicle significantly impact conversion costs. Older vehicles may have fewer readily available parts, potentially increasing expenses. Conversely, converting a newer model might involve more complex electronics, necessitating specialized expertise and thus leading to higher labour charges. The compatibility of the automatic transmission with the existing chassis also plays a crucial role in the overall pricing;

Availability of Parts

The ease with which necessary parts can be sourced directly affects the total conversion cost. If specific automatic transmission components are rare or need to be imported, prices will escalate. Vehicles with readily available aftermarket or used parts will typically have lower conversion costs. The time taken to acquire these parts can also extend the overall project duration, impacting labour expenses as well.

Labour Costs for Conversion

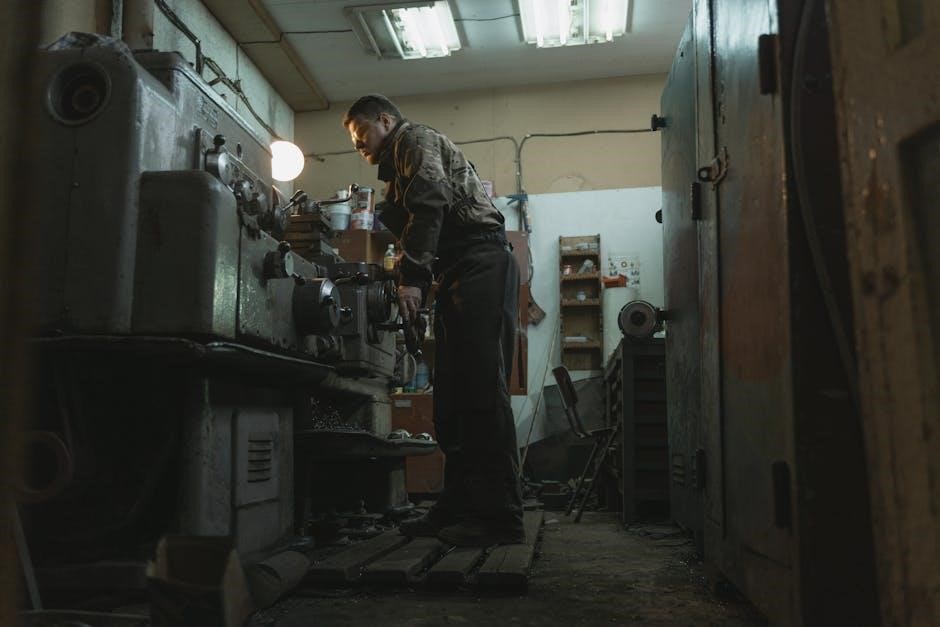
Labour expenses are a substantial factor in the overall conversion cost. These costs depend on whether the work is done in a professional garage or undertaken as a DIY project.

Garage vs DIY Conversion

Choosing between a garage and DIY conversion significantly impacts labour costs. Garages offer expertise and tools, but at higher rates, often including a fixed labour charge plus parts costs. DIY conversions can save money on labour but require mechanical skills, specialized tools, and could lead to potential complications if not done correctly. It is important to also consider the time commitment needed for a DIY project.

Estimated Labour Hours

Labour hours for a manual to automatic conversion can vary, with some estimates suggesting around 7 hours for a basic swap. More complex conversions involving additional modifications or older vehicles might require significantly more time. Factors like the complexity of wiring and component replacement directly influence the final labour hours, impacting overall cost. Thorough research and precise calculations are vital.

Parts Required for Conversion

Essential parts include the automatic transmission, torque converter, and associated wiring. Depending on the vehicle, a new center console and gear shift knob may also be needed for the conversion.

Transmission and Torque Converter

The automatic transmission is the core component for this conversion, replacing the manual gearbox. A torque converter is also crucial, as it transfers power from the engine to the transmission, differing significantly from the clutch system in manual vehicles. Selecting compatible and reliable parts is vital for the successful conversion process. These components are the heart of the system.

Wiring and Electronics

Automatic transmissions require a complex network of wiring and electronic components. This includes the transmission control unit, sensors, and associated wiring harnesses. Integrating these systems into a vehicle originally designed for manual operation can be intricate. Proper installation and compatibility are crucial to ensure seamless functionality and prevent electrical issues. These can impact the overall cost.

Additional Costs to Consider

Beyond core components, factor in potential unexpected issues and post-conversion adjustments. These include software updates, sensor recalibration, and addressing any unforeseen mechanical or electrical complications. Budget for these extra expenses.

Potential for Unexpected Issues

During a manual to automatic conversion, unforeseen problems can arise, including compatibility issues with the vehicle’s existing electronics, wiring harness complications, and the need for additional custom fabrication. These unexpected hurdles can significantly inflate the overall cost. Be prepared for potential delays and extra expenses to address these complications, ensuring a successful and reliable conversion process, and have a contingency fund.

Post-Conversion Adjustments

After completing a manual to automatic transmission conversion, various adjustments may be necessary. These could include fine-tuning the gear ratios, recalibrating the engine control unit (ECU) to accommodate the new transmission, and addressing any sensor discrepancies. Also, ensure proper alignment and fluid levels are checked. These post-conversion adjustments are crucial for optimal performance and may incur additional costs, so factor in these potential expenses when planning your budget.

Pros and Cons of Manual to Automatic Conversion

Automatic conversions offer ease of driving and potentially better power handling. However, they are expensive, complex, and may reduce driver engagement, so weigh the benefits against the drawbacks.

Advantages of Automatic Transmission

Automatic transmissions provide a smoother, more relaxed driving experience, particularly beneficial in heavy traffic. They eliminate the need for manual gear changes, reducing driver fatigue and allowing for increased focus on the road. Additionally, automatic systems can often handle higher engine power outputs, potentially extending the lifespan of the drivetrain. This ease of use makes them popular with many drivers in the UK.

Disadvantages of Automatic Conversion

Automatic conversions are complex, often costing more than the vehicle’s value, with potential issues arising from mismatched components or incorrect installations. The process can lead to decreased fuel efficiency and altered vehicle handling. Furthermore, it may be difficult to find mechanics skilled in this specific type of conversion. It can be very time consuming and disruptive. These conversions could affect the future resale value of the car.

Alternatives to Conversion

Instead of conversion, consider selling your manual car and purchasing an automatic model. Exploring other vehicle modifications might be more cost-effective and less complex than a full transmission conversion.

Selling and Buying an Automatic

A practical alternative to a manual to automatic conversion is selling your existing manual vehicle and purchasing a car already equipped with an automatic transmission. This approach often proves more economical, bypassing the complexities and costs associated with a full conversion. It also provides a quicker solution, allowing you to enjoy an automatic driving experience immediately, without the hassle of extensive modifications. Consider this option for a simpler transition.

Exploring Other Modifications

Before committing to a manual to automatic transmission conversion, consider other vehicle modifications that might address your driving needs. Options like short-throw shifters or clutch upgrades can enhance the manual driving experience. These alternatives may prove less costly and complex than a full conversion. Assess whether these modifications offer a viable solution that aligns with your preferences and budget, potentially avoiding the extensive work of a complete transmission swap.

Specific Examples of Conversion Costs

Conversion costs vary greatly. A Mini conversion might range from £850 to £950 for labour and parts, while other vehicles require custom quotes. Prices depend on vehicle specifics.

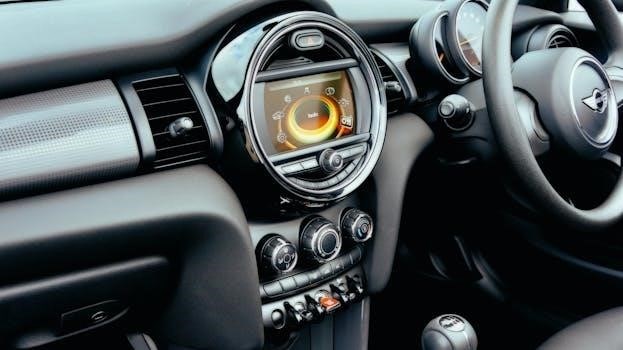
Mini Conversion Example

For a Mini, converting from automatic to manual transmission has a somewhat fixed price. Expect to pay around £850 for labour and parts, potentially rising to £950 if it’s a Japanese import with factory-fitted air conditioning. This service typically requires the car to be at the workshop for a minimum of three days, highlighting the scope of the work involved, this is the only example that has fixed pricing.

Other Vehicle Examples

Conversion costs for other vehicles vary significantly. Some older cars might present challenges due to differing body designs, impacting the complexity and price of the conversion; Estimates range from £1,000 for DIY jobs using junkyard parts to over £4,000 when using a professional shop. The availability of an automatic version of your car will affect how easy and therefore how costly it will be to convert.

Finding a Reputable Conversion Specialist in the UK

Choosing a qualified mechanic is essential for a successful conversion. Look for specialists with experience in transmission conversions and check reviews to ensure a high standard of work.

Importance of a Qualified Mechanic

A qualified mechanic is crucial for a manual to automatic conversion, ensuring the complex process is handled correctly. They possess the necessary technical expertise to manage intricate wiring, transmission installation, and potential compatibility issues. Choosing an experienced professional minimizes the risk of errors, ensures safety, and can prevent costly future repairs. A reputable mechanic provides peace of mind, knowing your vehicle is in capable hands.

Checking Reviews and Experience

Before entrusting your vehicle for a manual to automatic conversion, it’s vital to check reviews and experience. Look for testimonials that highlight the mechanic’s proficiency in similar conversions. Verify their track record with complex projects and assess customer feedback regarding their service quality. Positive reviews and substantial experience indicate a higher likelihood of a successful and reliable conversion. This step helps avoid potential problems and ensures your investment is worthwhile.

the story bible study guide pdf

The Story Bible Study Guide: An Overview

The Story Bible Study Guide PDF offers a captivating journey through the Bible‚ presenting key narratives in a chronological order. This guide enhances understanding by revealing God’s overarching plan. The 31 week curriculum helps individuals and groups engage with scripture.

The Story” presents the Bible as a seamless narrative‚ combining scripture with transitional text. This approach makes it accessible for both new and seasoned readers. Randy Frazee emphasizes understanding scripture through two perspectives: our lower story and God’s upper story. This enhances personal engagement. The study guide helps individuals align their lives with God’s plan revealed in the Bible’s characters and events. “The Story” fosters a deeper connection to God and promotes spiritual growth.

Key Components of The Story Bible Study Guide

The Story Bible Study Guide integrates personal reflection and group discussion. It includes video content to enhance understanding. The guide also explores both the “Upper Story” and “Lower Story”. This helps participants to apply biblical teachings.

Personal Time and Group Discussion

Within The Story Bible Study Guide‚ a critical component is the balance between personal reflection and group discussion. Each of the 31 sessions is designed with dedicated personal time‚ encouraging participants to study and reflect on the material before meeting. This individual preparation enhances engagement during group discussions‚ allowing for deeper insights and shared understanding. The group setting provides an opportunity to apply personal learning to real-life situations.

Video Curriculum Integration

The Story Bible Study Guide seamlessly integrates with a video curriculum‚ enhancing the learning experience. The video component features teachings from Randy Frazee. The videos provide visual and auditory learners with an engaging way to grasp the biblical narrative. Each video segment is designed to complement the study guide’s content‚ offering additional context and perspective. This integration makes the study more dynamic‚ and accessible‚ fostering a deeper connection with the material covered in each session.

Benefits of Using The Story Bible Study Guide

The Story Bible Study Guide offers enhanced biblical understanding and encourages deeper engagement with scripture. It fosters community through group discussions and provides a chronological view. Participants will gain a new perspective on God’s plan.

Understanding the Upper and Lower Stories

The Story Bible Study Guide emphasizes understanding the Bible through two lenses: the Upper Story and the Lower Story. The Upper Story represents God’s overarching narrative and divine plan for humanity. The Lower Story encompasses the individual stories of people interacting with God‚ revealing their personal journeys‚ struggles‚ and triumphs within the context of God’s grand scheme. Recognizing both perspectives offers a deeper‚ more meaningful engagement with scripture and enhances understanding.

Engaging with Scripture Chronologically

The Story Bible Study Guide facilitates a unique approach to Bible study by presenting scripture in chronological order. This method allows participants to experience the Bible as a cohesive narrative‚ unfolding from Genesis to Revelation. By following the timeline of events‚ individuals gain a clearer understanding of the connections between different stories and characters. This chronological framework helps to reveal the progressive nature of God’s plan and the unfolding of his promises.

How to Use The Story Bible Study Guide

To effectively utilize The Story Bible Study Guide‚ prepare individually by reviewing the assigned chapter. Engage in group discussions‚ facilitated by the guide’s questions‚ to deepen comprehension and foster community. Embrace the Upper and Lower stories.

Individual Preparation

Before participating in group sessions‚ dedicate personal time to reading the assigned chapter from The Story. Reflect on the key events‚ characters‚ and themes presented in the narrative. Consider how the Lower Story of individuals interacts with God’s Upper Story. Engage with the provided study questions‚ noting personal insights and areas where further clarification is needed. By preparing thoughtfully‚ you’ll enrich both your understanding and group discussions.

Facilitating Group Sessions

As a facilitator‚ create a welcoming environment for open discussion and shared learning. Begin by summarizing the chapter from The Story‚ highlighting major themes. Encourage participants to share their individual insights from the personal preparation. Guide the discussion through the study questions‚ ensuring everyone has a chance to contribute. Be prepared to offer additional context or clarification‚ drawing from the video curriculum or other resources.

Available Resources for The Story Bible Study

Enhance your study with various resources‚ including The Story Adult Video Curriculum. There are also free downloadable guides and materials available to facilitate deeper engagement and understanding of the biblical narrative for both individuals and groups.

The Story Adult Video Curriculum

Enhance your study of The Story with the engaging Adult Video Curriculum. Designed to complement The Story Bible Study Guide PDF‚ this video series offers visual insights into the biblical narrative‚ fostering deeper understanding through dynamic storytelling. Each video session corresponds with the weekly study guide content‚ creating a cohesive learning experience. Facilitate meaningful group discussions and personal reflections using this valuable resource. Explore God’s story and your role.

Free Downloadable Guides and Materials

Access a wealth of resources to support your journey through The Story. Enhance your understanding and engagement with free downloadable guides and materials. These supplements complement The Story Bible Study Guide PDF. Discover helpful tools for individual reflection and group discussion. Uncover deeper insights into biblical characters and events. Utilize these resources to enrich your study and connect with God’s story on a more personal level. Expand your study today.

The Story Bible Study Guide: Structure and Content

The Story Bible Study Guide PDF presents a 31-week curriculum‚ focusing on key Bible characters and events. Its chronological structure enhances understanding of God’s plan. Each session includes personal study and group discussion.

31-Week Curriculum Design

The Story Bible Study Guide PDF is structured around a 31-week curriculum‚ designed to facilitate a deep dive into the Bible. This comprehensive approach allows participants to explore the overarching narrative of Scripture. Each week focuses on specific chapters and themes‚ providing a balanced study experience. The curriculum integrates personal reflection‚ group discussion‚ and video content. This combination creates a multi-faceted engagement with the Bible’s key stories. Participants can easily follow the chronological progression‚ fostering a strong understanding of God’s plan.

Focus on Bible Characters and Events

The Story Bible Study Guide PDF places a strong emphasis on exploring the lives of significant Bible characters and pivotal events. This focus allows participants to connect with the human element of Scripture. By examining the stories of individuals like Moses‚ Deborah‚ and Joseph‚ students gain insights into their faith journeys. The curriculum carefully highlights key events‚ such as the Exodus and the establishment of the covenant. Through this lens‚ students can better grasp God’s interaction with humanity. Understanding these characters and events fosters a deeper appreciation for the Bible’s narrative.

Target Audience for The Story Bible Study Guide

The Story Bible Study Guide PDF is designed for small groups‚ Sunday school classes‚ and individuals seeking deeper Bible engagement. It benefits both beginners and seasoned Bible readers. The 31-week curriculum can be adapted for various group settings.

Small Groups and Sunday School Classes

The Story Bible Study Guide PDF is ideally suited for small groups and Sunday school classes‚ offering a structured format for collective learning and discussion. The 31-week curriculum provides a cohesive framework for exploring biblical narratives chronologically. Its design promotes interactive engagement‚ allowing participants to share insights and apply lessons to their lives. The guide fosters a sense of community as groups journey through the Bible together‚ deepening their understanding and faith. Facilitators can leverage the guide to create meaningful and impactful sessions.

Individuals Seeking Deeper Bible Engagement

For individuals yearning to connect with the Bible on a more profound level‚ The Story Bible Study Guide PDF provides an invaluable resource. Its chronological arrangement of biblical narratives fosters a holistic comprehension of God’s unfolding plan. The guide encourages personal reflection and application of scriptural teachings‚ promoting spiritual growth. With its structured format‚ individuals can systematically explore key events and characters‚ gaining new perspectives and insights. This study guide helps individuals deepen their faith and understanding through immersive Bible engagement.

Where to Find The Story Bible Study Guide PDF

The Story Bible Study Guide PDF can be found through online retailers‚ and publisher websites. Many sites offer free downloadable guides. Check ministry websites for supplemental materials to enrich your study experience.

Online Retailers and Publishers

Numerous online retailers‚ such as Amazon‚ offer The Story Bible Study Guide PDF for purchase. Zondervan‚ the publisher‚ also provides the guide on its official website. Digital versions are available for immediate download after purchase‚ facilitating convenient access. Exploring these platforms ensures you can acquire the study guide from reputable sources‚ often with additional resources and customer support. Always verify the authenticity before downloading.

Free Download Options

While a full PDF of The Story Bible Study Guide is typically not available for free due to copyright‚ some websites offer sample chapters or promotional materials. Walk Thru the Bible provides free downloadable guides. Churches or ministries might occasionally offer limited-time free downloads as part of campaigns. These can provide a glimpse into the guide’s content and format. Always ensure downloads are from trusted sources to avoid malware.

Other Bible Study Resources and Tools

Beyond The Story‚ resources like Walk Thru the Bible guides offer alternative approaches. Comprehensive Bible study editions provide in-depth analysis. These tools enhance understanding and engagement with scripture‚ catering to diverse learning styles.

Walk Thru the Bible Guides

Walk Thru the Bible guides offer a dynamic approach to scripture‚ providing free downloadable resources that help individuals and groups dive deeper into God’s Word. These guides complement The Story Bible Study Guide PDF by offering unique perspectives and interactive learning experiences. They often incorporate visual aids and mnemonic devices to enhance comprehension and retention‚ making Bible study engaging and accessible. These guides cater to diverse learning preferences‚ ensuring a well rounded approach to studying scripture.

Comprehensive Bible Study Editions

Comprehensive Bible study editions provide in depth resources for serious students of scripture. These editions often include detailed commentary‚ maps‚ and historical context to enrich understanding. They enhance the experience of The Story Bible Study Guide PDF by offering deeper insights into the original text. They provide tools for detailed analysis and thoughtful reflection. These editions often feature multiple translations and scholarly articles‚ catering to those seeking a rigorous‚ academic approach to Bible study‚ and promoting spiritual growth.

manual roller squeezer pump for peyronie’s disease

Manual roller squeezer pump for peyronies disease is a device used to treat the condition‚ with research showing temporary results and potential benefits for users effectively.

Definition and Purpose of the Device

The manual roller squeezer pump is a device designed to provide temporary relief and treatment for peyronies disease‚ with a focus on improving penile health and function. The device operates by applying gentle pressure to the penis‚ helping to increase blood flow and reduce curvature. The purpose of the manual roller squeezer pump is to provide a non-invasive and non-surgical treatment option for individuals suffering from peyronies disease‚ with the goal of improving overall penile health and reducing symptoms associated with the condition. By using the device‚ individuals can potentially experience improved penile function and reduced discomfort‚ making it a valuable treatment option for those affected by peyronies disease. The device is typically used in conjunction with other treatments‚ and its effectiveness can vary depending on individual circumstances and usage. Overall‚ the manual roller squeezer pump is a valuable tool in the treatment of peyronies disease.

How the Manual Roller Squeezer Pump Works

The device uses vacuum pressure to aid in penis extension and improve blood flow effectively always.

Basic Principles of the Device

The manual roller squeezer pump operates on the principle of vacuum pressure‚ which helps to increase blood flow and promote penis extension. This is achieved through the creation of a partial vacuum‚ which draws blood into the penis‚ causing it to become engorged. The device is designed to be used in a specific manner‚ with the user following a series of steps to ensure safe and effective operation. The basic principles of the device are centered around the concept of penile traction‚ which has been shown to be effective in promoting penis extension and improving erectile function. By understanding the basic principles of the device‚ users can better appreciate its potential benefits and limitations‚ and use it in a way that maximizes its effectiveness. The device is a valuable tool for men seeking to improve their sexual health.

Benefits and Limitations of the Manual Roller Squeezer Pump

Manual roller squeezer pump offers benefits and has limitations for users effectively always.

Temporary Results and Permanent Gains

The manual roller squeezer pump provides temporary results‚ with the penis appearing larger for about two hours after use‚ and a harder erection than normal‚ but this is not permanent.
The temporary results are due to the vacuum pressure‚ which aids in penis extension‚ but only when combined with traction‚ as research has shown‚ with studies like Chung and Brock’s review of penile traction therapy.
The temporary nature of the results means that users must continue to use the pump to maintain the desired effects‚ and it is essential to follow the instructions carefully to avoid any discomfort or injury.
The pump’s temporary results can be beneficial for users‚ but it is crucial to understand that permanent gains are not guaranteed‚ and the device should be used as directed to achieve the best possible outcomes‚ with a focus on safe and effective use.

Combining the Manual Roller Squeezer Pump with Traction Therapy

Combining the pump with traction therapy offers a research-backed approach to penis extension and treatment.

Research-Backed Approach to Penis Extension

A research-backed approach to penis extension is crucial for effective treatment‚ with studies such as Chung and Brock’s 2013 review providing valuable insights into penile traction therapy.

The combination of manual roller squeezer pump and traction therapy has shown promising results‚ with a focus on gentle and consistent stretching to promote tissue growth.
This approach is supported by various studies‚ including those published in Therapeutic Advances in Urology‚ which highlight the importance of a comprehensive treatment plan.
By incorporating a manual roller squeezer pump into a traction therapy regimen‚ individuals can potentially achieve significant improvements in penis size and overall sexual health.
A thorough understanding of the research backing this approach is essential for making informed decisions about treatment options.
With the right combination of therapies‚ individuals can experience noticeable gains in penis size and improved erectile function.
Regular use and patience are key to achieving optimal results.

Using the Manual Roller Squeezer Pump Safely and Effectively

Proper use involves following instructions and using lubrication to minimize discomfort and maximize results safely.

Step-by-Step Guide to Operation

To operate the manual roller squeezer pump‚ start by ensuring the device is clean and any attached tubes or gaiters are firmly in place. Next‚ fill the pump with warm water if using a water pump‚ or lubricate if using an air pump. Then‚ insert the penis into the pump using any included comfort sleeve. Activate the pump mechanism and maintain comfortable pressure for the prescribed amount of time. It is essential to follow the manufacturer’s instructions and take necessary precautions to avoid discomfort or injury. The pump should be used in a comfortable and relaxed environment‚ allowing for optimal results. By following these steps‚ users can safely and effectively operate the manual roller squeezer pump to achieve desired outcomes. Regular use and proper maintenance are crucial for optimal performance and longevity of the device.

Potential Risks and Side Effects of the Manual Roller Squeezer Pump

Manual roller squeezer pump may cause sensitivity and mild bruising with proper use and precautions always.

Common Issues and Rare Instances

Common issues with the manual roller squeezer pump include sensitivity and mild bruising‚ which can be alleviated with proper use and precautions. Rare instances may involve significant discomfort‚ even on the lowest setting‚ requiring alternative treatments. Users should be aware of these potential issues and take necessary steps to minimize risks. The pump’s design and functionality can contribute to these issues‚ and it is essential to follow the manufacturer’s instructions carefully. By understanding the common issues and rare instances associated with the manual roller squeezer pump‚ users can make informed decisions about its use and potential benefits for treating peyronies disease‚ with a focus on safe and effective operation‚ using a step-by-step approach to minimize complications. Proper use and maintenance are crucial to avoiding common issues and rare instances. Regular checks and maintenance can help prevent issues.

Alternative Treatments for Peyronies Disease

Treatments include oral medications and implants for peyronies disease management and care options.

Acute Phase Treatment Options

Acute phase peyronies disease treatment options are available‚ including oral medications‚ injections‚ and surgery. These treatments aim to reduce pain and curvature of the penis.

Some treatments involve the use of devices and implants to help manage the condition.

It is essential to consult a healthcare professional to determine the best course of treatment for individual cases.

Treatment options may vary depending on the severity of the condition and the patient’s overall health.

In some cases‚ a combination of treatments may be recommended to achieve the best results.

Early treatment can help improve outcomes and reduce the risk of long-term complications.

Healthcare professionals can provide guidance on the most effective treatment options for acute phase peyronies disease.

miami-dade school calendar 2024 2025 pdf

Miami-Dade School Calendar 2024-2025 PDF: An Overview

The Miami-Dade County Public Schools calendar for 2024-2025‚ issued in August 2024‚ outlines important dates. This includes the first and last days of school‚ teacher professional development days‚ and key holidays for elementary and secondary students.

Key Dates for the 2024-2025 School Year

The 2024-2025 academic year in Miami-Dade County Public Schools includes key dates such as the start and end of school‚ scheduled breaks‚ and important holidays. Review the official calendar for details.

First Day of School

The first day of school for Miami-Dade County Public Schools in the 2024-2025 academic year is a significant date for students‚ parents‚ and teachers alike. According to the official school calendar‚ students will return to classrooms on August 14‚ 2024. This marks the commencement of a new academic journey filled with learning‚ growth‚ and opportunities.

As families prepare for the start of the school year‚ it’s essential to review the school calendar for important dates and events. Parents should ensure their children are well-prepared with the necessary school supplies and a positive mindset for a successful academic year. The first day sets the tone for the entire year‚ fostering excitement and a commitment to learning.

The administration and staff have worked to create a welcoming and supportive environment for all students on their first day back. This includes orientation activities‚ classroom introductions‚ and opportunities for students to reconnect with their peers and teachers.

Last Day of School

The last day of school in the Miami-Dade County Public Schools for the 2024-2025 academic year is a momentous occasion‚ signaling the end of a year filled with learning and accomplishments. As students and teachers look forward to a well-deserved break‚ it’s essential to mark this date on the calendar: June 5‚ 2025.

This day represents the culmination of hard work‚ dedication‚ and academic growth. Students will celebrate their achievements‚ bid farewell to their teachers and classmates‚ and eagerly anticipate the summer break. Teachers‚ likewise‚ will reflect on their students’ progress and prepare for the next academic year.

The school administration encourages students to finish the year strong‚ completing all assignments and preparing for final exams. Parents are urged to support their children in these final weeks‚ ensuring they stay focused and motivated. The last day of school is not just an end but also a stepping stone toward future educational endeavors.

Important Holidays and Breaks

The Miami-Dade County Public Schools calendar for 2024-2025 includes several key holidays and breaks‚ providing students and staff with essential time off. These breaks are strategically placed throughout the academic year to promote rest and rejuvenation‚ ensuring everyone returns refreshed and ready to learn.

Notable holidays include Labor Day‚ Thanksgiving Break‚ Winter Recess (December 23‚ 2024 ౼ January 5‚ 2025)‚ Martin Luther King Jr. Day‚ Presidents’ Day‚ and Spring Break. These breaks offer opportunities for family time‚ travel‚ and personal enrichment. It’s crucial for families to plan around these dates to maximize the benefits of these periods.

The calendar also marks days off for teacher planning and professional development‚ where teachers engage in training and preparation. Awareness of these dates helps parents coordinate childcare and activities. By observing these holidays and breaks‚ the Miami-Dade school system supports a balanced and productive learning environment.

Accessing the Official Miami-Dade School Calendar 2024-2025 PDF

The official Miami-Dade County Public Schools calendar for the 2024-2025 academic year is readily available in PDF format through multiple channels. Parents‚ students‚ and staff can access this crucial document via the school district’s official website‚ ensuring everyone has access to the most up-to-date information regarding important dates and events.

Typically‚ the calendar can be found in the “Calendars” or “Resources” section of the Miami-Dade County Public Schools website. Alternatively‚ a direct link may be provided on school websites or through official communications. The PDF format ensures easy download and printing for convenient reference.

Additionally‚ physical copies may be available at school administrative offices. Always verify the document’s revision date‚ as updates may occur. Accessing the official calendar ensures alignment with school schedules and activities.

Miami-Dade School Calendar 2024-2025 PDF: Teacher Planning Days

The Miami-Dade school calendar includes designated Teacher Planning Days. These days are crucial for professional development and preparation. Check the official PDF for specific dates and details.

Teacher Professional Development Days

Miami-Dade County Public Schools allocates specific days for teacher professional development‚ as indicated in the 2024-2025 school calendar. These days are essential for educators to enhance their skills and knowledge. New teachers may have options regarding additional workdays.

Teachers new to Miami-Dade County Public Schools might choose to work on June 9th and 10th in 2025. This would be instead of working on one or two designated professional development days. One such day is October 3rd‚ as noted in the calendar.

These dedicated days allow teachers to engage in training‚ collaborate with colleagues‚ and refine their teaching methods. The goal is to improve the quality of education. For students across the Miami-Dade school system‚ this will improve outcomes.

Consult the official 2024-2025 calendar for exact dates and details regarding teacher professional development opportunities throughout the academic year.

Miami-Dade School Calendar 2024-2025 PDF: Grading Periods

The Miami-Dade County Public Schools’ 2024-2025 calendar clearly defines the grading periods for elementary and secondary students. These periods mark the intervals for assessing student performance and issuing grades. The calendar specifies the number of days within each grading period.

Knowing the grading period dates is crucial for parents‚ students‚ and teachers to monitor academic progress. It allows for timely interventions and adjustments to learning strategies. The official PDF calendar‚ revised in June 2024‚ includes this information.

The calendar will detail the start and end dates for each quarter or trimester. This helps families plan accordingly and stay informed about important deadlines. Parents and students should refer to the official document.

Accessing the Miami-Dade County Public Schools 2024-2025 calendar ensures everyone is aware of the grading period schedule. This promotes academic success.

Miami-Dade School Calendar 2024-2025 PDF: Winter and Spring Recess

The Miami-Dade County Public Schools 2024-2025 calendar includes important dates for Winter Recess and Spring Break. These breaks provide students and staff with time off for rest and relaxation.

Winter Recess Dates

The Miami-Dade County Public Schools’ 2024-2025 calendar designates specific dates for the Winter Recess. According to the calendar‚ the college will be closed for winter recess. Students can anticipate a break spanning from December 23‚ 2024‚ to January 5‚ 2025. This extended period allows students and staff to enjoy the holiday season.

It’s a time for families to come together‚ celebrate traditions‚ and recharge before the start of the new year. The recess provides a valuable opportunity for students to relax from their studies and engage in activities outside of school. This break aligns with typical winter holiday schedules. It aims to accommodate various religious and cultural observances during this period.

Parents and guardians should mark these dates on their personal calendars. Planning for travel or family events during this time will be easier. The school system encourages everyone to use this time for rest‚ reflection‚ and quality time with loved ones.

Spring Break Dates

The 2024-2025 Miami-Dade County Public Schools calendar includes a designated period for Spring Break. The exact dates for Spring Break in 2025 vary among school districts. Some districts schedule it in early March‚ while others wait until April. Parents should consult the official Miami-Dade County Public Schools calendar PDF for the precise dates applicable to their children.

This break provides students and staff with a chance to relax and rejuvenate. It follows a period of focused academic work. Spring Break offers an opportunity for travel‚ family activities‚ or simply unwinding at home. Knowing the specific dates well in advance allows families to plan accordingly.

Refer to the official calendar to avoid any scheduling conflicts. The Miami-Dade school calendar is essential for planning vacations. It is also essential for any other commitments during the break. Check the official document for the most accurate and up-to-date information.

Immigration Policies Implications in Miami-Dade Schools

Changes in immigration policies significantly affect Miami-Dade schools‚ where a large portion of the student population is impacted. Data from the 2023-2024 school year reveals that one in every student in Miami-Dade faces implications related to immigration. This underscores the importance of understanding how these policies affect students‚ families‚ and the educational environment.

Miami-Dade County Public Schools must navigate the complexities of supporting students with diverse immigration backgrounds. This includes addressing language barriers‚ providing culturally sensitive resources‚ and ensuring access to necessary social services. The school system employs U.S. citizens and lawfully authorized alien workers to cater to the needs of all students.

Understanding these implications is crucial for educators‚ administrators‚ and community stakeholders. This is to create a welcoming and inclusive learning environment. It is also to promote academic success for all students‚ irrespective of their immigration status.

Changes and Revisions to the Miami-Dade School Calendar 2024-2025

The Miami-Dade County Public Schools calendar for 2024-2025 may undergo changes and revisions after its initial publication. The original version of the calendar was issued in August 2024. However‚ updates can occur due to unforeseen circumstances or administrative decisions.

For instance‚ the calendar revised on August 1‚ 2024‚ reflects potential adjustments to the originally planned dates. These revisions could involve modifications to teacher planning days‚ grading periods‚ or holiday schedules. Similarly‚ a revised version from June 24‚ 2024‚ indicates ongoing adjustments to the academic schedule.

It is crucial for parents‚ students‚ and staff to regularly check for the latest version of the calendar. They can do this through the official Miami-Dade County Public Schools website. Staying informed about any changes ensures everyone is aware of the most up-to-date information. This is related to important dates and events throughout the school year.

edelweiss score pdf

Edelweiss Score PDF: A Comprehensive Guide

“Edelweiss,” a show tune from “The Sound of Music,” evokes deep emotions. Finding a reliable “Edelweiss” score PDF allows musicians to recreate its beauty. This guide navigates the world of “Edelweiss” sheet music in PDF format. It assists musicians in finding suitable arrangements for their skill levels.

“Edelweiss,” a poignant song from the musical masterpiece “The Sound of Music,” holds a special place in the hearts of many. Penned by the legendary duo Richard Rodgers and Oscar Hammerstein II, this tune transcends mere entertainment, embodying themes of patriotism, love, and resilience. Its simple yet evocative melody and heartfelt lyrics have made it a timeless classic, cherished across generations.

The song’s significance extends beyond the stage and screen. It has become a symbol of Austrian identity and resistance, often sung during times of national pride and unity. The Edelweiss flower itself, a rare bloom found high in the Alps, represents purity, courage, and devotion. This symbolism further enhances the song’s emotional depth and enduring appeal.

For musicians and enthusiasts alike, having access to the sheet music of “Edelweiss” is essential. Whether you are a seasoned pianist, a budding vocalist, or a guitarist eager to learn a classic, the “Edelweiss” score provides the gateway to mastering this iconic song. The availability of “Edelweiss” sheet music in PDF format makes it easier than ever to learn and play this beloved tune, allowing you to share its beauty with others.

The Origins of “Edelweiss” from The Sound of Music

“Edelweiss” wasn’t just another song in “The Sound of Music”; it was specifically crafted to provide a powerful, emotional anchor within the narrative. Richard Rodgers and Oscar Hammerstein II created it for the character Captain Georg von Trapp, portrayed by Theodore Bikel in the original Broadway production. The song arises as a subtle act of defiance against the encroaching Nazi regime in Austria.

Initially, the creators sought to incorporate a genuine Austrian folk song into the musical. However, they realized the need for a song that would more directly express the Captain’s love for his homeland and his growing resistance. Thus, “Edelweiss” was born, becoming the Captain’s heartfelt farewell to his beloved Austria.

The placement of “Edelweiss” within the musical is crucial to its impact. It’s sung during a concert scene, where the Captain, initially hesitant to express his patriotism openly, is moved by his family’s love and support. The song becomes a symbol of Austrian identity, and it resonates deeply with the audience, both within the musical and in real life. Its creation fulfilled a specific need, resulting in an iconic piece of musical theater history. The song became an instant classic due to its emotional weight and memorable melody.

Availability of “Edelweiss” Sheet Music

Finding “Edelweiss” sheet music is remarkably straightforward, thanks to its enduring popularity and iconic status. A wide array of options caters to different needs and preferences. Whether you’re seeking a simple piano arrangement, a full orchestral score, or something in between, availability is rarely an issue;

Numerous online platforms specialize in sheet music distribution, providing instant access to digital scores in PDF format. These platforms often offer various arrangements, including versions for piano, voice, guitar, and various instrumental ensembles. Users can typically preview the first page or two before purchasing, ensuring the arrangement suits their skill level and desired instrumentation.

Traditional music stores also carry printed sheet music for “Edelweiss,” particularly in collections of songs from “The Sound of Music.” These physical copies offer the advantage of having a tangible score, preferred by some musicians. Furthermore, libraries may provide access to sheet music collections, allowing musicians to borrow scores for practice or performance.

Free resources also exist, although the quality and accuracy of these scores may vary. Websites dedicated to sharing user-submitted sheet music sometimes host “Edelweiss” arrangements. However, it’s crucial to verify the accuracy of these scores before relying on them for serious performance. Overall, the accessibility of “Edelweiss” sheet music ensures that musicians of all levels can enjoy playing this timeless classic.

“Edelweiss” Sheet Music for Piano

The piano arrangement of “Edelweiss” sheet music is exceptionally popular. It’s a favorite among pianists of varying skill levels. Its melodic simplicity lends itself beautifully to the instrument. Numerous versions cater to beginners, intermediate players, and advanced musicians.

Beginner arrangements often feature simplified harmonies and melodies, focusing on single-note lines or basic chords. These versions are perfect for students learning to read music. They also help develop fundamental piano skills. Intermediate arrangements introduce more complex chords, richer harmonies, and slightly more intricate rhythms. These versions maintain the song’s recognizable melody while offering a greater musical challenge.

Advanced piano arrangements of “Edelweiss” may include elaborate ornamentation, complex harmonies, and virtuosic passages. These arrangements are often intended for solo performances. They showcase the pianist’s technical abilities; Some advanced arrangements even incorporate elements of improvisation or reharmonization.

Regardless of skill level, “Edelweiss” sheet music for piano is readily available online and in print. Many websites offer downloadable PDF versions, often with options for different keys and arrangements. Music stores also carry printed collections featuring “Edelweiss” alongside other popular songs. The accessibility of these resources makes “Edelweiss” a staple in many pianists’ repertoires. Its enduring appeal ensures its continued presence in piano books and online sheet music libraries.

“Edelweiss” Sheet Music for Voice

“Edelweiss” is a beloved song for vocalists, its gentle melody and heartfelt lyrics making it a popular choice for singers of all levels. The availability of “Edelweiss” sheet music for voice ensures its continued performance in various settings.

Vocal arrangements of “Edelweiss” are commonly found in collections of show tunes and popular songs. These arrangements typically include the melody line, lyrics, and chord symbols for accompaniment. The vocal range is generally moderate, making it accessible to most singers.

Different versions of “Edelweiss” sheet music for voice may cater to specific vocal types. Soprano, alto, tenor, and bass arrangements are available, each transposed to a suitable key. These transpositions ensure that the song sits comfortably within the singer’s vocal range.

In addition to solo vocal arrangements, “Edelweiss” is often arranged for choirs and vocal ensembles. These choral arrangements may include SATB (soprano, alto, tenor, bass) parts. They also include SSA (soprano, soprano, alto) or other voice combinations. Choral arrangements add depth and richness to the song.
Finding “Edelweiss” sheet music for voice is relatively easy. Many online resources offer downloadable PDF versions, often with options for different keys and arrangements. Music stores also carry printed vocal scores and songbooks. The accessibility of these resources makes “Edelweiss” a staple in vocal repertoire. Its enduring appeal ensures its continued presence in vocal music collections.

“Edelweiss” Sheet Music for Guitar

“Edelweiss,” with its simple yet elegant melody, translates beautifully to the guitar. Guitar arrangements of “Edelweiss” sheet music are widely available, catering to various skill levels and playing styles. These arrangements offer guitarists the opportunity to explore the song’s harmonic structure and create their interpretations.

Guitar sheet music for “Edelweiss” typically includes standard notation and tablature. Tablature simplifies the learning process for beginners. It shows the specific frets and strings to play. Standard notation provides a more detailed representation of the melody and harmony.

Chord charts are also common in guitar arrangements. These charts display the chord symbols above the melody line, allowing guitarists to strum along. Strumming patterns can be adapted to suit individual preferences;
Fingerstyle arrangements of “Edelweiss” are popular among more advanced guitarists. These arrangements involve playing the melody, harmony, and bass line simultaneously. Fingerstyle versions showcase the guitar’s versatility. They create a rich and full sound.

Many online resources offer free and paid “Edelweiss” sheet music for guitar. These resources often include multiple arrangements. They range from beginner-friendly versions to more complex fingerstyle interpretations. Guitarists can easily find an arrangement that suits their abilities. The accessibility of these resources makes “Edelweiss” a popular choice for guitar players of all levels. Its timeless melody ensures its continued presence in guitar repertoire.

Other Arrangements of “Edelweiss” Sheet Music

Beyond piano, voice, and guitar, “Edelweiss” enjoys diverse arrangements. These adaptations cater to various instruments and ensemble settings. The song’s simple structure and memorable melody make it ideal for creative interpretations.

String arrangements, for string quartets or orchestras, are popular. They highlight the song’s lyrical qualities. Wind ensembles can also perform “Edelweiss.” These arrangements often feature woodwinds and brass. They create a rich and resonant sound.

Choir arrangements are frequently used. SATB arrangements are common. They divide the voices into soprano, alto, tenor, and bass sections. These arrangements are suitable for choirs of various sizes. They provide a full and harmonious rendition of the song.

Instrumental ensembles can also perform “Edelweiss”. These ensembles include combinations of instruments, such as flute, clarinet, and oboe. The arrangements for these groups often emphasize the melody. They create a delicate and charming sound.

Jazz arrangements of “Edelweiss” offer a unique twist. These arrangements incorporate improvisation and syncopation. They transform the song into a jazz standard. These renditions showcase the song’s versatility.

Furthermore, harp arrangements capture the song’s beauty. The harp’s ethereal tones enhance the song’s emotional impact. These arrangements often feature intricate arpeggios. They exploit the harp’s unique sound. The availability of these diverse arrangements makes “Edelweiss” accessible to a wide range of musicians.

Free “Edelweiss” Sheet Music Resources

Finding free “Edelweiss” sheet music online is easier than you might think. Several resources offer legal and high-quality scores. These platforms cater to musicians of all levels. They provide access to a variety of arrangements.

IMSLP (International Music Score Library Project) is a great resource. It hosts a vast collection of public domain scores. You can often find “Edelweiss” arrangements here. Arrangements in the public domain are free to use.

Musescore.com is another popular option. This website has user-uploaded sheet music. Many users share their “Edelweiss” arrangements for free. Be sure to check the quality and accuracy of these scores.

Free-scores.com offers a selection of free sheet music. This site includes various “Edelweiss” arrangements. These arrangements cater to different instruments and skill levels.

Sometimes, composers and arrangers offer free downloads on their personal websites. Searching for “Edelweiss sheet music free download” can reveal these hidden gems.
Libraries are also excellent resources. Many libraries offer sheet music collections. You can often find “Edelweiss” scores. You can borrow them for free with a library card.

When using free resources, be mindful of copyright; Ensure the sheet music is legally available. Respecting copyright laws supports musicians and composers. It ensures the continued creation of music. By utilizing these resources, musicians can access “Edelweiss” sheet music without any cost.

“Edelweiss” Sheet Music in PDF Format

“Edelweiss” sheet music is commonly available in PDF format. This format offers numerous advantages for musicians. PDF files are easily accessible and compatible with various devices. You can view them on computers, tablets, and smartphones. This accessibility makes practicing and performing more convenient.

The PDF format preserves the formatting of the sheet music. It ensures that the notation appears as intended by the arranger. This is crucial for accurate interpretation. High-quality PDFs maintain clarity. They prevent pixelation or blurring. This is particularly important for intricate musical scores.

Downloading “Edelweiss” sheet music in PDF format is straightforward. Many online platforms offer direct downloads. Once downloaded, the file can be printed. This allows musicians to have a physical copy. Printing is useful for rehearsals and performances.

PDFs can be easily shared. This facilitates collaboration among musicians. Sharing is helpful for group practices. It is also useful for music teachers providing materials to students.

Furthermore, PDFs can be annotated. This allows musicians to add markings, fingerings, and other personal notes. Annotation is helpful for customized learning. It allows for tailored performances.

However, it’s important to ensure the PDF is from a reputable source. This guarantees the accuracy and legality of the sheet music. A reliable PDF ensures the best possible musical experience.

“Edelweiss” Sheet Music for Different Skill Levels

“Edelweiss” sheet music caters to a wide range of skill levels, from beginners to advanced musicians. For novice players, simplified arrangements are available. These versions typically feature larger note sizes. They also include fewer complex rhythms. This makes the learning process less daunting.

Intermediate players can explore arrangements with more harmonic richness. These versions often include added chords. They might also feature slightly more intricate fingerings. This provides a balance between challenge and playability.

Advanced musicians can find sophisticated arrangements that showcase their technical prowess. These versions may include complex harmonies. They might also feature elaborate ornamentation. Such arrangements are ideal for performance settings.

Piano arrangements are particularly diverse in catering to different skill levels. Beginner versions often focus on the melody. They use simple chord accompaniments. More advanced piano arrangements incorporate countermelodies. They also include complex harmonic voicings.

Vocal arrangements also vary in complexity. Beginner vocalists can start with unison arrangements. More advanced singers can explore part harmonies. The arrangements allow for richer vocal textures.

Guitar arrangements range from basic chord charts to intricate fingerstyle versions. The versions allow guitarists of all levels to enjoy playing “Edelweiss”.

Ultimately, selecting the right sheet music depends on the individual’s proficiency. Choosing an appropriate arrangement ensures an enjoyable and rewarding musical experience. It also fosters continued growth and improvement.

Arrangers of “Edelweiss” Sheet Music

Numerous talented arrangers have contributed to the vast collection of “Edelweiss” sheet music available today. These individuals possess the skill. They have the expertise to adapt the song for various instruments and skill levels. Their work ensures “Edelweiss” remains accessible to musicians of all backgrounds.

Some arrangers specialize in creating simplified versions for beginner pianists. Others focus on crafting elaborate arrangements for advanced ensembles. Certain arrangers create vocal harmonies. This enhances the song’s emotional depth.
Colton_C3 Tube is one notable arranger. They provide arrangements for solo piano. BarbossaThePianist offers arrangements for piano and tenor voice. Stephen DeCesare has created arrangements for full orchestra. Each arranger brings a unique perspective. They also bring a unique style to their work.

Andrew J Emmet has arranged “Edelweiss” for choir. This allows choral groups to perform the beloved song. These arrangements highlight the beauty of vocal harmonies.

By exploring the diverse arrangements available, musicians can discover new facets of “Edelweiss.” They can tailor the music to their specific needs and preferences. The arrangers’ creativity ensures that the song remains fresh and engaging.

The contributions of these arrangers are invaluable. They have broadened the accessibility of “Edelweiss”. The arrangers have made it possible for countless musicians to experience the joy of playing this timeless classic. Their dedication to musical craftsmanship is truly commendable.

Purchasing “Edelweiss” Sheet Music

The Significance of the Edelweiss Flower in the Song

The edelweiss flower, a small, white bloom found high in the Alps, holds profound significance within the song “Edelweiss.” More than just a pretty flower, it symbolizes courage, dedication, and love for one’s homeland. The flower’s resilience in harsh environments reflects the unwavering spirit of the Austrian people.

In “The Sound of Music,” Captain Georg von Trapp sings “Edelweiss” as a heartfelt expression of his love for Austria. As he sings, the song becomes a symbol of defiance against the encroaching Nazi regime. The edelweiss represents his commitment to his homeland’s values and traditions.

The lyrics, “Edelweiss, Edelweiss, every morning you greet me,” evoke a sense of familiarity and comfort. The flower serves as a reminder of simpler times. It reminds people of the beauty of the Austrian landscape.

The line “Bless my homeland forever” underscores the deep emotional connection between the flower and Austria. The edelweiss embodies the spirit of patriotism and the desire to protect one’s cultural heritage.

The flower’s visual image is powerful. It evokes a sense of purity and innocence. Its delicate appearance belies its strength and resilience. In the context of the song, the edelweiss becomes a potent symbol of hope. It is a symbol of resistance in the face of adversity. It represents the enduring spirit of a nation.

The edelweiss is a timeless emblem of love, loyalty, and resilience.

attilio meucci pdf

Attilio Meucci: An Overview

Attilio Meucci was an Italian statistician and financial engineer. He specialized in quantitative risk and portfolio management. Meucci earned degrees from the University of Milan and Bocconi University. He is the founder of ARPM.

Early Life and Education

Antonio Santi Giuseppe Meucci, known as Attilio Meucci, was born in Italy. While details of his early life are scarce, it is known that he demonstrated an aptitude for both science and invention. He pursued higher education, achieving a BA in Physics from the prestigious University of Milan. This foundational education in physics provided him with a robust understanding of scientific principles.

Furthering his academic pursuits, Meucci obtained an MA in Economics from Bocconi University. This interdisciplinary approach, combining physics with economics, shaped his unique perspective. He later earned a Ph.D. in Mathematics from the University of Milan. His diverse educational background laid the groundwork for his future.

Meucci’s Contributions to Quantitative Finance

Attilio Meucci is a pioneer in quantitative finance. He developed Entropy Pooling and Factors on Demand. His work significantly impacts risk and portfolio management. His methodologies are widely recognized and implemented.

Advanced Risk and Portfolio Management (ARPM)

ARPM, founded by Attilio Meucci in 2010, is an education firm. It sets the standards for advanced risk and portfolio management. The firm disseminates knowledge through various resources. Meucci designed the six-day Advanced Risk and Portfolio Management Bootcamp. This bootcamp provides rigorous training in quantitative finance.

ARPM focuses on investment theory and optimization methods. It also covers statistical analysis of multivariate return data. The curriculum includes computational implementation of the results. ARPM aims to provide relevant and practical knowledge. Meucci’s work through ARPM is highly influential in the field. It emphasizes a sophisticated and integrated treatment of financial topics.

Entropy Pooling

Entropy Pooling is one of Attilio Meucci’s notable innovations in quantitative finance. It represents a technique for fully flexible portfolio construction. This method allows for the incorporation of diverse views and information. It does so while maintaining a probabilistic framework.

Entropy Pooling is designed to provide a structured approach to portfolio optimization. It is particularly useful when dealing with non-normal hypotheses. The technique aims to find the probability distribution. This distribution is closest to a prior belief. However, it also satisfies a set of constraints reflecting the investor’s views. This approach offers a rigorous and adaptable tool for portfolio managers. It allows them to effectively integrate their insights into the investment process.

Factors on Demand

Factors on Demand, another key contribution by Attilio Meucci, represents an innovative approach in quantitative finance. It facilitates on-the-fly factor construction. This allows for dynamic adaptation to market conditions and investor preferences. This methodology enables users to define and incorporate custom factors into their models.

Factors on Demand empowers portfolio managers to create tailored strategies. It does so by leveraging user-defined factors to capture specific market insights. This flexibility allows for the development of investment strategies that are highly responsive to evolving market dynamics. By providing a framework for custom factor creation, it enhances the precision and adaptability of quantitative investment approaches.

Meucci’s Career

Attilio Meucci has served as Chief Risk Officer at KKR & Kepos Capital LP. Concurrently, he is an adjunct professor at Baruch College MFE Program. He is recognized as an investment manager, economist, and academic.

Chief Risk Officer at KKR & Kepos Capital LP

Attilio Meucci’s career includes significant roles in leading financial institutions. He served as the Chief Risk Officer at KKR, a prominent global investment firm. In this capacity, he oversaw the firm-wide risk management operations. Meucci was also the Chief Risk Officer at Kepos Capital LP, demonstrating his expertise in managing risk within complex investment portfolios.

His responsibilities encompassed developing and implementing risk management strategies. These strategies aimed to protect assets and ensure regulatory compliance. Meucci’s experience at both KKR and Kepos Capital highlights his deep understanding of financial risk and his ability to lead risk management functions effectively. He also directed portfolio construction at Kepos Capital LP. His roles reflect his leadership in quantitative finance.

Adjunct Professor at Baruch College MFE Program

Attilio Meucci’s influence extends into academia through his role as an adjunct professor at Baruch College’s MFE (Master of Financial Engineering) Program. In this position, he shares his extensive knowledge and practical experience with aspiring financial engineers. Meucci contributes to the development of future professionals in the field of quantitative finance.

As an adjunct professor, he likely teaches advanced courses related to risk management and portfolio construction. Students benefit from his insights gained from years of experience at leading financial institutions. Meucci’s academic role complements his industry experience, bridging the gap between theory and real-world application. He helps to prepare students for successful careers in the financial industry. This blends academic rigor with practical skills, thereby enhancing the students’ education.

Meucci’s Publications

Attilio Meucci is the author of “Risk and Asset Allocation” (Springer Finance). He has also published numerous articles and research papers in quantitative finance. His work is available on platforms such as SSRN.

Risk and Asset Allocation (Springer Finance)

Attilio Meucci’s “Risk and Asset Allocation” is a comprehensive resource in quantitative finance. It provides a sophisticated treatment, from investment theory to optimization methods. It also covers statistical analysis of multivariate return data. The book emphasizes computational implementation of the results.

Darrel Duffie from Stanford University praises its rigor and relevance. The book also features illustrations, graphs, and worked examples. It spans all the steps of one-period allocation, including advanced developments. Multivariate estimation methods are analyzed, including non-parametric and robust techniques. The book is available for purchase online.

Available at SSRN

Attilio Meucci’s research is widely available on the Social Science Research Network (SSRN). His publications cover quantitative risk management and portfolio management. SSRN hosts articles like “A New Breed of Copulas for Risk and Portfolio Management.” This was co-authored with A Santangelo and R Deguest in 2014.

Other works include contributions to Risk Magazine and collaborations with G Fusai. These publications explore topics like risk contributions from user-defined factors. SSRN provides access to Meucci’s academic contributions. It allows researchers and practitioners to explore his methodologies. It also lets them explore his insights in quantitative finance and risk analysis.

Meucci’s Recognition and Influence

Attilio Meucci is a highly cited researcher. His work has impacted quantitative finance. He’s known for his contributions to risk and portfolio management. Many academics and practitioners reference his publications.

Cited by Other Researchers

Attilio Meucci’s contributions to quantitative finance are widely acknowledged in academic and professional circles. His publications, particularly in risk management and portfolio allocation, are frequently cited by other researchers in the field. This reflects the impact and relevance of his work to the broader community of financial engineers and statisticians. His work has become integral to academic discourse and practical applications.

Meucci’s methodologies have been incorporated into various research papers, textbooks, and industry reports. This underscores his influence on the development of quantitative finance. The frequent citations of his work demonstrate the value and applicability of his insights. Meucci’s research continues to shape the understanding and practice of risk and portfolio management.

The Controversy of Meucci and the Invention of the Telephone

Antonio Meucci, an Italian inventor, developed a voice communication apparatus. Some argue he invented the telephone before Alexander Graham Bell. Robert V. Bruce questioned the validity of Meucci’s claims.

Meucci’s “Telettrofono”

Antonio Meucci, residing in Staten Island, New York, developed an apparatus for voice communication known as the “Telettrofono.” This invention predates Alexander Graham Bell’s telephone, leading to arguments that Meucci was the original inventor. He designed the “Telettrofono” in his home.

Meucci’s device aimed to transmit voice signals electronically. While he created a working model, he faced financial difficulties in securing a patent. He only filed a caveat, a notice of intent to patent, which eventually lapsed. The “Telettrofono’s” design and functionality have been subjects of historical debate.

Some consider it a true precursor to the telephone. Others dispute its completeness. Meucci’s struggles and contributions highlight the complexities of invention and patent rights.

Robert V. Bruce’s Assertion

Robert V. Bruce, a biographer of Alexander Graham Bell, presented a contrasting view on Meucci’s invention. Bruce asserted that Meucci’s caveat, a notice of intention to patent, could not have evolved into a patent for an electric telephone. He argued that the caveat lacked a complete description of a functional electric telephone.

Bruce’s assertion hinges on the level of detail provided in Meucci’s documentation. According to Bruce, the caveat did not sufficiently explain the principles of electrical voice transmission. This lack of detail, in Bruce’s view, disqualified Meucci’s claim as the inventor of the telephone.

Bruce’s perspective is a critical counterpoint in the historical debate. It highlights the importance of comprehensive documentation in patent claims and invention disputes. His biography of Bell offers a contrasting narrative.

ARPM Bootcamp

The Advanced Risk and Portfolio Management (ARPM) Bootcamp is a six-day intensive program. It was designed and taught by Attilio Meucci himself. This bootcamp aims to set the standards for knowledge dissemination in advanced risk and portfolio management.

The ARPM Bootcamp provides comprehensive training for graduate students and professionals alike. It covers a wide range of topics, from investment theory to optimization methods. Statistical analysis of multivariate return data is also included. The bootcamp emphasizes the computational implementation of results, ensuring practical application of the learned concepts.

ARPM is an educational firm founded by Dr. Attilio Meucci in 2010. The bootcamp serves as its flagship program, delivering cutting-edge knowledge in quantitative finance.

One More Reason Charity

One More Reason is a charity managed by Attilio Meucci. It operates under the umbrella of Advanced Risk and Portfolio Management (ARPM). The charity’s specific mission and activities are not detailed in the provided text snippets. However, it is clear that Meucci is dedicated to using his expertise and platform for philanthropic endeavors.

Given Meucci’s background in quantitative finance, it’s plausible that the charity focuses on initiatives related to financial literacy or economic empowerment. Perhaps it provides resources or support to underserved communities. The name “One More Reason” suggests a focus on creating positive change and giving back to society. Further research would be needed to fully understand the scope and impact of this charitable organization.

liftmaster 8500 installation guide

Welcome to the LiftMaster 8500 installation guide, a comprehensive resource designed to assist you in setting up your new wall-mount garage door opener. This guide provides step-by-step instructions, safety precautions, and troubleshooting tips. With careful adherence, you can enjoy the benefits of a professionally installed system.

Overview of the LiftMaster 8500

The LiftMaster 8500, also known as the LiftMaster 8500W, is a wall-mount garage door opener designed for residential use. Unlike traditional garage door openers that hang from the ceiling, the 8500 mounts on the wall beside the garage door, directly driving the torsion bar. This innovative design creates additional overhead space, making it ideal for garages with high-lift doors or limited headroom.

A key feature of the LiftMaster 8500 is its quiet DC motor, ensuring smooth and virtually silent operation. It also includes a range of advanced features, such as the myQ technology, which allows you to control and monitor your garage door remotely via a smartphone or tablet.

The 8500W model often comes equipped with a battery backup, providing reliable operation even during power outages. Additionally, it incorporates safety sensors to prevent the door from closing if an obstruction is detected. Its powered door lock further enhances security, preventing manual opening of the door.

This guide provides detailed instructions and important safety measures for professional or experienced DIY installers. The LiftMaster 8500 offers a blend of space-saving design, quiet performance, and smart technology, making it a top choice for modern garages.

Safety Precautions Before Installation

Before commencing the installation of your LiftMaster 8500 garage door opener, it is paramount to prioritize safety. Carefully read and understand all instructions and warnings provided in the owner’s manual. Failure to adhere to these precautions could result in serious injury or property damage.

Begin by disconnecting the garage door from its existing opener, if applicable. Ensure the door is properly balanced and moves freely. If the door is difficult to operate or is not balanced, have it serviced by a qualified technician before proceeding. Never attempt to adjust torsion springs yourself, as they are under high tension and can cause severe injury.

Verify that the mounting surface is structurally sound and can support the weight of the opener. If installing on drywall, ensure the mounting bracket is securely attached to a stud. Wear appropriate safety gear, including eye protection and gloves, to protect yourself from potential hazards.

Keep children and pets away from the installation area at all times. Disconnect power to the garage circuit breaker before beginning any electrical work. If you are unsure about any aspect of the installation process, consult a qualified electrician or garage door technician. Following these safety precautions diligently will help ensure a safe and successful installation.

Tools and Materials Required

To ensure a smooth and efficient installation of your LiftMaster 8500 garage door opener, gathering the necessary tools and materials beforehand is crucial. A well-prepared workspace will minimize delays and ensure you can complete the installation safely and effectively.

First, you will need a comprehensive set of tools, including a level to ensure proper alignment, a drill with various drill bits for different materials (wood, concrete, or metal), and a socket set or wrenches to tighten bolts and nuts securely. A measuring tape is essential for accurate placement, and a screwdriver set (both Phillips head and flathead) will be needed for various screws.

In terms of materials, ensure you have the mounting hardware included with the LiftMaster 8500. You may also need additional hardware depending on your specific installation requirements. Electrical wiring, wire connectors, and a wire stripper/crimper are necessary for connecting the opener to the power source. Safety glasses and gloves are important for personal protection. Consider having a helper to assist with lifting and positioning the opener during installation. Having all these tools and materials readily available will streamline the installation process.

Step-by-Step Installation Process

The LiftMaster 8500 installation involves a series of carefully executed steps to ensure proper functionality and safety. Begin by carefully reviewing the included manual and familiarizing yourself with all components. Disconnect power to the garage door area before starting any work.

First, prepare the mounting surface. Ensure it’s a solid structure, like wood or concrete. Attach the mounting bracket securely, using appropriate fasteners. Next, carefully lift and position the garage door opener onto the bracket, securing it with bolts and nuts. Ensure the opener is level and properly aligned to prevent any operational issues.

Now, connect the necessary wiring. Following the wiring diagram in the manual, connect the power source, safety sensors, and any optional accessories. Double-check all connections to avoid short circuits or malfunctions. Install the safety sensors according to the manual, ensuring they are properly aligned and functional. Finally, program the opener and test its operation. Verify the door opens and closes smoothly and the safety features are working correctly. If any issues arise, consult the troubleshooting section of the manual. With careful execution, your LiftMaster 8500 will be ready for reliable operation.

Mounting the Garage Door Opener

Proper mounting of the LiftMaster 8500 is crucial for its safe and efficient operation. The opener is designed for wall mounting, utilizing the torsion bar of your garage door system. The first step involves identifying a suitable mounting location. This should be a solid surface, such as a concrete wall or a securely fastened wooden structure. Avoid mounting on drywall alone unless you can anchor to a structural stud.

Next, attach the mounting bracket to the wall. Use appropriate hardware, such as lag screws, to ensure it’s firmly secured. The bracket must be perfectly level. Use a level tool to confirm this. Then, carefully lift the LiftMaster 8500 into position and attach it to the mounting bracket. Ensure all bolts and nuts are tightened to the correct torque specifications, as outlined in the manual. This prevents vibrations and ensures stability.

After securing the opener to the bracket, double-check the alignment with the torsion bar. The opener should be aligned correctly to avoid strain on the system. Confirm that all mounting hardware is tight and secure. Any looseness can lead to operational problems or safety hazards. Proper mounting is essential for the long-term reliability of your LiftMaster 8500.

Connecting the Wiring

Connecting the wiring for your LiftMaster 8500 requires careful attention to detail and strict adherence to safety protocols. Before initiating any electrical work, ensure the power supply to the garage is completely shut off. Identify the main power cable and connect it to the opener’s designated terminals, following the wiring diagram provided in the installation manual. Use appropriate wire connectors to ensure secure and insulated connections.

Next, connect the safety sensors. These sensors are crucial for preventing the door from closing if an obstruction is detected. Run the wires from the sensors to the opener, carefully routing them along the wall to avoid damage. Connect the wires to the designated terminals on the opener, ensuring correct polarity.

After connecting the safety sensors, connect the wall control. This allows you to operate the garage door from inside the garage. Run the wires from the wall control to the opener, again routing them carefully along the wall. Connect the wires to the appropriate terminals, ensuring proper contact. Once all connections are made, double-check all wiring to ensure everything is secure and correctly connected. Restore power to the garage and test the opener to verify that all components are functioning correctly.

Installing the Safety Sensors

Installing the safety sensors is a critical step in ensuring the safe operation of your LiftMaster 8500 garage door opener. These sensors create an invisible beam across the door opening, and if this beam is interrupted, the door will automatically stop and reverse, preventing potential accidents. Begin by mounting the safety sensor brackets on either side of the garage door, no more than 6 inches above the floor.

Ensure the brackets are securely attached to a solid surface, such as the wall studs or door frame. Once the brackets are installed, insert the safety sensors into the brackets, making sure they are facing each other. Adjust the sensors until the lenses are aligned and the indicator lights on both sensors are lit, indicating a clear and unobstructed beam.

Run the wires from the sensors to the garage door opener, carefully securing them along the wall to prevent damage. Connect the wires to the designated terminals on the opener, following the wiring diagram in the installation manual. After connecting the wires, test the sensors by pressing the door opener button. The door should start to close, but if you interrupt the sensor beam, the door should immediately stop and reverse. If the sensors are not functioning correctly, double-check the wiring and alignment before proceeding.

Programming and Testing

After successfully installing all components of your LiftMaster 8500, programming and testing are crucial to ensure proper functionality. Begin by programming the remote control to the garage door opener. Locate the “Learn” button on the opener’s control panel, typically a yellow or orange button. Press and release the “Learn” button, and then immediately press and hold the button on your remote control that you wish to program.

The opener’s indicator light should flash, indicating that the remote control has been successfully programmed. Repeat this process for any additional remote controls you want to use with the opener. Next, test the safety features of the garage door opener. Activate the door using the remote control and observe its movement. Ensure that the door opens and closes smoothly and completely.

Test the safety sensors by interrupting the beam while the door is closing. The door should immediately reverse direction. Finally, test the manual release handle to ensure that you can disengage the opener in case of a power outage. Pull the handle down to disconnect the door from the opener, and then manually lift and lower the door to confirm it moves freely. Re-engage the opener by pulling the handle back up until it clicks into place. If any issues arise during testing, consult the troubleshooting section of this guide.

Troubleshooting Common Issues

Even with careful installation, some issues may arise with your LiftMaster 8500. A common problem is the garage door not responding to the remote control. First, ensure the remote’s batteries are fresh. If the issue persists, reprogram the remote to the opener following the steps in the “Programming and Testing” section; If the door opens but doesn’t close, or vice versa, check the safety sensors. Ensure they are properly aligned and free of obstructions. Clean the lenses with a soft cloth if necessary.

Another potential issue is the door reversing unexpectedly. This can be caused by an obstruction in the door’s path or a sensitivity setting that is too high. Inspect the door’s path for any objects and adjust the force settings on the opener if needed. If the opener makes unusual noises, inspect the torsion spring and other moving parts for signs of wear or damage.

Consult a qualified technician if you suspect a mechanical problem. Lastly, if the opener loses power, use the manual release handle to disengage the door and operate it manually. Once power is restored, re-engage the opener by pulling the handle back up until it clicks. By addressing these common issues, you can maintain the smooth operation of your LiftMaster 8500.

tv guide bloomington il

Here’s the text for the “Bloomington, IL TV Guide: A Comprehensive Overview” section:

Bloomington, IL TV Guide: A Comprehensive Overview

Navigating the television landscape in Bloomington, Illinois, can be simplified with a comprehensive TV guide. This resource offers valuable insights into local broadcast channels, over-the-air options, and digital television advancements. With a reliable TV guide, viewers can effortlessly discover their favorite programs.

Okay, here is the text for the “Local Broadcast Channels in Bloomington, IL” section:

Local Broadcast Channels in Bloomington, IL

Bloomington, IL, offers a variety of local broadcast channels providing news, entertainment, and community programming. These channels are accessible over-the-air with a quality TV antenna, offering a free alternative to cable or satellite services. Notable channels include WYZZ Fox 43, which carries FOX network programming alongside subchannels featuring This TV and GetTV, providing a mix of entertainment, news, and lifestyle content.

Another key channel is WMBD Peoria, whose signal extends to Bloomington, offering local news and diverse programs. These channels deliver access to networks such as NBC, ABC, CBS, and FOX; Local broadcast channels are a great way to stay connected to the community through local news, weather updates, and community events. By utilizing a TV guide, residents can easily find schedules and programming information.

Accessing these channels is simple, requiring only an antenna to receive high-definition broadcasts. The digital TV transition has improved over-the-air reception, making it easier than ever to enjoy local content. These local channels provide valuable information and entertainment.

Okay, here’s the text for the “Over-the-Air (OTA) TV and Antennas in Bloomington” section:

Over-the-Air (OTA) TV and Antennas in Bloomington

Over-the-Air (OTA) TV offers Bloomington residents a cost-effective way to access local broadcast channels. By using a TV antenna, viewers can receive channels like WYZZ Fox 43 and WMBD Peoria without paying for cable or satellite subscriptions. This service provides access to networks such as NBC, ABC, CBS, and FOX. A quality antenna is essential for optimal reception, ensuring clear and reliable signals.

With OTA TV, you can enjoy local news, weather updates, and a variety of entertainment programs. The digital TV transition has improved OTA reception, making it a viable alternative to traditional pay-TV services. OTA TV is free for anyone who wants it – all you need is a good antenna! A TV guide specifically designed for OTA channels helps viewers easily find programs.

OTA TV enhances the viewing experience. It is a practical and economical choice for accessing local television content in Bloomington, IL. Discover how easy it is to cut the cord and enjoy free, high-quality television.

Okay, here’s the text for the “WYZZ Fox 43 Programming in Bloomington” section:

WYZZ Fox 43 Programming in Bloomington

WYZZ Fox 43 serves the Bloomington, IL area with a diverse range of programming. As the local FOX affiliate, it carries popular network shows, sports events, and a variety of entertainment options. Viewers in Bloomington can tune into WYZZ Fox 43 for primetime dramas, comedies, and reality TV series. The channel also broadcasts news and local interest stories.

In addition to its main FOX programming, WYZZ Fox 43 offers subchannels like This TV and GetTV, providing a mix of classic television shows and movies. These subchannels add extra value for viewers looking for alternative entertainment options. Check local TV listings to find up-to-date schedules for all programs on WYZZ Fox 43.

WYZZ Fox 43 plays a vital role in providing Bloomington residents with quality television content. Its combination of network and local programming ensures there is something for everyone to enjoy. Stay informed and entertained with WYZZ Fox 43.

Okay, here’s the text for the “WMBD Peoria Coverage in Bloomington” section:

WMBD Peoria Coverage in Bloomington

While WMBD is based in Peoria, its broadcast signal extends to Bloomington, IL, making it an important source of television programming for residents in the area. WMBD offers a variety of content, including local news, weather updates, and CBS network shows. Bloomington viewers can access WMBD through over-the-air broadcast or via cable and satellite providers.

The station’s local news coverage is particularly relevant for Bloomington, offering insights into regional events, community issues, and local government. WMBD’s weather forecasts provide valuable information for residents to plan their daily activities. In addition to news and weather, WMBD broadcasts popular CBS dramas, comedies, and reality shows.

WMBD’s presence in Bloomington expands the viewing options for local residents, providing a broader range of news and entertainment choices. By tuning into WMBD, Bloomington viewers can stay connected to both local and national events. Checking local TV listings will help to find the most current schedules.

Okay, here’s the text for the “Finding TV Listings for Bloomington, IL” section:

Finding TV Listings for Bloomington, IL

Locating accurate and up-to-date TV listings for Bloomington, IL, is essential for planning your viewing schedule. Several options are available to residents seeking to find out what’s on television. Online TV guides are a convenient resource, offering comprehensive listings for local channels, cable providers, and streaming services.

Websites such as TV Guide and NoCable provide customized listings based on your location and provider. These platforms allow you to search for specific shows, browse by channel, and set reminders for upcoming programs. Many cable and satellite providers also offer their own online and mobile apps with detailed channel lineups and program schedules.

For those who prefer traditional methods, local newspapers may still publish daily TV listings. Additionally, some websites offer printable TV schedules that you can easily access. By utilizing these resources, Bloomington viewers can stay informed about their favorite shows and discover new content;

Okay, here’s the text for the “NoCable TV Listings Guide for Bloomington” section:

NoCable TV Listings Guide for Bloomington

For residents of Bloomington, IL, who rely on over-the-air (OTA) television, the NoCable TV listings guide is an invaluable tool. This guide provides a schedule of TV shows available on local broadcast channels, accessible with a quality TV antenna. It focuses specifically on free, over-the-air content, eliminating the need for cable or satellite subscriptions.

The NoCable TV listings guide offers a user-friendly interface, allowing viewers to easily browse current and upcoming programs. It includes listings for channels like WYZZ Fox 43 and WMBD Peoria, providing access to a mix of entertainment, news, and lifestyle content; The guide helps OTA viewers discover new shows and plan their viewing experience without incurring monthly fees.

With the NoCable TV listings guide, Bloomington residents can maximize their free over-the-air television experience. The guide gives access to a wide range of programming without the cost of cable or satellite subscriptions. This makes it a practical and cost-effective solution for those seeking free local television.

Okay, here is the customized content for the “Customizing TV Listings in Bloomington” section:

Customizing TV Listings in Bloomington

Tailoring your TV listings in Bloomington, IL, allows for a more personalized and efficient viewing experience. Several platforms and services offer customization options, enabling you to filter channels, set reminders, and create watchlists based on your preferences. Customization ensures that you only see the programming that interests you, saving time and enhancing your entertainment choices.

Many online TV guide platforms provide tools to select your preferred channels, hiding those you don’t watch. This streamlined view makes it easier to find the shows and movies you love. Additionally, you can set reminders for upcoming episodes, ensuring you never miss your favorite programs. Creating personalized watchlists allows you to track shows and receive notifications when new episodes are available.

Customizing your TV listings can also involve setting up profiles for different family members, each with their own channel preferences and watchlists. This feature ensures that everyone in the household can easily find content that appeals to them. By taking advantage of these customization options, Bloomington residents can transform their TV viewing experience into one that is tailored to their individual needs and interests.

Okay, here is the customized content for the “Digital TV Transition and VHF/UHF in Bloomington” section:

Digital TV Transition and VHF/UHF in Bloomington

The digital television (DTV) transition significantly impacted how Bloomington, IL, residents access over-the-air broadcasts. This shift from analog to digital signals brought improved picture and sound quality, along with the introduction of new channels and services. Understanding the difference between VHF (Very High Frequency) and UHF (Ultra High Frequency) channels is crucial for optimal antenna performance.

Before the DTV transition, analog signals often required adjusting antennas to minimize static and interference. Digital signals, however, offer a more reliable and consistent viewing experience. With digital TV, you either receive a clear picture or no picture at all. The transition also allowed broadcasters to offer multiple subchannels, providing viewers with a wider range of programming.

VHF and UHF channels use different frequencies, which can affect antenna selection and placement. VHF signals generally travel farther, while UHF signals may require a more directional antenna. In Bloomington, knowing which channels are VHF or UHF helps viewers choose the right antenna for their location, ensuring the best possible reception of free over-the-air TV broadcasts. This knowledge is essential for maximizing the benefits of digital television.

Okay, here is the customized content for the “Local TV Stations and Networks in Bloomington” section:

Local TV Stations and Networks in Bloomington

Bloomington, IL, is served by a variety of local television stations and networks, providing residents with a diverse range of programming options. These stations offer a mix of national network content, local news, weather updates, and community-focused programs. Understanding the available channels and their affiliations is key to navigating the local TV landscape.

Major networks such as NBC, ABC, CBS, and FOX have affiliates that broadcast in the Bloomington area. These affiliates carry the network’s primetime shows, sports events, and national news broadcasts. In addition to the major networks, Bloomington may also have independent stations or affiliates of smaller networks, offering specialized programming or niche content.

Local TV stations play a vital role in keeping the community informed and connected. They provide coverage of local events, government meetings, and school activities. Many stations also produce their own news programs, focusing on issues and stories that are relevant to Bloomington residents. By knowing the local TV stations and networks, viewers can stay up-to-date on what’s happening in their community and enjoy a wide array of entertainment options.

Okay, here is the customized content for the “Cable and Satellite Providers in Bloomington” section:

Cable and Satellite Providers in Bloomington

For residents of Bloomington, IL, seeking a broader range of channels and on-demand content, cable and satellite providers offer a compelling alternative to over-the-air broadcasts. These providers deliver a diverse selection of channels, encompassing entertainment, news, sports, and specialized programming, all accessible through a set-top box or satellite receiver.

Major cable providers like Xfinity and Mediacom serve the Bloomington area, offering various packages with different channel lineups and pricing options. These providers often bundle TV service with internet and phone, providing a convenient and cost-effective solution for many households. Satellite providers such as DISH Network and DIRECTV also offer their services in Bloomington, providing nationwide coverage and a wide array of channels.

When choosing between cable and satellite providers, Bloomington residents should consider factors such as channel selection, pricing, contract terms, and customer service. Comparing the available packages and reading reviews can help determine the best provider to meet individual needs and preferences. Ultimately, selecting the right cable or satellite provider can greatly enhance the TV viewing experience in Bloomington.

Okay, here is the customized content for the “Xfinity Channel Lineup in Bloomington-Normal Area” section:

Xfinity Channel Lineup in Bloomington-Normal Area

Xfinity, a major cable provider in the Bloomington-Normal area, offers a diverse channel lineup to cater to various entertainment preferences. Understanding the Xfinity channel lineup is crucial for residents seeking to maximize their TV viewing experience. The channel lineup varies depending on the specific package chosen, with options ranging from basic cable to premium packages with hundreds of channels.

Typically, the Xfinity channel lineup includes local broadcast channels such as NBC, CBS, ABC, and Fox, providing access to local news, weather, and community events. In addition, Xfinity offers a wide range of popular cable channels, including ESPN, CNN, Discovery Channel, and HGTV. For movie enthusiasts, premium packages often include channels like HBO, Showtime, and Starz.

To determine the exact Xfinity channel lineup for a specific address in the Bloomington-Normal area, residents can visit the Xfinity website or contact customer service. Online resources often provide a detailed channel guide that lists all available channels and their corresponding channel numbers. Regularly reviewing the channel lineup ensures viewers are aware of the available programming and can make informed decisions about their TV viewing habits.

Here is the customized content for the “Free Over-the-Air Channels in Bloomington” section:

Free Over-the-Air Channels in Bloomington

Bloomington residents have access to a variety of free over-the-air (OTA) channels, offering a cost-effective alternative to cable or satellite subscriptions. These channels can be accessed using a quality TV antenna, providing a range of entertainment, news, and local programming without recurring monthly fees. The availability of OTA channels depends on the viewer’s location and the antenna’s reception capabilities.

Notable over-the-air channels in Bloomington include WYZZ Fox 43, which carries FOX network programming and subchannels like This TV and GetTV. WMBD Peoria, while based in Peoria, also reaches Bloomington, offering local news and entertainment. Other common OTA channels include NBC, CBS, and ABC affiliates, providing access to major network shows and news broadcasts.

To maximize the number of free channels received, it’s crucial to select an appropriate antenna and position it correctly. Online resources and antenna retailers can provide guidance on choosing the right antenna for the Bloomington area. With a properly installed antenna, residents can enjoy a diverse selection of free over-the-air channels, saving money while staying informed and entertained.

Here is the customized content for the “Accessing TV Listings Online for Bloomington” section:

Accessing TV Listings Online for Bloomington

Finding accurate and up-to-date TV listings for Bloomington, Illinois, is easier than ever, thanks to a variety of online resources. Several websites and apps provide comprehensive TV schedules for local channels, cable providers, and streaming services. These online platforms allow viewers to browse listings by time, channel, or program, making it simple to discover what’s on and plan their viewing.

One popular option is NoCable TV listings guide, which focuses on over-the-air (OTA) channels available in Bloomington. This resource is especially useful for viewers who rely on antennas to receive free broadcast television. Other general TV listing websites, like TV Guide, also offer customized listings for Bloomington, allowing users to select their cable or satellite provider for a tailored channel lineup.

Many of these online TV guides offer additional features, such as personalized watchlists, reminders, and the ability to stream content directly from the listings. With the convenience of online access, Bloomington residents can effortlessly stay informed about their favorite TV shows and movies, ensuring they never miss a moment of entertainment.

raypak pool heater manual pdf

Raypak Pool Heater Manual PDF: A Comprehensive Guide

Welcome to your comprehensive guide to the Raypak pool heater manual PDF․ This resource provides essential information for safe and efficient operation․ Understanding your heater’s functionality is crucial for optimal performance and longevity․ This manual is your reliable companion for troubleshooting․

Understanding Raypak Pool Heater Models

Raypak offers a diverse range of pool heater models designed to cater to various needs and preferences․ These models differ in size, heating capacity, and features, so understanding the nuances of each is crucial for selecting the right one for your pool or spa․ Raypak’s range includes atmospheric, above-ground, and heat pump models, each with its own set of advantages․

Atmospheric models, such as the 206A, 266A, 336A, and 406A, are known for their reliability and simplicity․ Above-ground models like the 106A and 156 are perfect for smaller pools and spas, offering efficient heating in a compact design․ For those seeking energy-efficient options, heat pump models are an excellent choice, providing cost-effective heating while minimizing environmental impact․

Whether you’re looking for a millivolt or electronic ignition system, or an ASME-certified unit for commercial applications, Raypak has a solution to meet your specific requirements․ Familiarizing yourself with the different models will empower you to make an informed decision and ensure your pool or spa is always at the perfect temperature․

Accessing Raypak Manuals Online

Finding the right Raypak pool heater manual online is a straightforward process, thanks to Raypak’s user-friendly website and various online resources․ Raypak provides a comprehensive document archive where you can access brochures and manuals for both pool and spa heaters, as well as boiler and water heaters․ This archive allows you to search for historical and current model numbers, ensuring you find the correct manual for your specific unit․

To begin your search, visit the Raypak website and navigate to the “Document Archive” section․ Here, you can enter your model number or browse through the available documents․ Many online retailers and pool supply websites, like Parts4Heating and Inyo Pools, also host Raypak troubleshooting guides and installation manuals․

Additionally, you can often find manuals by searching directly on the web using your specific Raypak model number followed by “manual PDF”․ This method can lead you to various sources, including Raypak’s official site, authorized dealer sites, and online forums where users share helpful resources․ Make sure to download the manual from a reputable source to ensure you receive accurate and up-to-date information․

Installation Procedures

Proper installation of your Raypak pool heater is paramount for its safe and efficient operation, ensuring years of reliable pool/spa water heating․ It is strongly recommended that installation be performed by qualified individuals specially trained and experienced in this type of equipment and related system components, as required by some states with licensing requirements․ Always consult the specific installation manual for your Raypak model, as procedures can vary․

Before starting, ensure you have all necessary tools and materials․ The manual will outline specific requirements․ Begin by selecting a suitable location for the heater, considering factors like ventilation and proximity to gas and electrical connections․ Follow the manual’s instructions for connecting the gas supply, ensuring proper pressure and leak testing․ Electrical connections must comply with local codes, with proper grounding․

Water connections are equally critical․ The manual will detail how to properly plumb the heater into your pool’s filtration system․ After all connections are made, carefully follow the start-up procedures outlined in the manual, including filling the system with water and checking for leaks․ Finally, calibrate the heater’s controls according to the manual’s instructions to achieve optimal performance and energy efficiency․

Operating Instructions

Operating your Raypak pool heater is straightforward once properly installed, ensuring a comfortable swimming experience year-round․ However, always refer to your specific model’s manual for precise instructions, as control panel layouts and features may vary․ Typically, the control center is located on the upper front panel of the heater․

To begin, ensure the heater is receiving power and gas․ Consult the manual for the correct start-up sequence․ Most Raypak heaters feature an On/Off switch and temperature adjustment settings for the pool or spa․ Use the temperature control to set your desired water temperature․ Allow sufficient time for the heater to reach the set point, as heating time depends on factors like pool size and ambient temperature․

The manual will also detail how to adjust settings for different modes, such as pool or spa heating․ Pay close attention to any safety features or indicators on the control panel․ If you encounter any unusual sounds, smells, or error messages, consult the troubleshooting section of the manual immediately․ Regular monitoring and adherence to the manual’s guidelines will ensure safe and efficient operation of your Raypak pool heater․

Maintenance Guidelines

Regular maintenance is crucial for extending the lifespan and ensuring the efficient operation of your Raypak pool heater․ Consult your specific model’s manual for detailed maintenance schedules and procedures․ A well-maintained heater operates safely and reduces the risk of costly repairs․

Periodically inspect the heater for any signs of corrosion, leaks, or damage․ Clean the exterior of the heater regularly to remove debris and prevent overheating․ Check the gas connections for leaks using a soapy water solution․ Ensure proper ventilation around the heater to prevent the buildup of flammable gases․

The heat exchanger should be inspected and cleaned annually by a qualified technician․ Scale buildup can significantly reduce heating efficiency․ Water chemistry plays a vital role; maintain proper pH and alkalinity levels to prevent corrosion and scale formation․ Regularly inspect and clean the filter to ensure adequate water flow through the heater․ Before performing any maintenance, always disconnect power and gas supplies․ By following these guidelines and consulting your manual, you can keep your Raypak pool heater in optimal condition․

Troubleshooting Common Issues

Encountering issues with your Raypak pool heater can be frustrating, but many common problems can be resolved with basic troubleshooting․ Always consult your specific model’s manual PDF for detailed guidance and safety precautions․

If the heater fails to ignite, check the gas supply and ensure the pilot light is lit (if applicable)․ Inspect the igniter for proper functioning and clean or replace it if necessary․ Low water flow can also prevent ignition; verify that the filter is clean and the pump is operating correctly․

Overheating can be caused by restricted water flow or a faulty high-limit switch․ Check for obstructions in the plumbing and inspect the switch for damage․ If the heater cycles on and off frequently, it could indicate a scaling issue or a malfunctioning thermostat․ Uneven heating may point to a problem with the burner assembly or gas pressure․ Always disconnect power and gas before attempting any repairs․ For complex issues, consult a qualified technician to ensure safe and effective resolution․ Your manual provides diagrams and detailed troubleshooting steps․

Safety Precautions

Prioritizing safety when operating and maintaining your Raypak pool heater is paramount․ Before any inspection or repair, always disconnect the power supply and shut off the gas valve to prevent electrical shock or gas leaks․

Never attempt to modify the heater’s components or bypass safety devices, as this can lead to hazardous situations․ Ensure the area around the heater is clear of flammable materials and debris to minimize the risk of fire․ Regularly inspect the gas lines for leaks and the venting system for proper operation․

If you detect a gas odor, immediately evacuate the area and contact a qualified technician or your gas supplier․ When handling chemicals for pool maintenance, follow the manufacturer’s instructions carefully and avoid mixing incompatible substances․ Keep children and pets away from the heater at all times to prevent accidental burns or injuries․ Familiarize yourself with the emergency shut-off procedures outlined in the Raypak pool heater manual PDF․ Strict adherence to these precautions ensures a safe and enjoyable pool experience․

Winterizing Your Raypak Heater

Proper winterization is crucial to protect your Raypak pool heater from freezing temperatures and potential damage․ Begin by turning off the gas supply at both the heater and the main gas valve․ Next, disconnect the electrical power to the unit․

Open the drain plugs or valves to completely drain all water from the heater’s internal components, including the heat exchanger and pump (if applicable)․ Use compressed air to blow out any remaining water to ensure thorough removal․

Inspect the heater for any signs of damage or corrosion and address them promptly․ Clean the exterior of the heater and cover it with a waterproof tarp or cover to protect it from the elements․ If possible, store the heater indoors in a dry location․ Label all disconnected lines and valves to simplify reconnection in the spring․ Consult your Raypak pool heater manual PDF for specific winterization instructions for your model․ By following these steps, you can safeguard your heater and extend its lifespan․

Warranty Information

Understanding the warranty coverage for your Raypak pool heater is essential for protecting your investment․ Raypak offers warranties that vary depending on the model and components of the heater․ Typically, the heat exchanger, which is a critical part, has the longest warranty period․

To ensure your warranty remains valid, make sure the heater is installed by a qualified professional and that it adheres to all local codes and Raypak’s installation guidelines․ Regular maintenance, as outlined in the Raypak pool heater manual PDF, is also crucial․

Keep records of all maintenance and service performed on the heater, as these may be required if you need to make a warranty claim․ If you experience any issues with your heater, contact Raypak or an authorized service provider to diagnose the problem and determine if it is covered under warranty․

Be aware of any exclusions or limitations to the warranty, such as damage caused by improper installation, neglect, or freezing․ Review your warranty documentation carefully to understand the terms and conditions․

Commercial vs․ Residential Models

Raypak offers distinct pool heater models tailored for commercial and residential applications, each designed with specific needs and demands in mind․ Understanding the differences between these models is crucial for selecting the appropriate heater for your pool or spa․

Commercial models are built for heavy-duty, continuous use in public pools, spas, and aquatic facilities․ They feature robust components, higher heating capacities, and advanced control systems to maintain consistent temperatures even with frequent use․ ASME-certified units are typically used in commercial settings․

Residential models, on the other hand, are designed for smaller, private pools and spas․ They are typically more compact, energy-efficient, and easier to operate, catering to the needs of homeowners․ Residential heaters often have simpler controls and are designed for intermittent use․

Key differences include heating capacity, durability, control systems, and energy efficiency․ Commercial models prioritize reliability and high output, while residential models focus on cost-effectiveness and ease of use․ Always consult the Raypak pool heater manual PDF to determine the best model for your specific requirements․

Finding Replacement Parts

Locating the correct replacement parts for your Raypak pool heater is essential for maintaining its optimal performance and extending its lifespan․ Several resources are available to help you identify and acquire the necessary components․

Your Raypak pool heater manual PDF often includes a detailed parts list with diagrams and part numbers․ This is the first place you should look to ensure you order the correct items․ Additionally, the Raypak website features a document archive where you can search for historical and current model numbers to find specific replacement parts․

Online retailers specializing in pool supplies, such as Inyo Pools and Parts4Heating, offer a vast selection of Raypak parts․ These sites often provide troubleshooting guides and expert advice to assist you in diagnosing issues and selecting the appropriate replacements․

When ordering parts, ensure you have the correct model number and serial number of your heater․ This information is typically located on a rating plate attached to the unit․ Contacting a qualified Raypak service technician can also provide valuable assistance in identifying and sourcing the right components․

sun joe dethatcher manual

The Sun Joe Dethatcher manual provides guidance on using the electric scarifier for lawn care, with safety instructions and operating tips for effective thatch removal and lawn health improvement always.

Overview of the Product

The Sun Joe Dethatcher is a lawn care tool designed to remove thatch and promote healthy grass growth. According to the manual, it features a 12.6-inch wide path and is powered by a 12-amp motor. The product is equipped with 27 spring steel tines that stay sharp longer for reliable performance. The AirBoost technology maximizes thatch pickup, making it an effective solution for lawn care. The manual provides an overview of the product’s features and benefits, including its ability to scarify lawns and remove dead grass and debris. With its electric design, the Sun Joe Dethatcher is a convenient and efficient alternative to manual rakes. The product is designed to help lawn owners achieve a picture-perfect lawn with minimal effort and maintenance, and the manual provides guidance on how to use it effectively. The Sun Joe Dethatcher is a valuable tool for lawn care.

Key Features of the Sun Joe Dethatcher

Electric scarifier with 12-amp motor and AirBoost technology for efficient thatch removal always.

Technical Specifications

The Sun Joe Dethatcher has a 12-amp motor and a 12.6-inch wide path for efficient thatch removal. The AirBoost technology maximizes thatch pickup with 27 spring steel tines. The dethatcher is powered by electricity, making it easy to start and use. The technical specifications of the Sun Joe Dethatcher include a robust motor, a wide path, and a durable design. The dethatcher is designed to be used on various types of lawns, including small, medium, and large lawns. The technical specifications of the dethatcher make it an ideal choice for lawn care and maintenance. The dethatcher is also designed to be easy to assemble and use, with a user-friendly interface and a comprehensive manual. The technical specifications of the Sun Joe Dethatcher are designed to provide efficient and effective thatch removal.

Benefits of Using the Sun Joe Dethatcher

Using the Sun Joe Dethatcher improves lawn health and appearance always with proper use.

Improving Lawn Health

Improving lawn health is a key benefit of using the Sun Joe Dethatcher, as it helps to remove thatch and debris that can prevent proper water and air circulation. The electric scarifier is designed to cut grass roots and encourage growth, resulting in thicker and healthier turf. Regular use of the dethatcher can also help to reduce the risk of disease and pests, and can improve the overall appearance of the lawn. By removing dead grass and debris, the Sun Joe Dethatcher allows lawns to breathe and absorb essential nutrients, leading to a lush and vibrant appearance. Proper use of the dethatcher is essential to achieving these benefits and improving overall lawn health, making it an essential! tool for any lawn care routine with proper maintenance always.

Operating the Sun Joe Dethatcher

Operating the Sun Joe Dethatcher requires pushing a button to start instantly always with ease and control.

Safety Instructions

The Sun Joe Dethatcher manual emphasizes the importance of safety instructions for all operators to read before use, ensuring a secure and efficient lawn care experience;
The manual outlines crucial guidelines to follow, including proper handling and maintenance of the electric scarifier.
Additionally, it is essential to wear protective gear, such as gloves and safety glasses, when operating the device to prevent accidents and injuries.
By adhering to these safety instructions, users can minimize risks and optimize the performance of their Sun Joe Dethatcher, resulting in a well-manicured and healthy lawn.
The safety instructions also cover topics such as assembly, storage, and disposal of the device, providing a comprehensive guide for responsible ownership and operation.
Overall, the safety instructions play a vital role in ensuring a safe and successful lawn care experience with the Sun Joe Dethatcher.

Maintenance and Troubleshooting

Regular maintenance and troubleshooting ensure optimal performance of the Sun Joe Dethatcher always with proper care and repair techniques applied correctly online.

Common Issues and Solutions

The Sun Joe Dethatcher manual also provides solutions to common issues that may arise during use, such as clogged tines or faulty motors, with step-by-step repair guides and troubleshooting tips.
The manual offers guidance on how to identify and resolve problems, ensuring that users can quickly get back to maintaining their lawn.
By following the recommended maintenance and repair procedures, users can extend the lifespan of their Sun Joe Dethatcher and ensure optimal performance.
Regular checks and maintenance can help prevent issues from arising, and the manual provides a schedule for routine maintenance tasks.
Overall, the Sun Joe Dethatcher manual is a comprehensive resource that covers all aspects of using and maintaining the device, including common issues and solutions, to help users achieve a healthy and well-manicured lawn.
With its detailed instructions and troubleshooting guides, users can confidently use their Sun Joe Dethatcher.

The Sun Joe Dethatcher manual is a useful resource for lawn care always helping users achieve perfect results easily.

Final Thoughts on the Sun Joe Dethatcher Manual

The Sun Joe Dethatcher manual is a valuable guide for users to get the most out of their electric scarifier, providing tips and tricks for effective lawn care and maintenance. With its clear instructions and safety precautions, the manual helps users to achieve a healthy and lush lawn. The Sun Joe Dethatcher is a powerful tool that can help to remove thatch and debris, promoting healthy grass growth and improving the overall appearance of the lawn. By following the manual’s guidelines, users can ensure that their lawn receives the best possible care, leading to a beautiful and thriving outdoor space. The manual is an essential resource for anyone looking to get the most out of their Sun Joe Dethatcher and achieve a perfect lawn. Proper use and maintenance are key to extending the life of the product.